
Beef Tenderloin Two Ways
What do you do when you are in your local Lowes Foods and you find a $130 cut of grass fed beef tenderloin at 50% off? You buy that sucker, take it home and dry brine it!! Then you ask you dig through recipes, ask for advice and suggestions, and get to work. At least that is what yours truly did. I settled on steaks and Beef Wellington cooked a few days a part. Here is how that went.
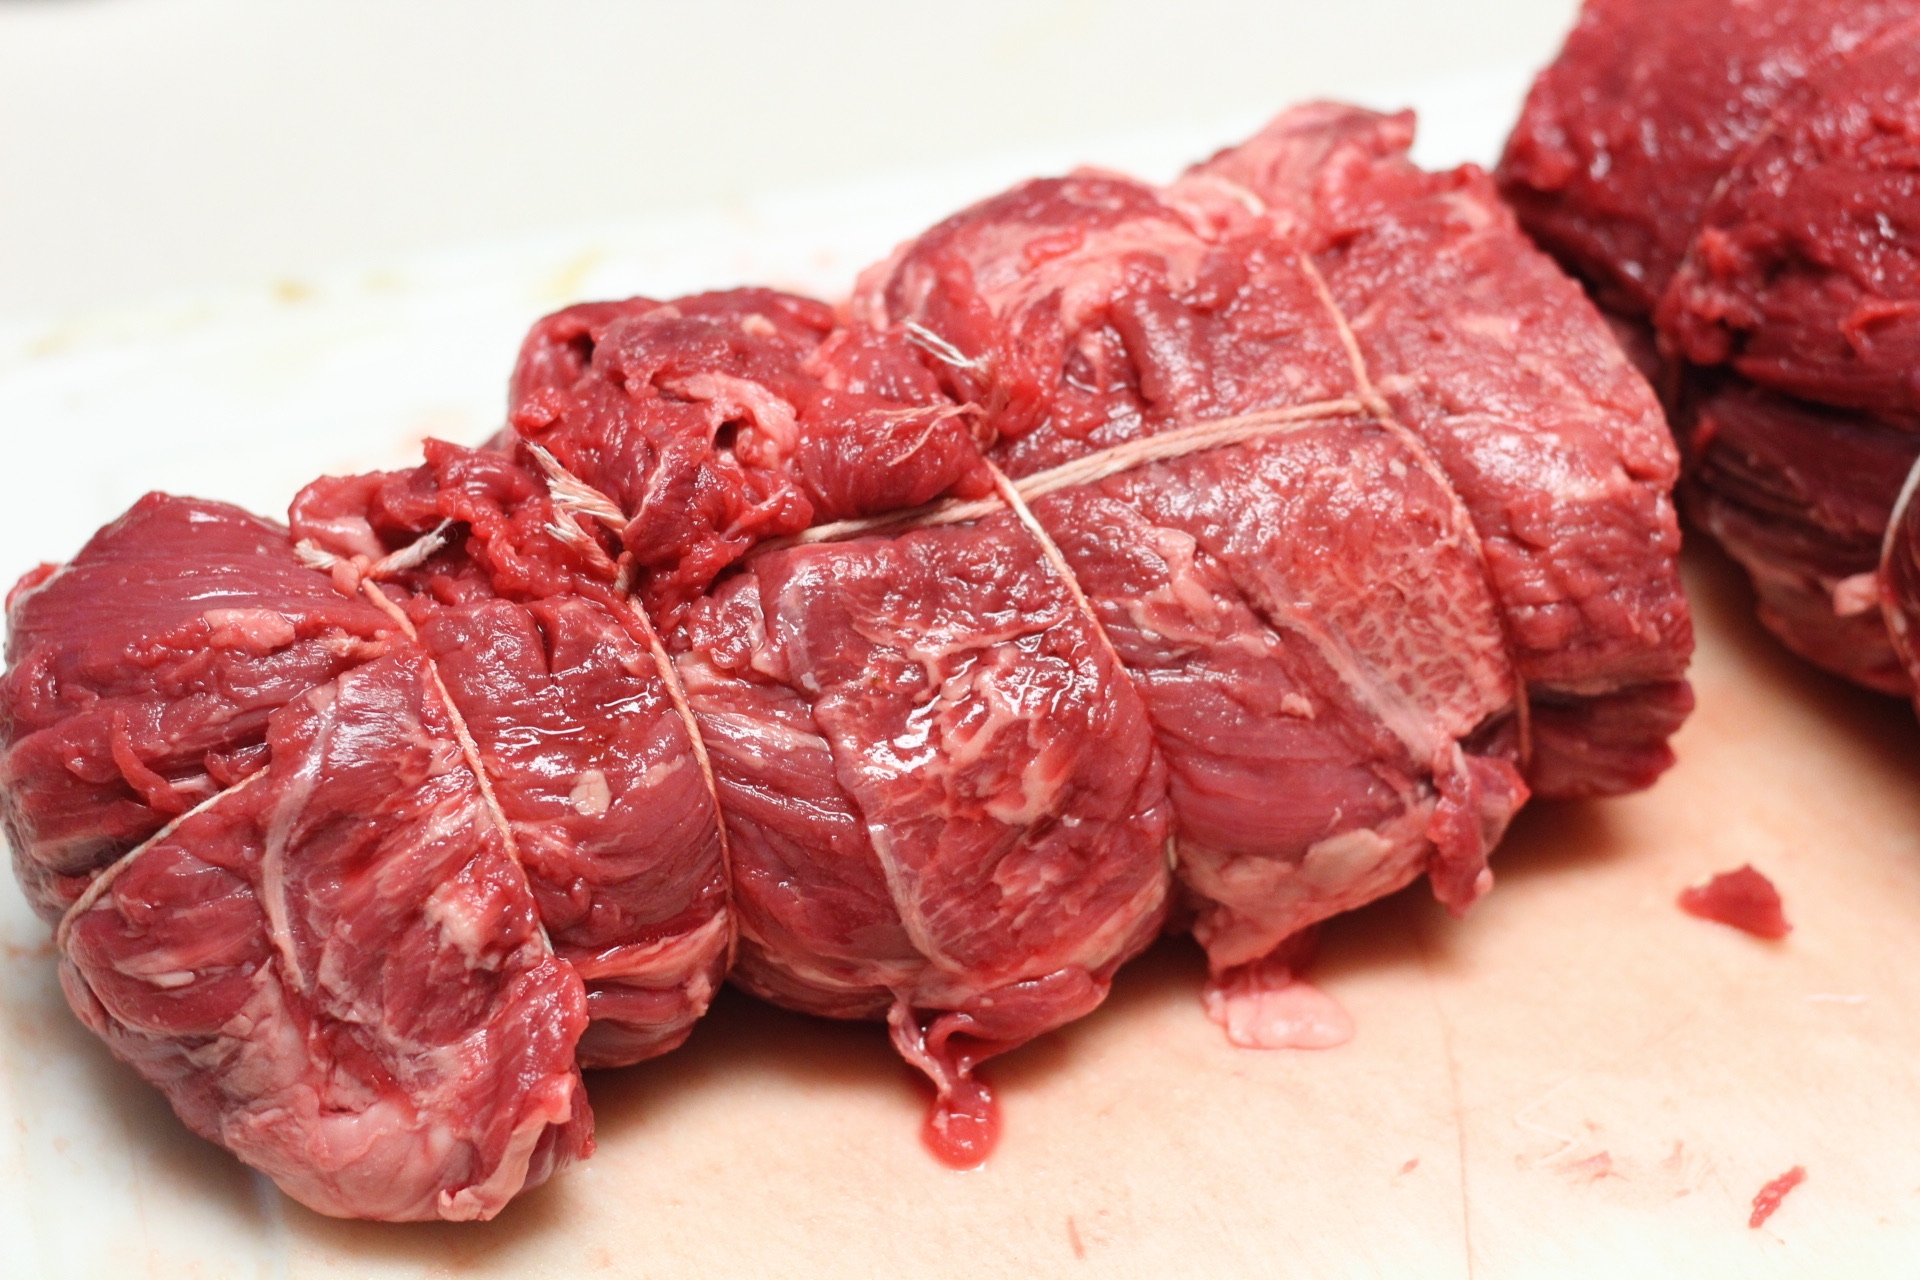
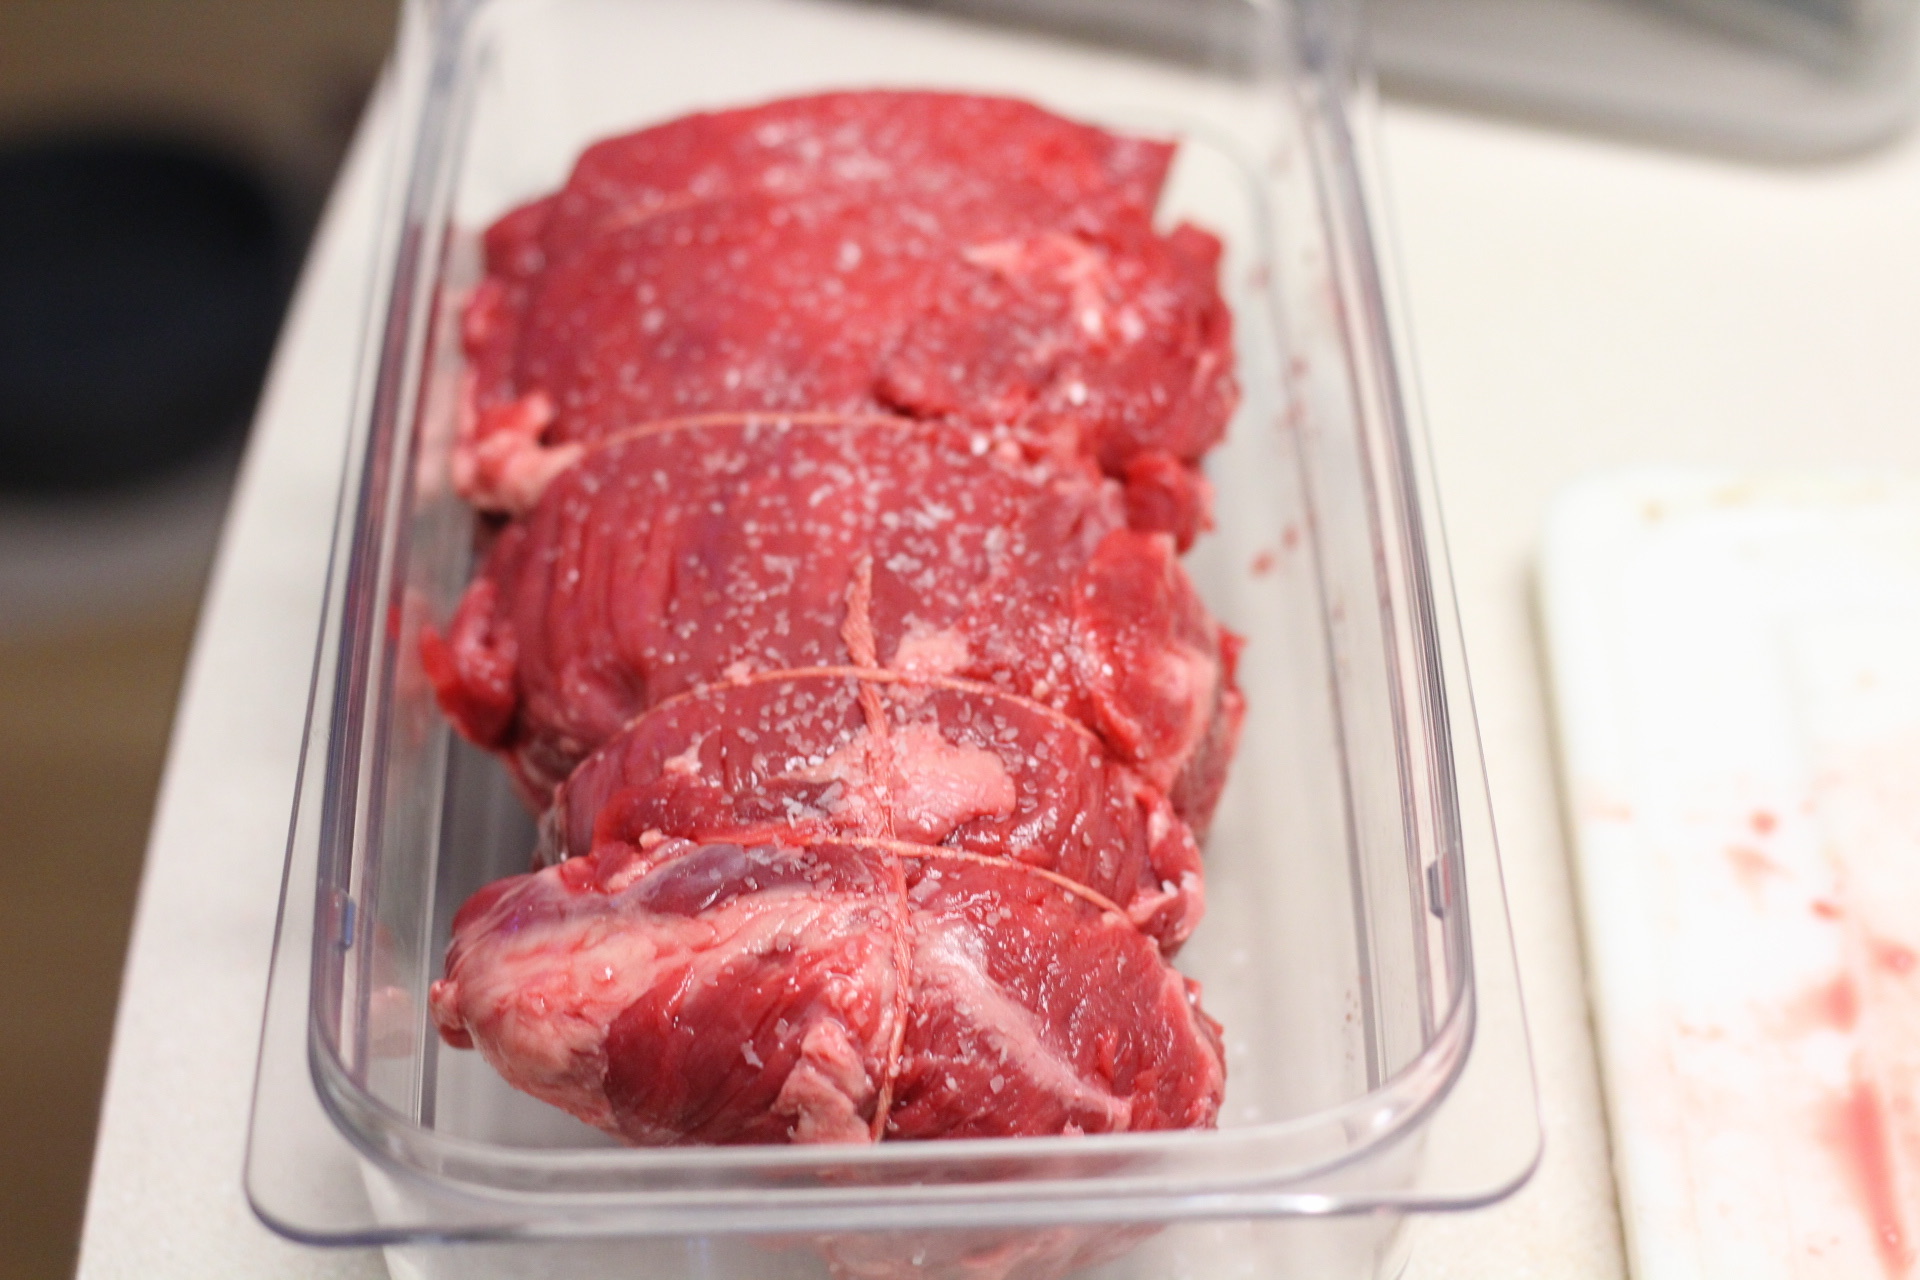
I trimmed the silverskin from the tenderloin and cut it in half, the half that was smaller in diameter I placed in a vacuum sealable container, sprinkled it with kosher salt, sealed it up and put it in the fridge where it would spend the next 96 hours. We will come back to that.
The other half got the same treatment along with some rosemary and Pennsylvania Pepper however it went into a vacuum seal bag for 24 hours.
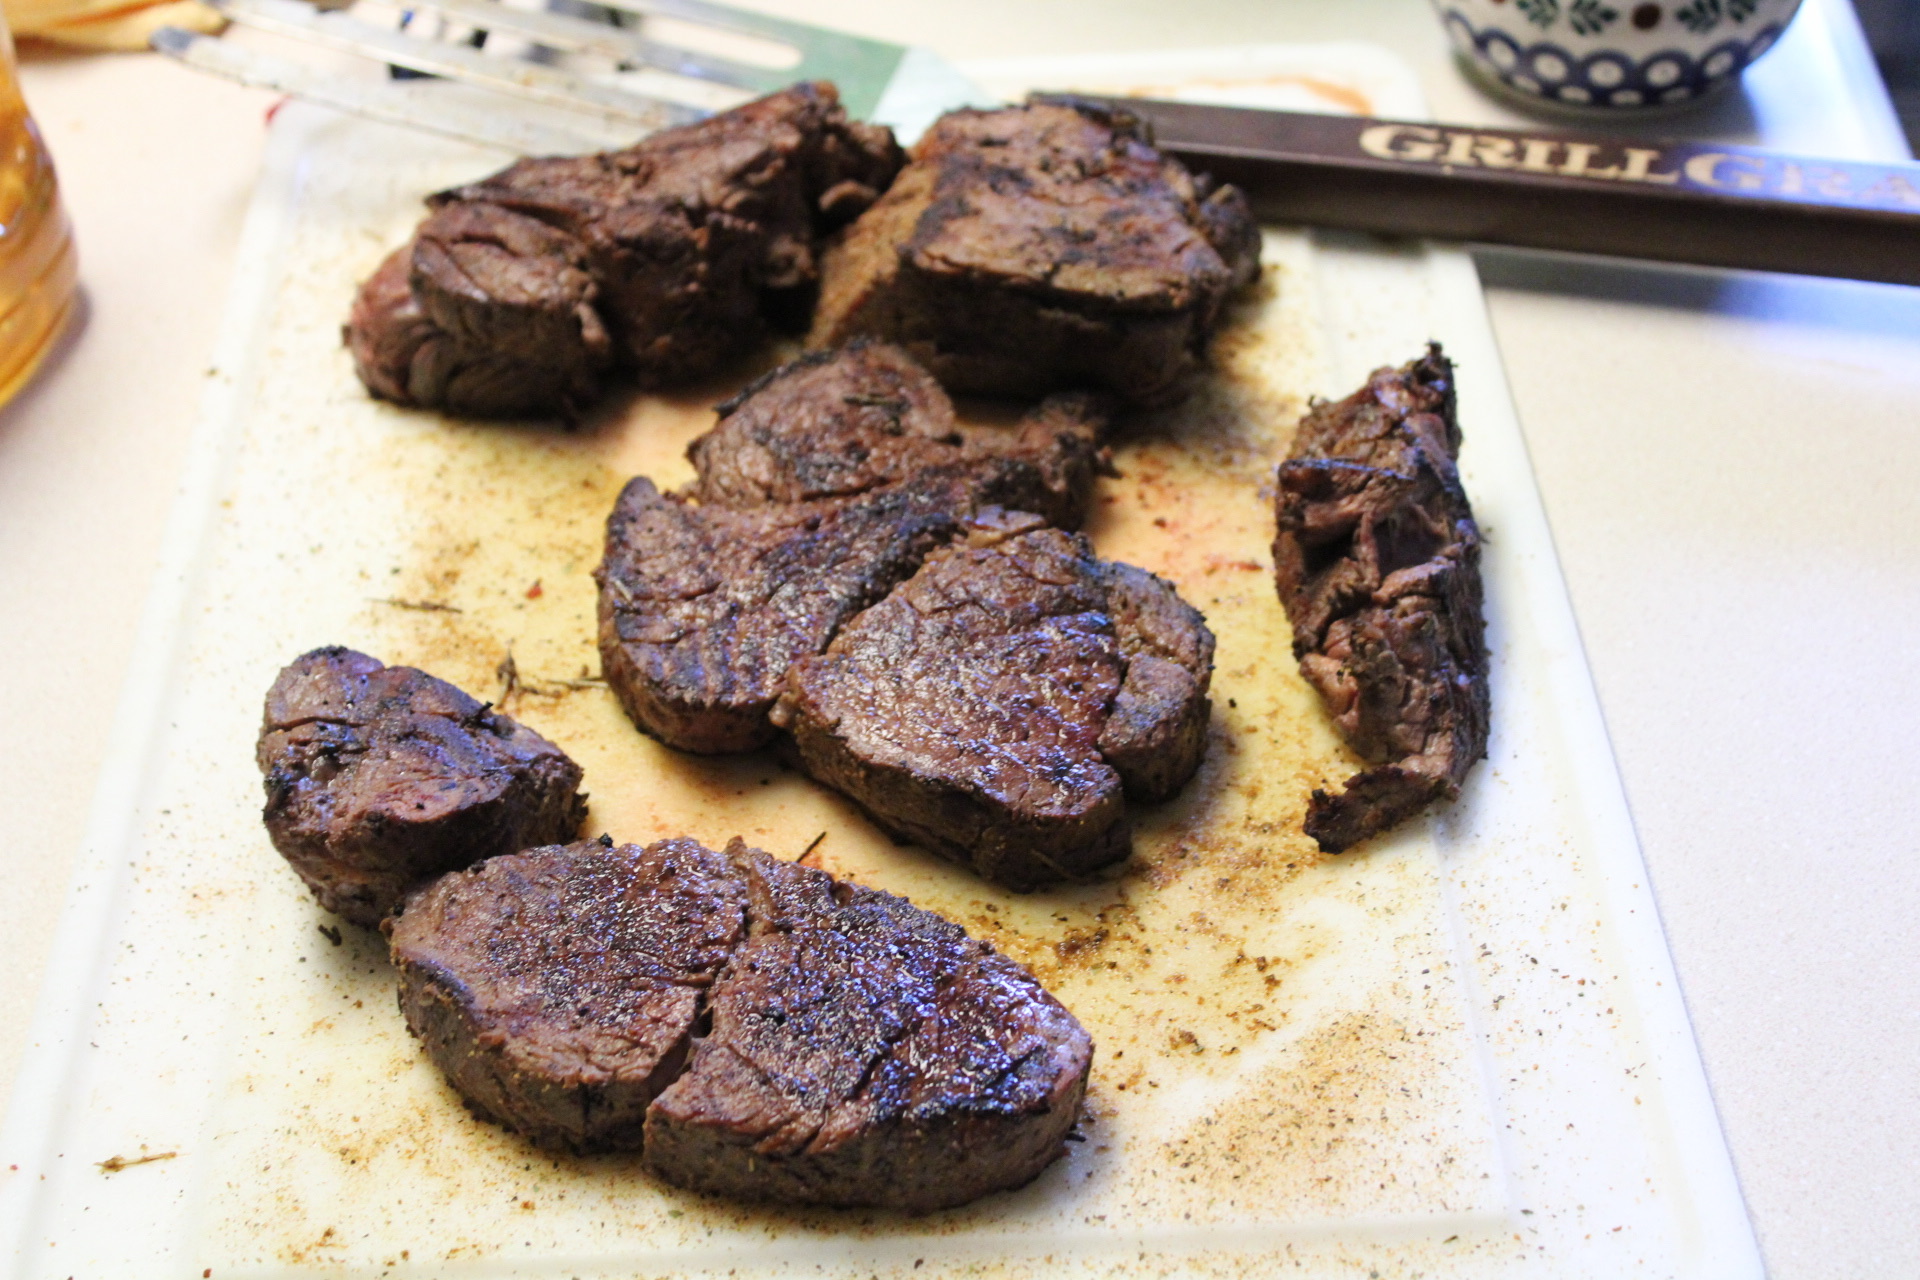
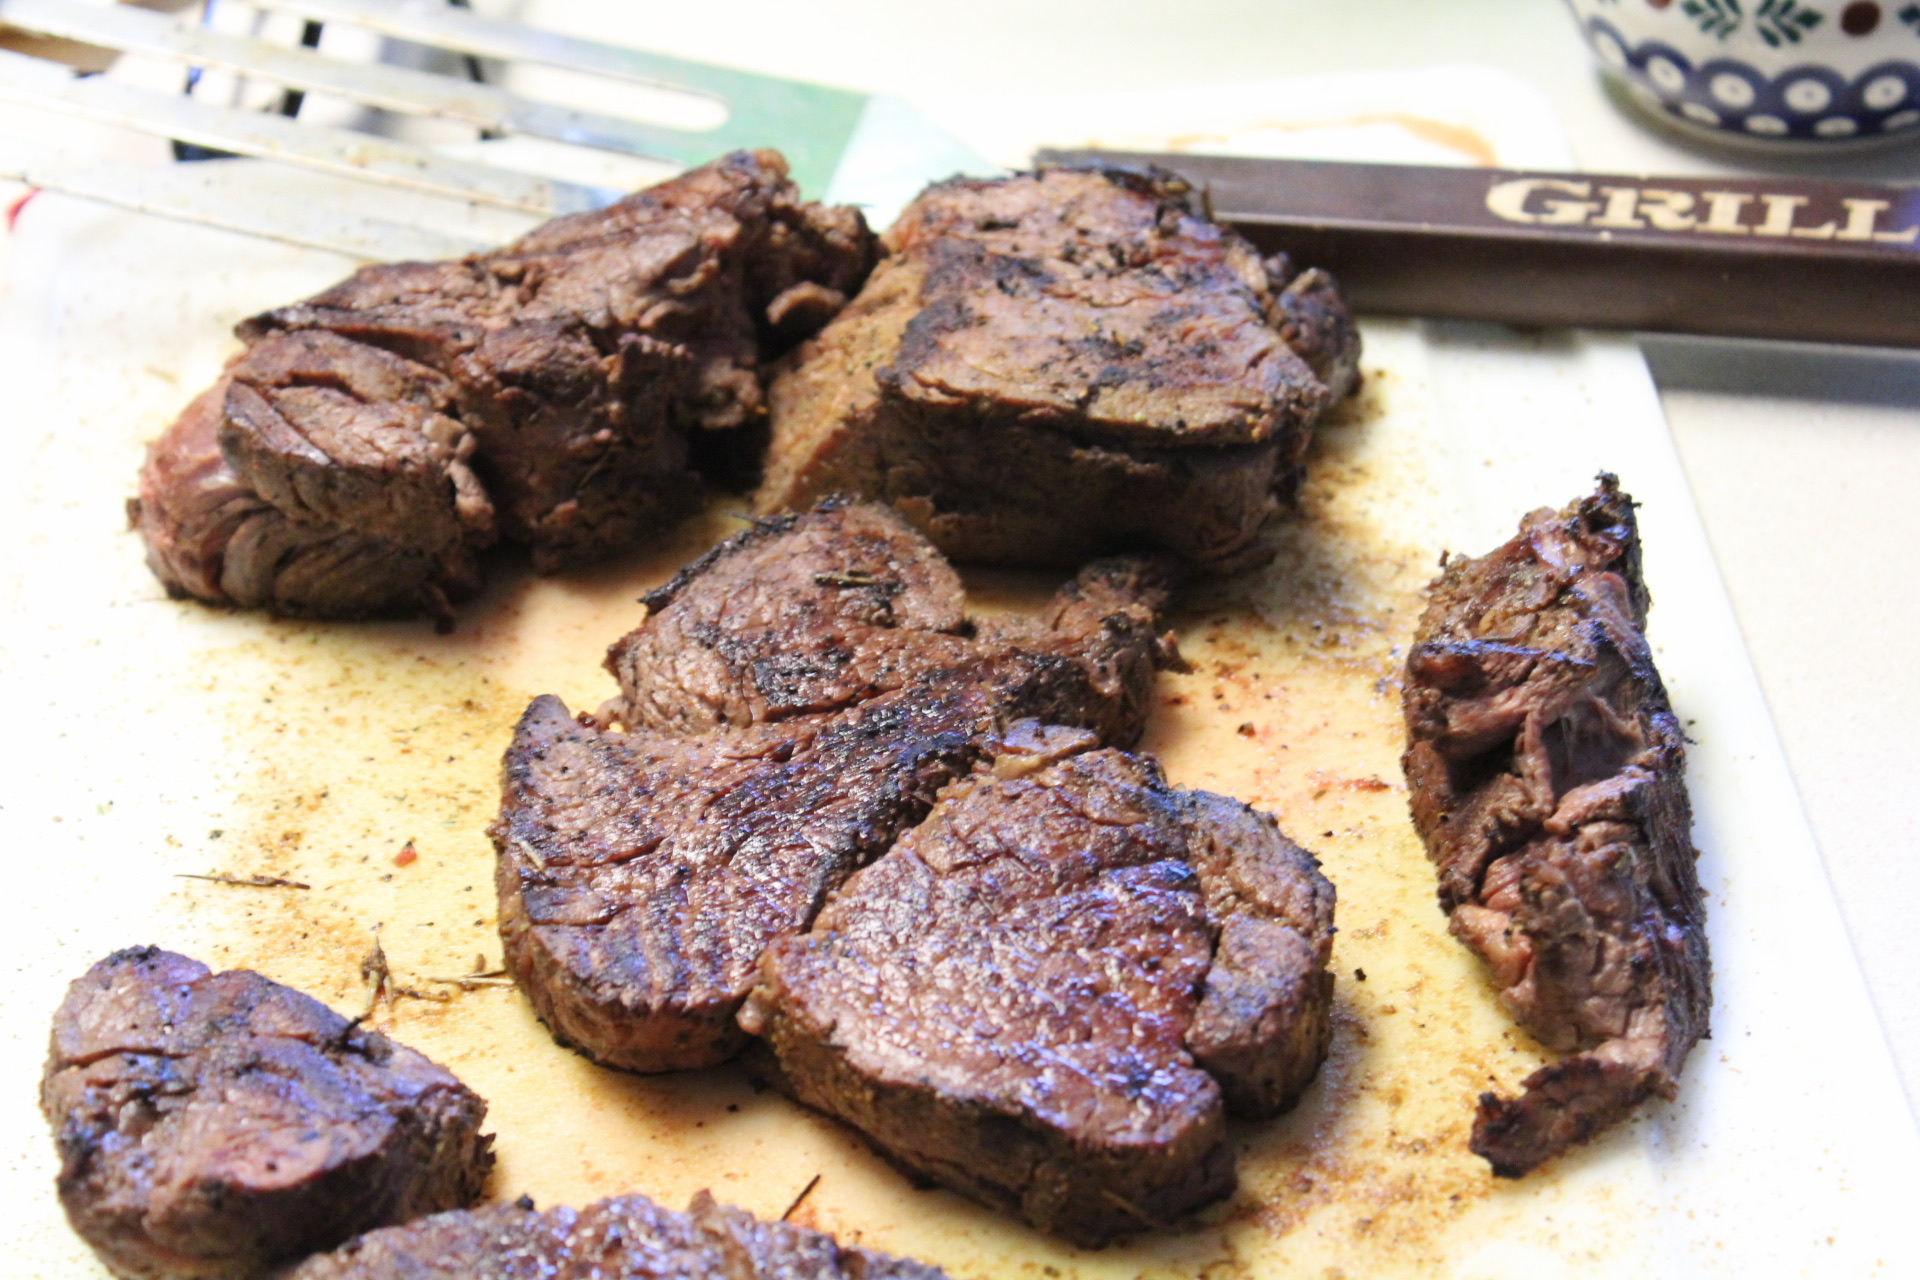
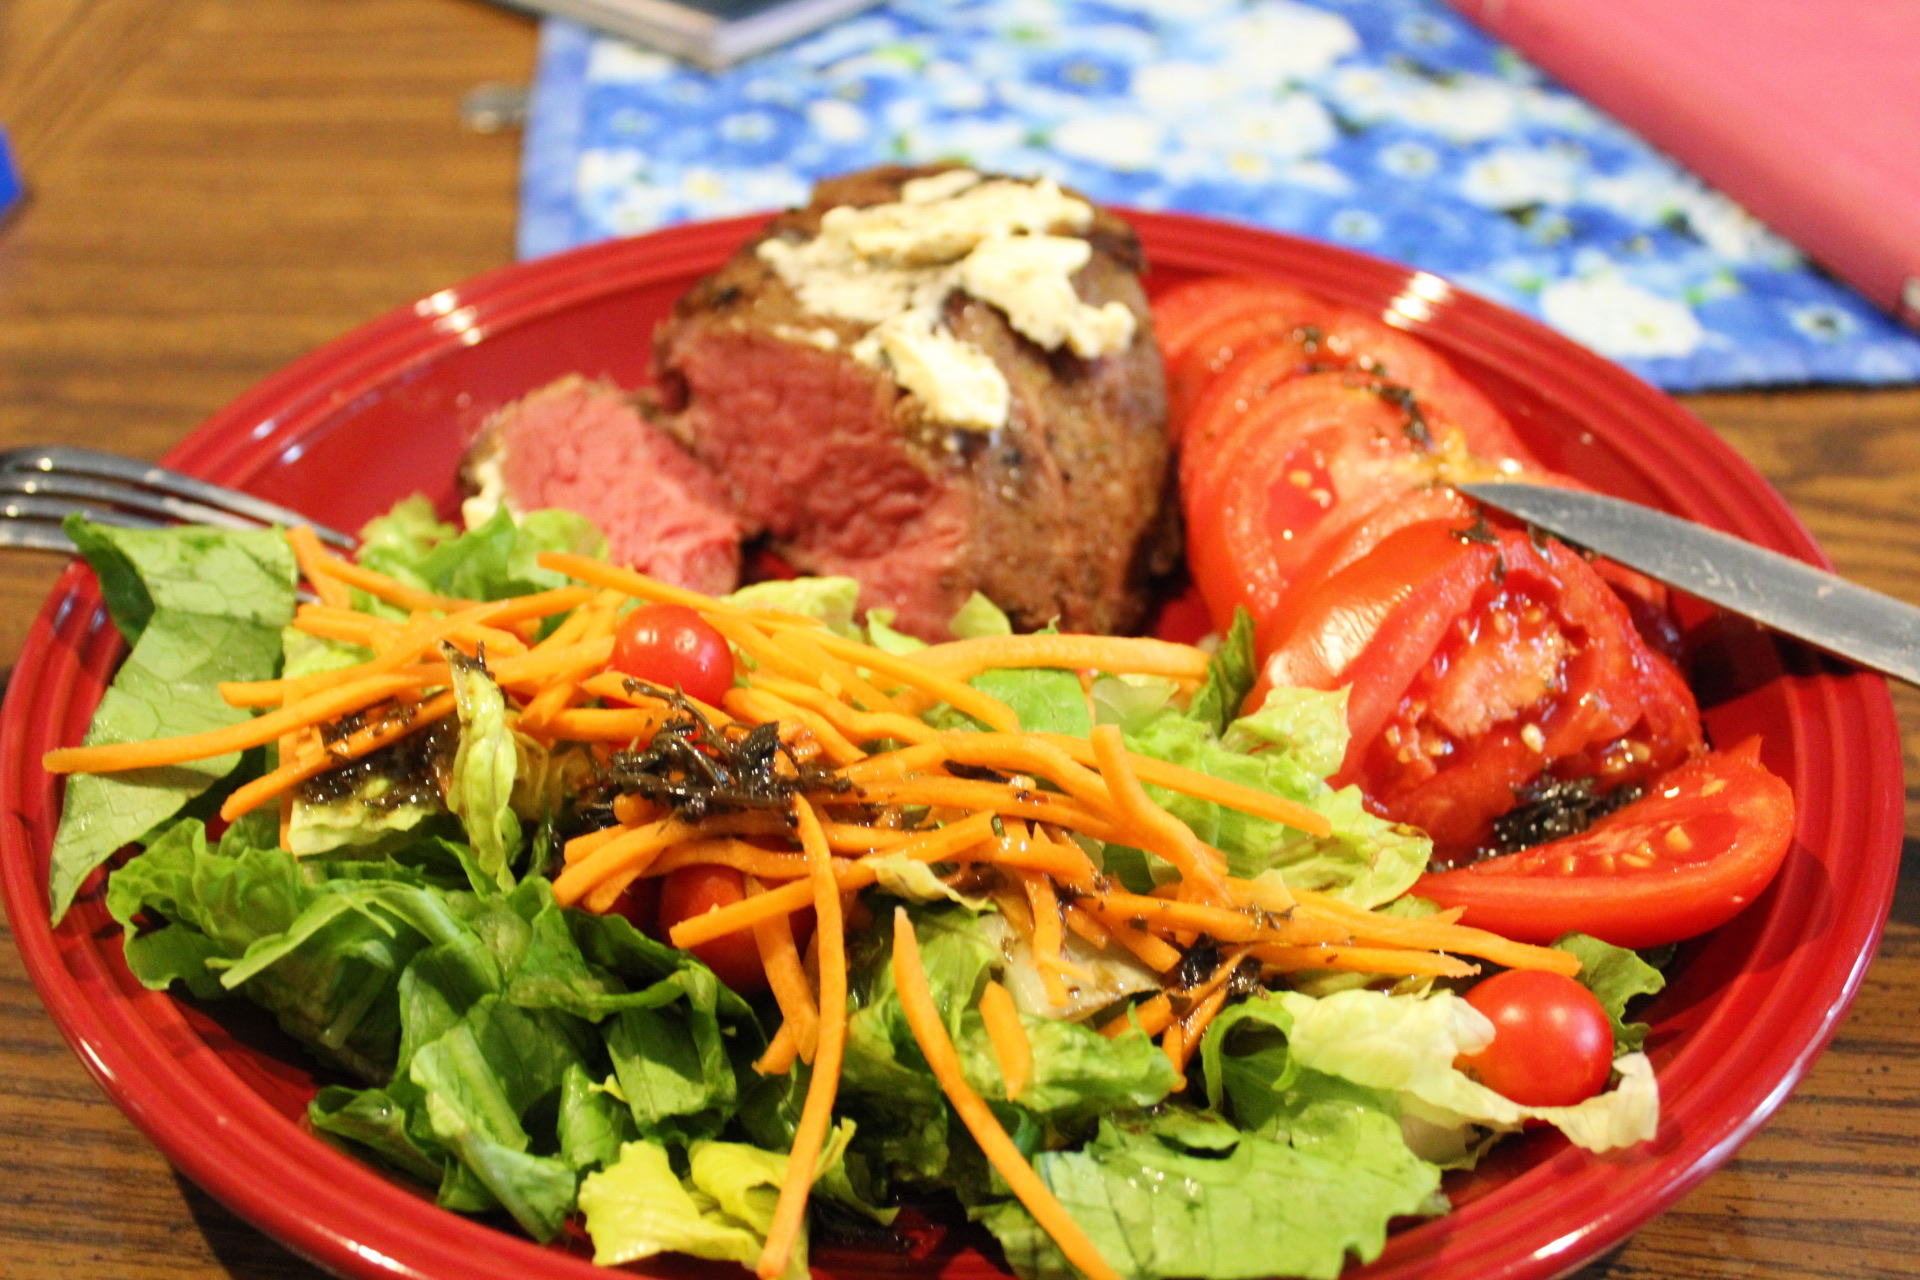
After the dry brine worked it magic it was time to do use take advantage of some modern conveniences, chiefly my Anova Precision Cooker, a sous vide machine, aka the hot tub time machine aka HTTM. The sealed bag went into the HTTM for 3 hours at 130F. When time was up I put the beef, still in the bag, in an ice bath, because strangely, my wife and daughter seemed to be taking a long time 'shopping'. No matter. A quick ice bath and then into the fridge to hold. When I received the text that they were on their way home I started the Kingsford and prepped the Weber. Thirty minutes later the ladies walked in, the grill was hot and I started to slice the tenderloin into steaks and give them a healthy dose of Oakridge BBQs Santa Maria Steak Rub. I made sure to save the drippings to make gravy with later in the week. Here is what they looked like before going on the grill.


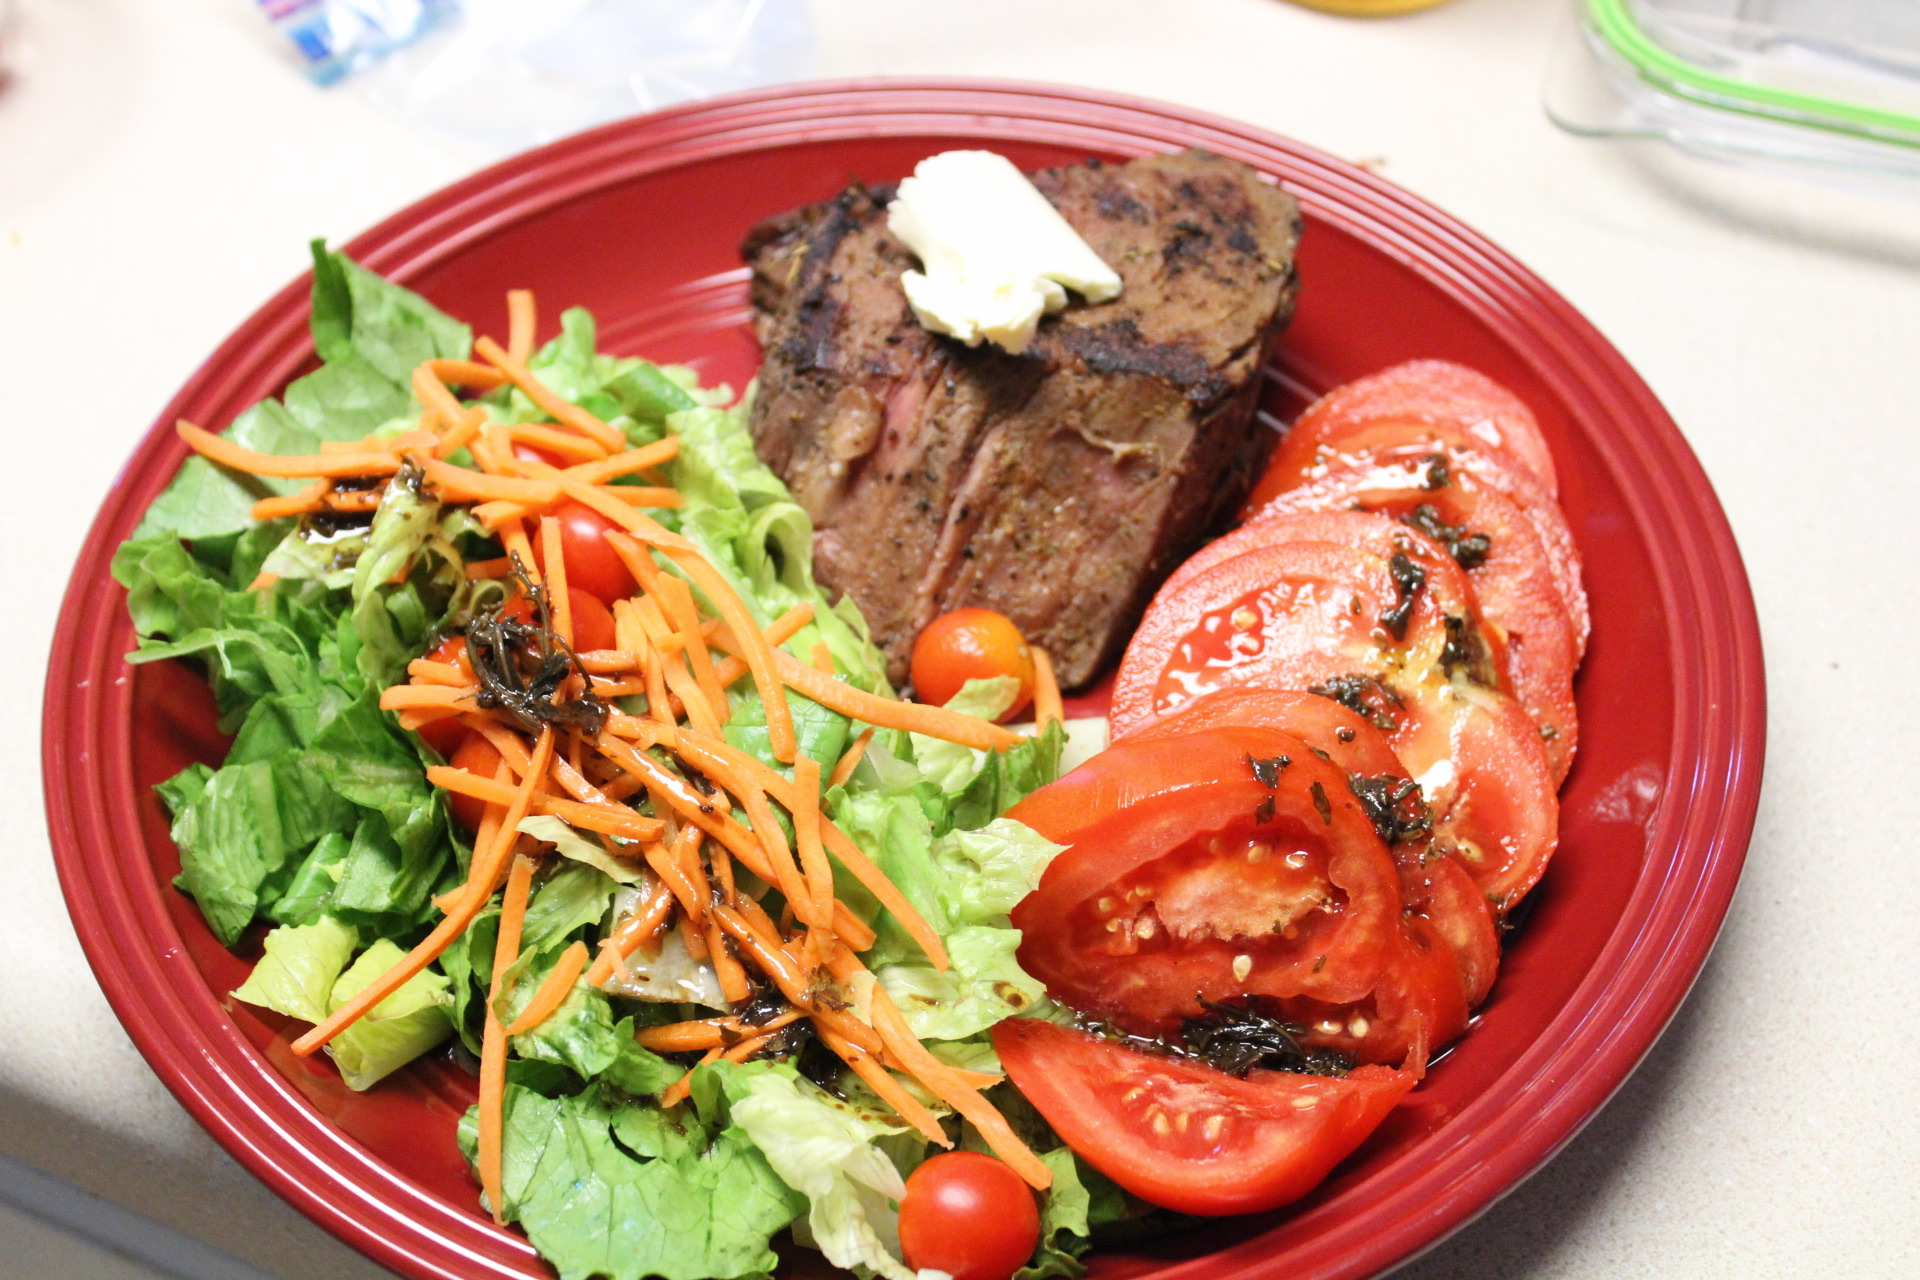
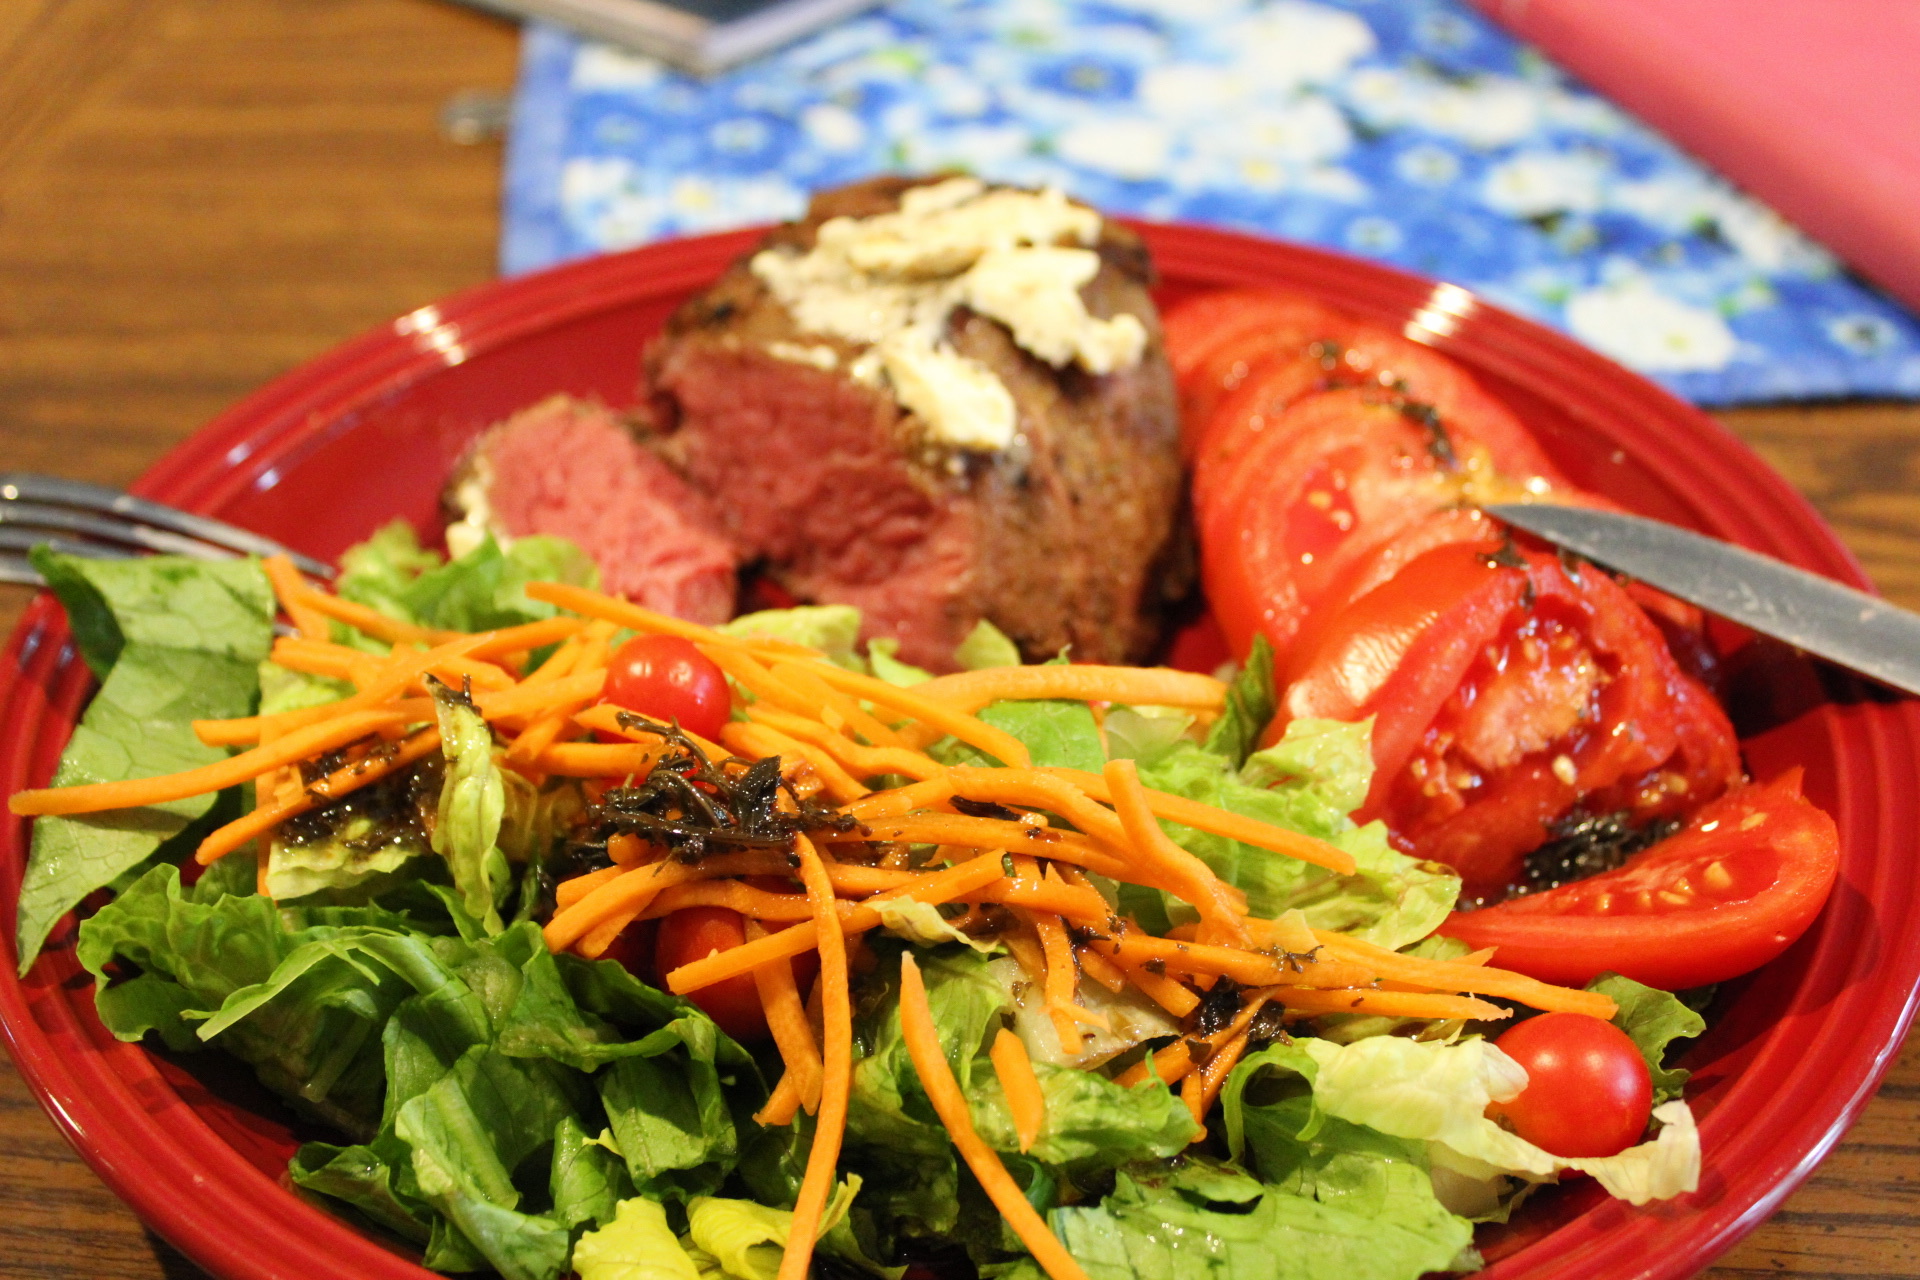
I walked out the door saying, dinner will be served in six minutes. Please finish the salad", and headed out to the Weber. I use my GrillGrates with the flat side over the SlowNSear and the raised grill mark side on the indirect heat side of the Weber. This gives me a consistent sear across the meat, grill marks are pretty, but they aren't giving you as much flavor as you deserve. Trust me on this. Bam, I was back inside carrying a plate full of what would be the most tender steaks I have ever eaten. I have had $100 plates of ribeye and porterhouse and some of America's top steak houses. I killed them, this beef was top notch. Steak and salad no need for taters that night.
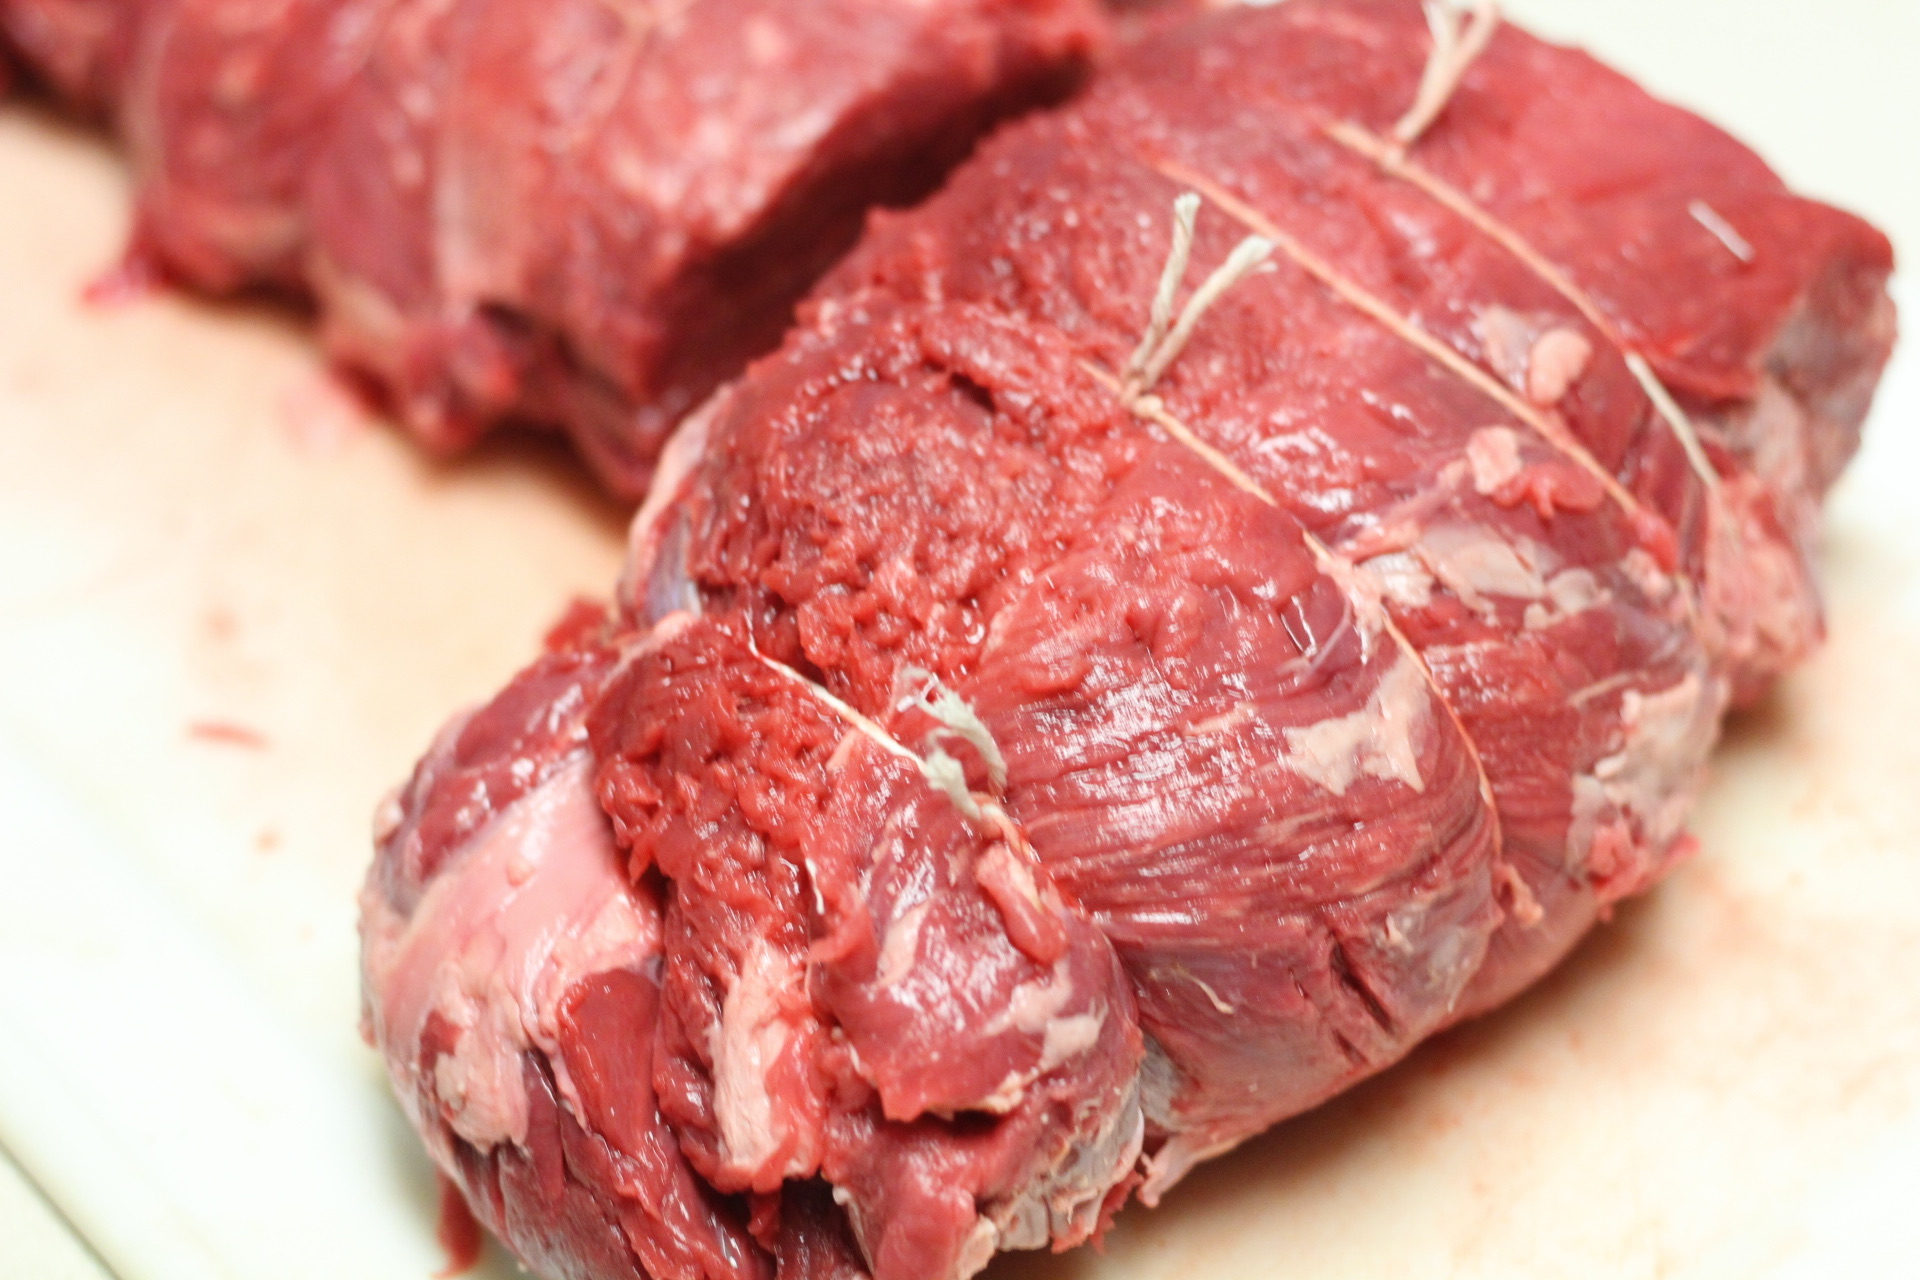
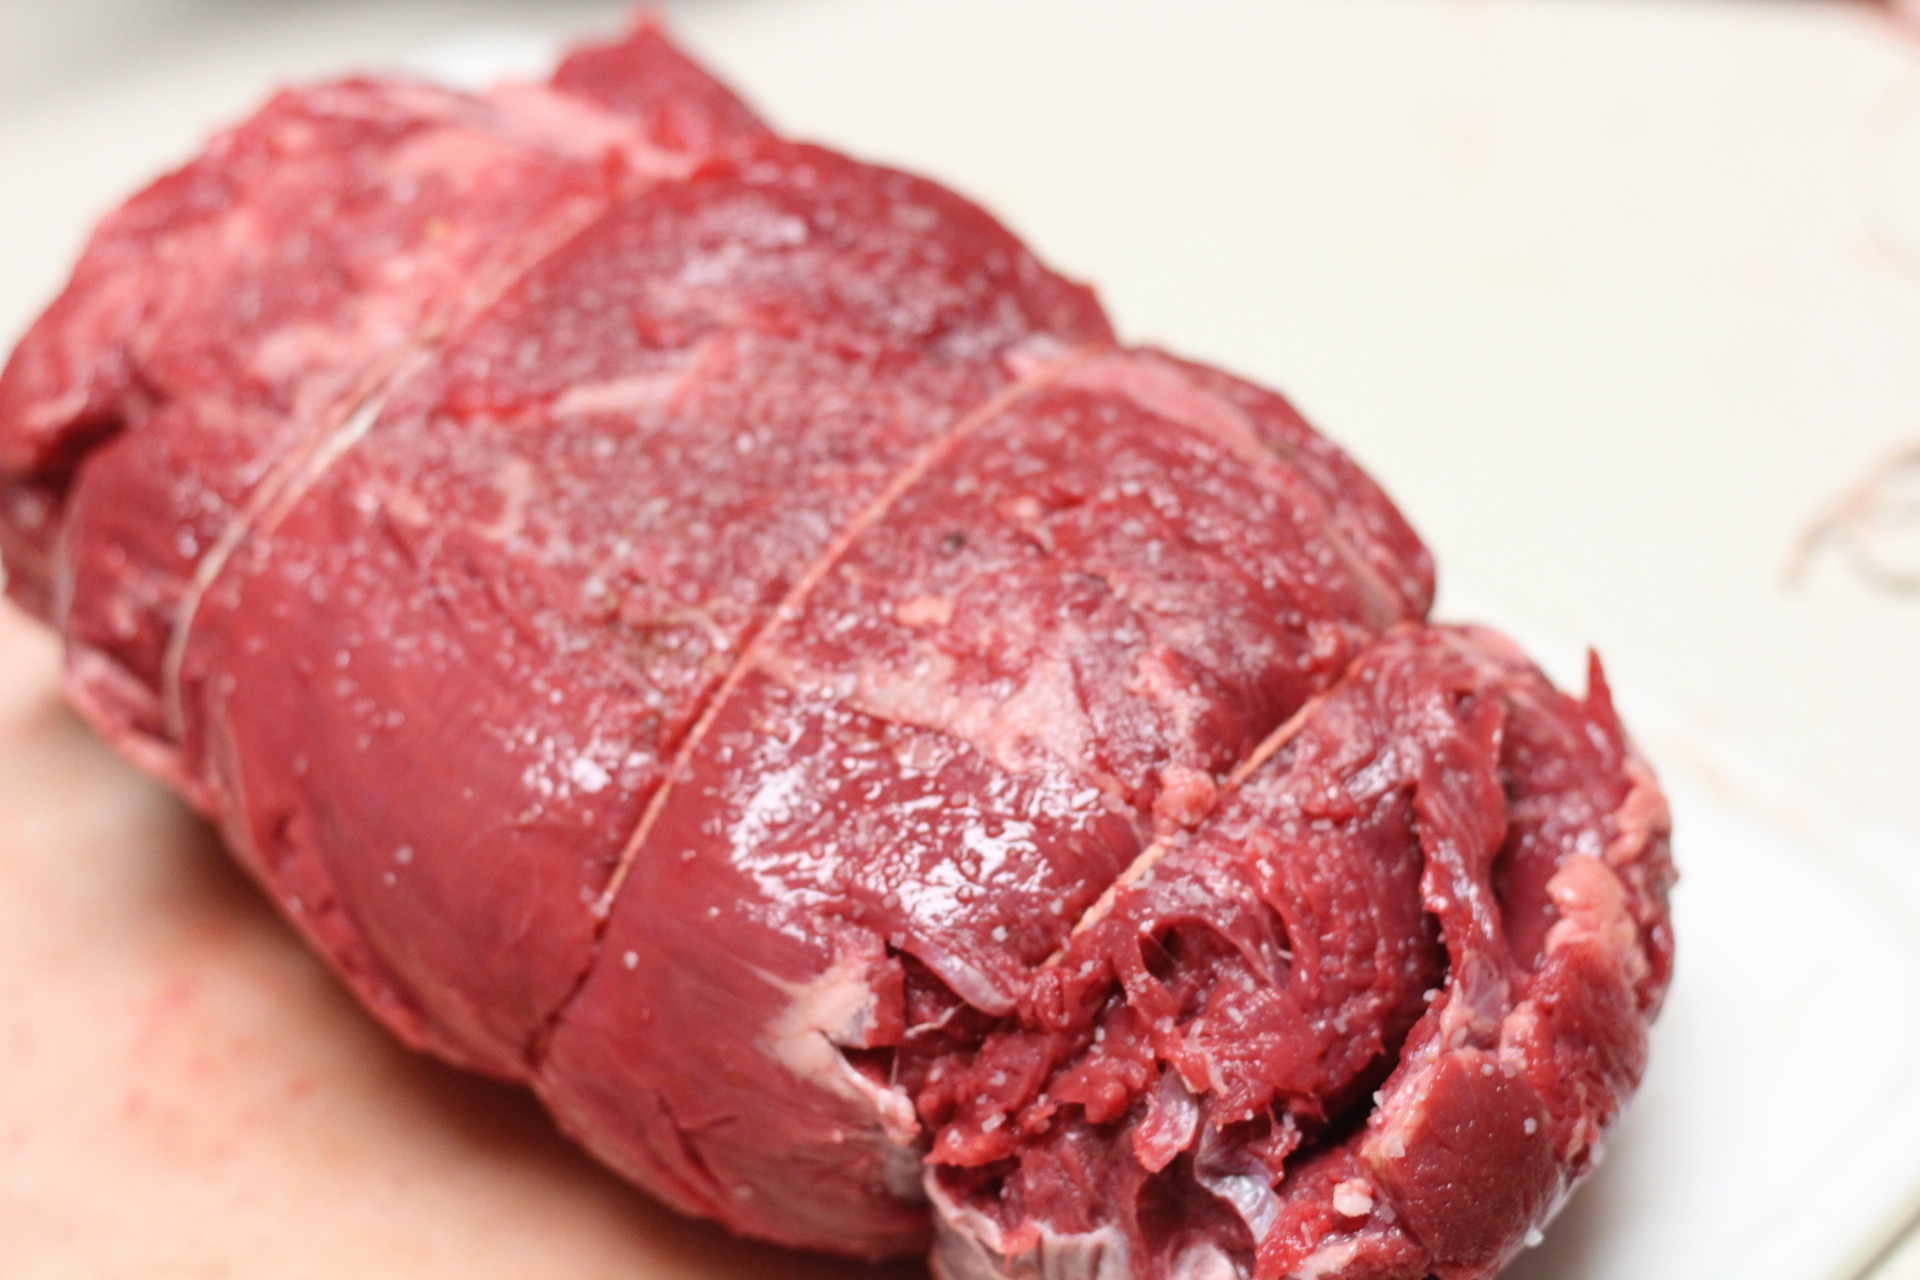
And fast forward to Saturday...Remember that other half of the tenderloin we left to dry brine so long? It is time to bring it out. Note the difference in color in the before and after pictures.


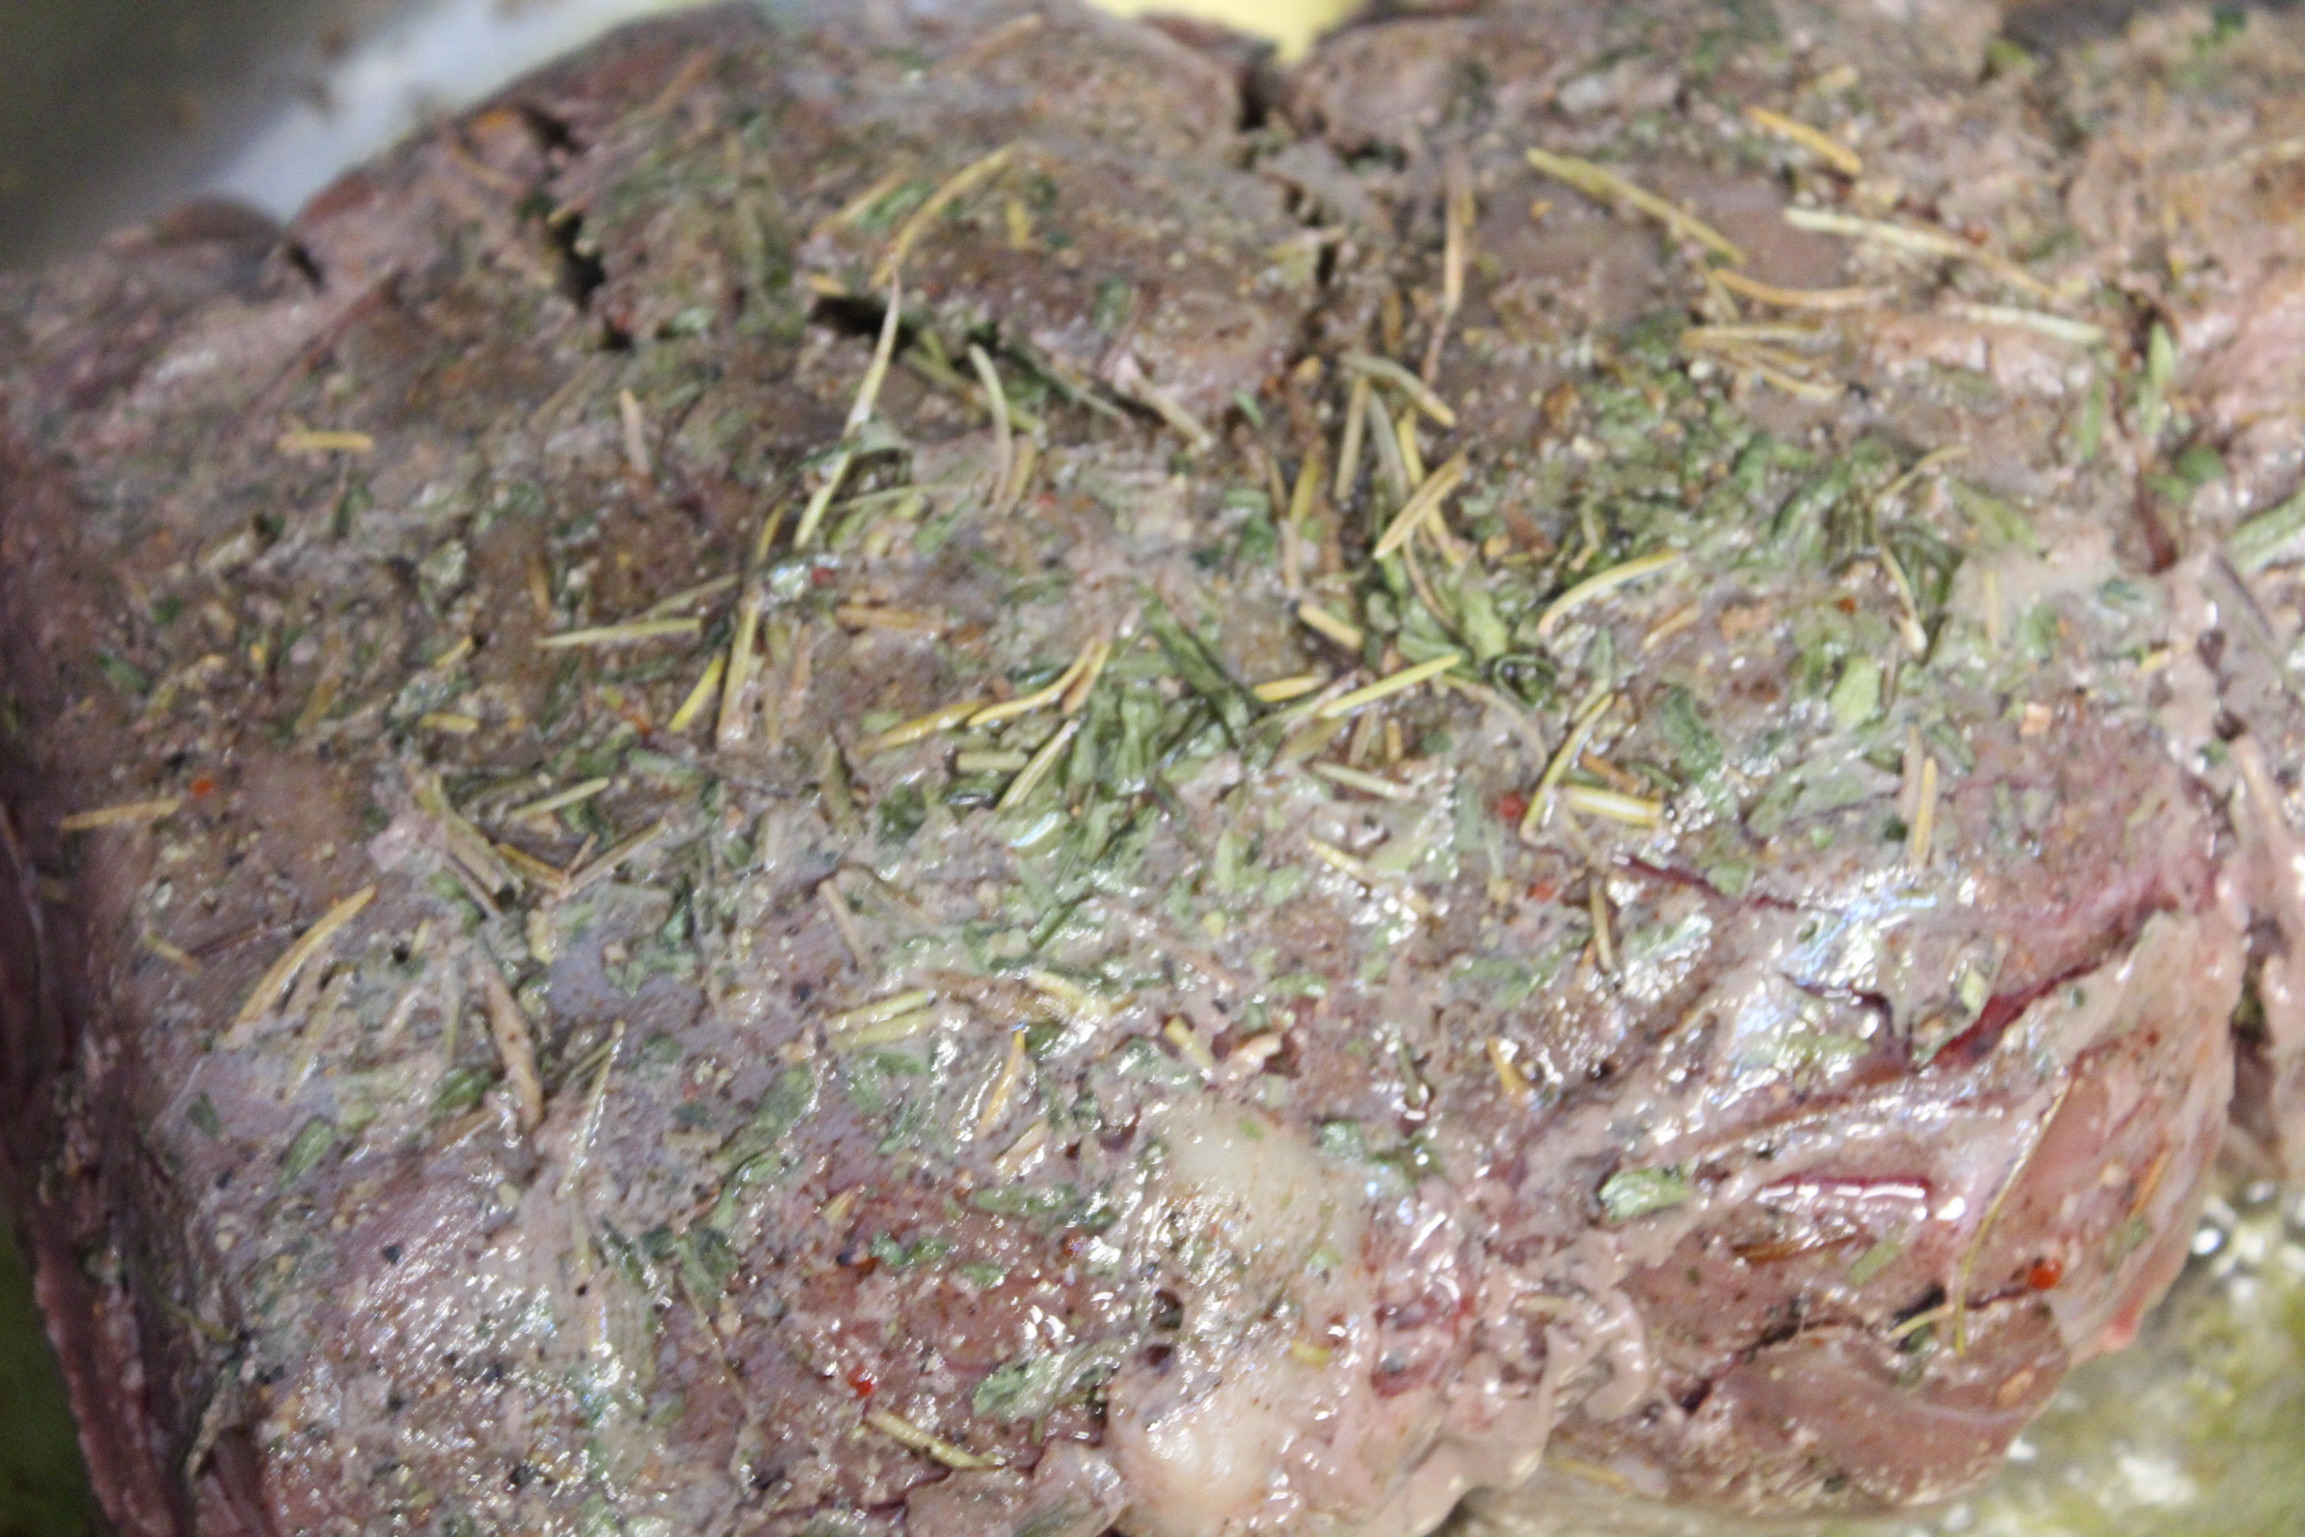
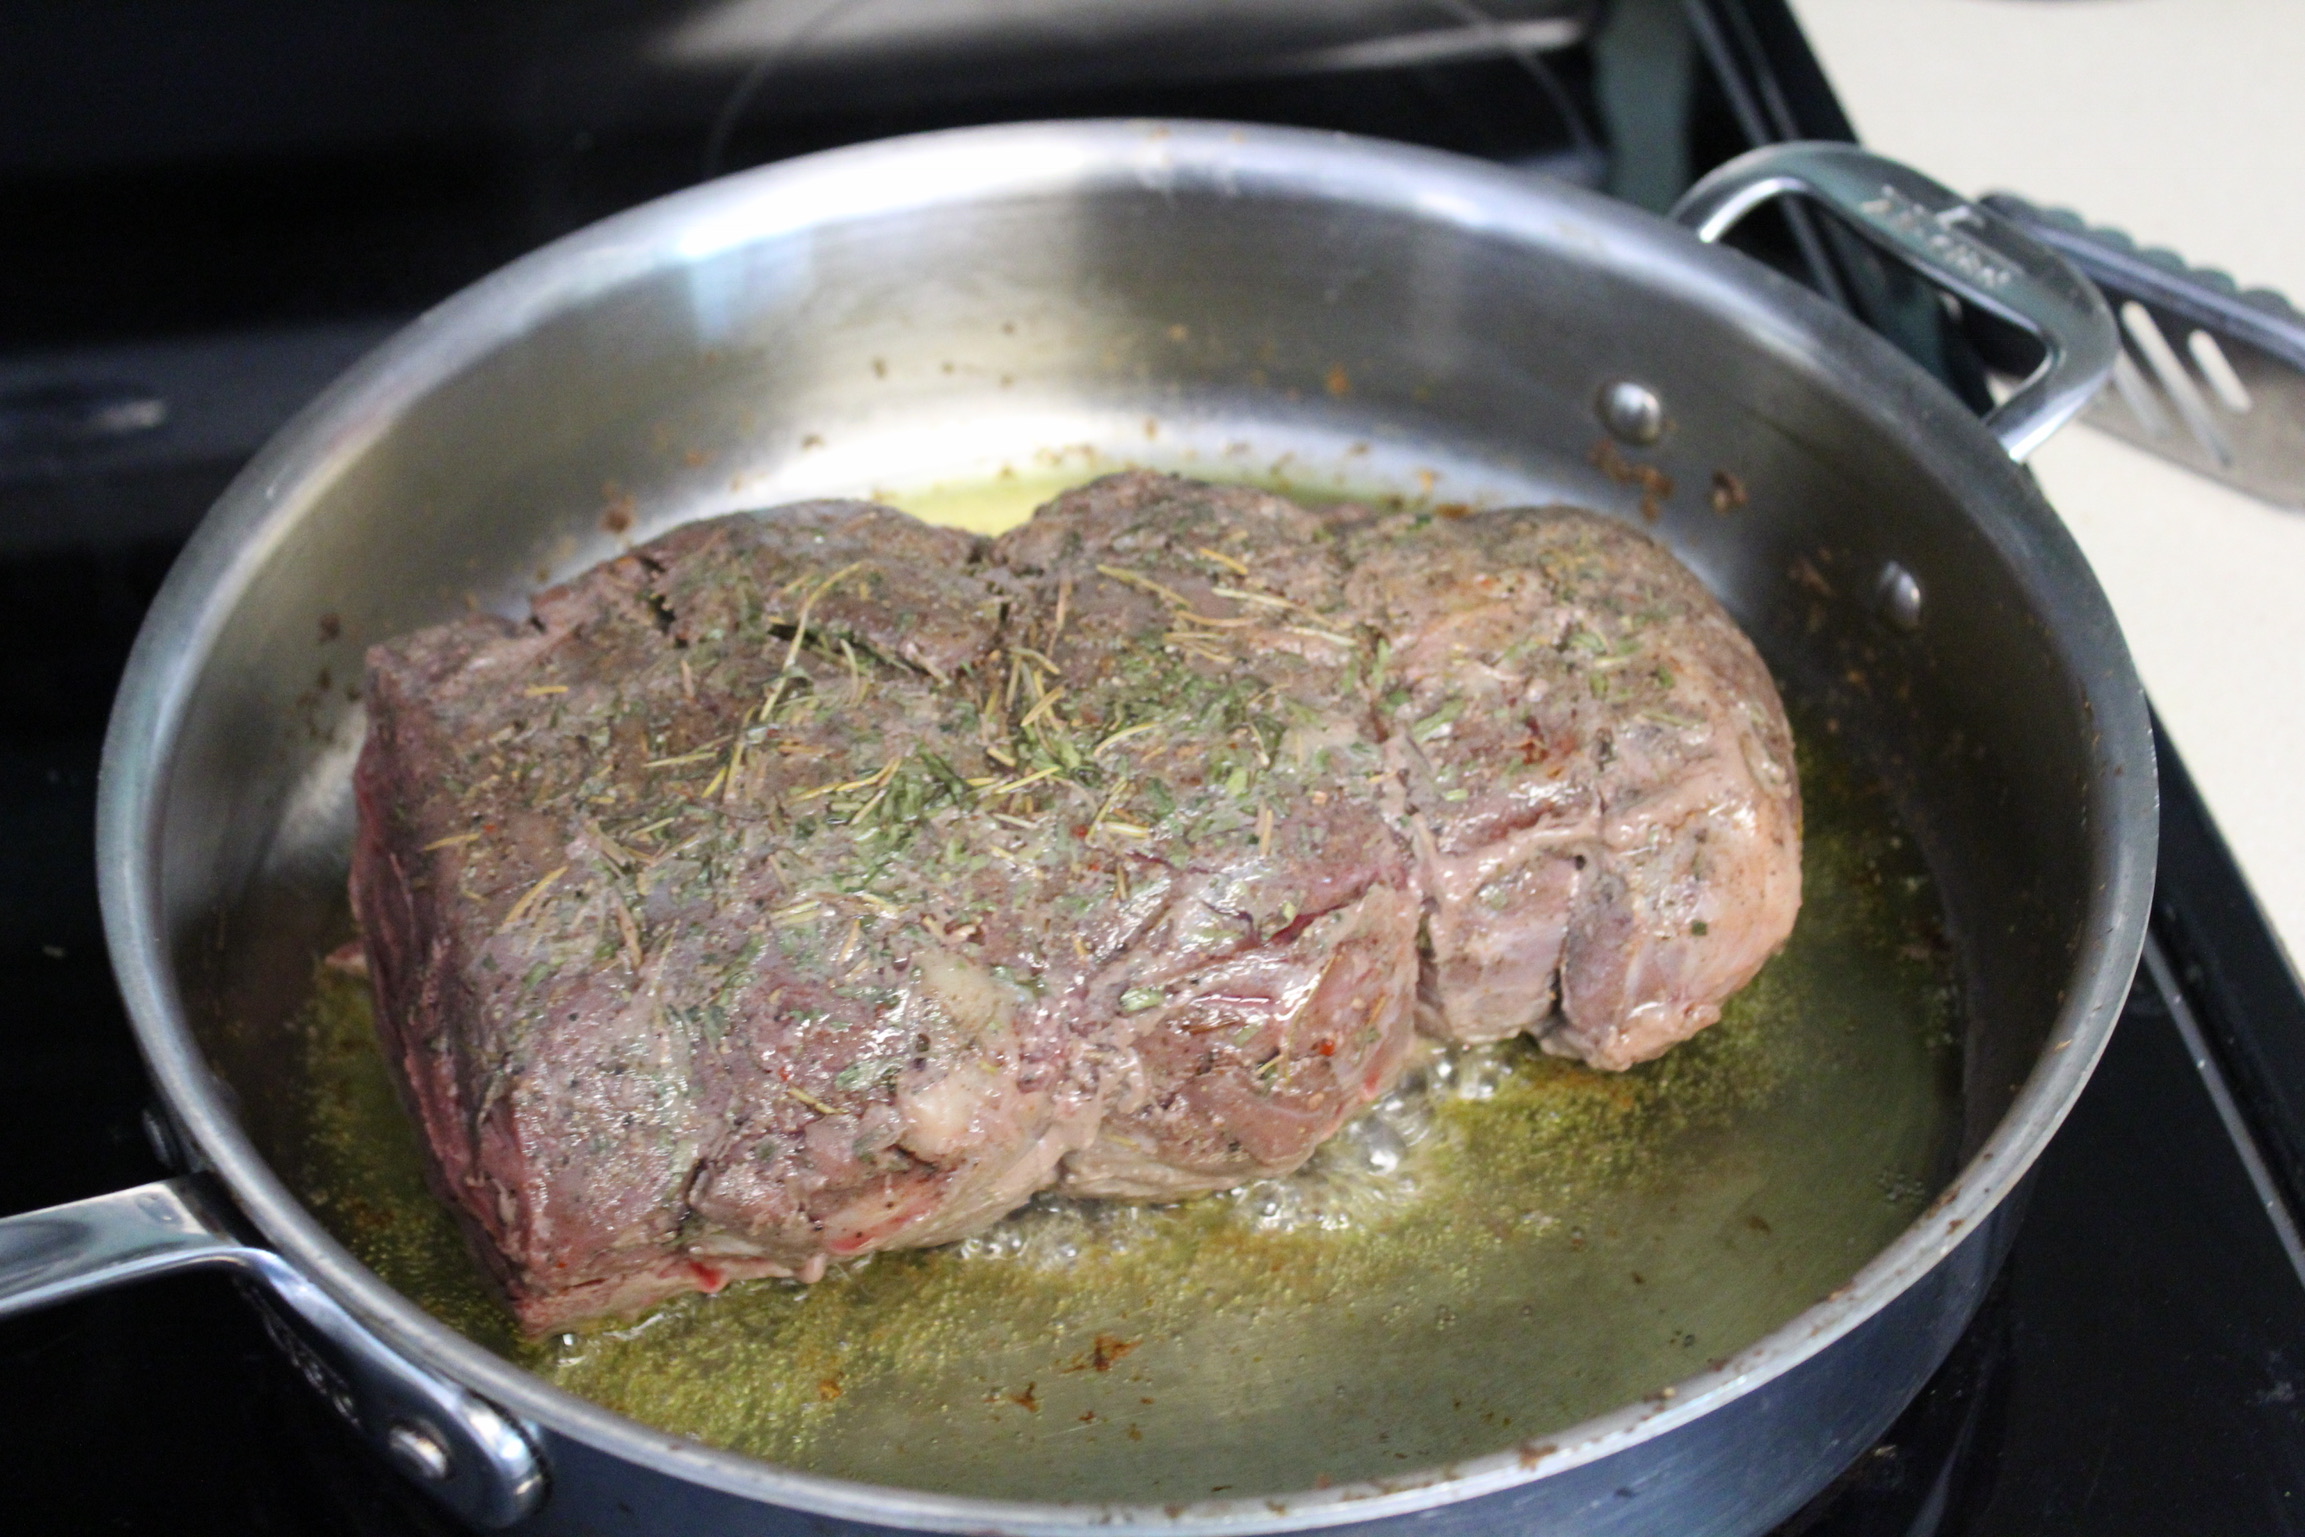
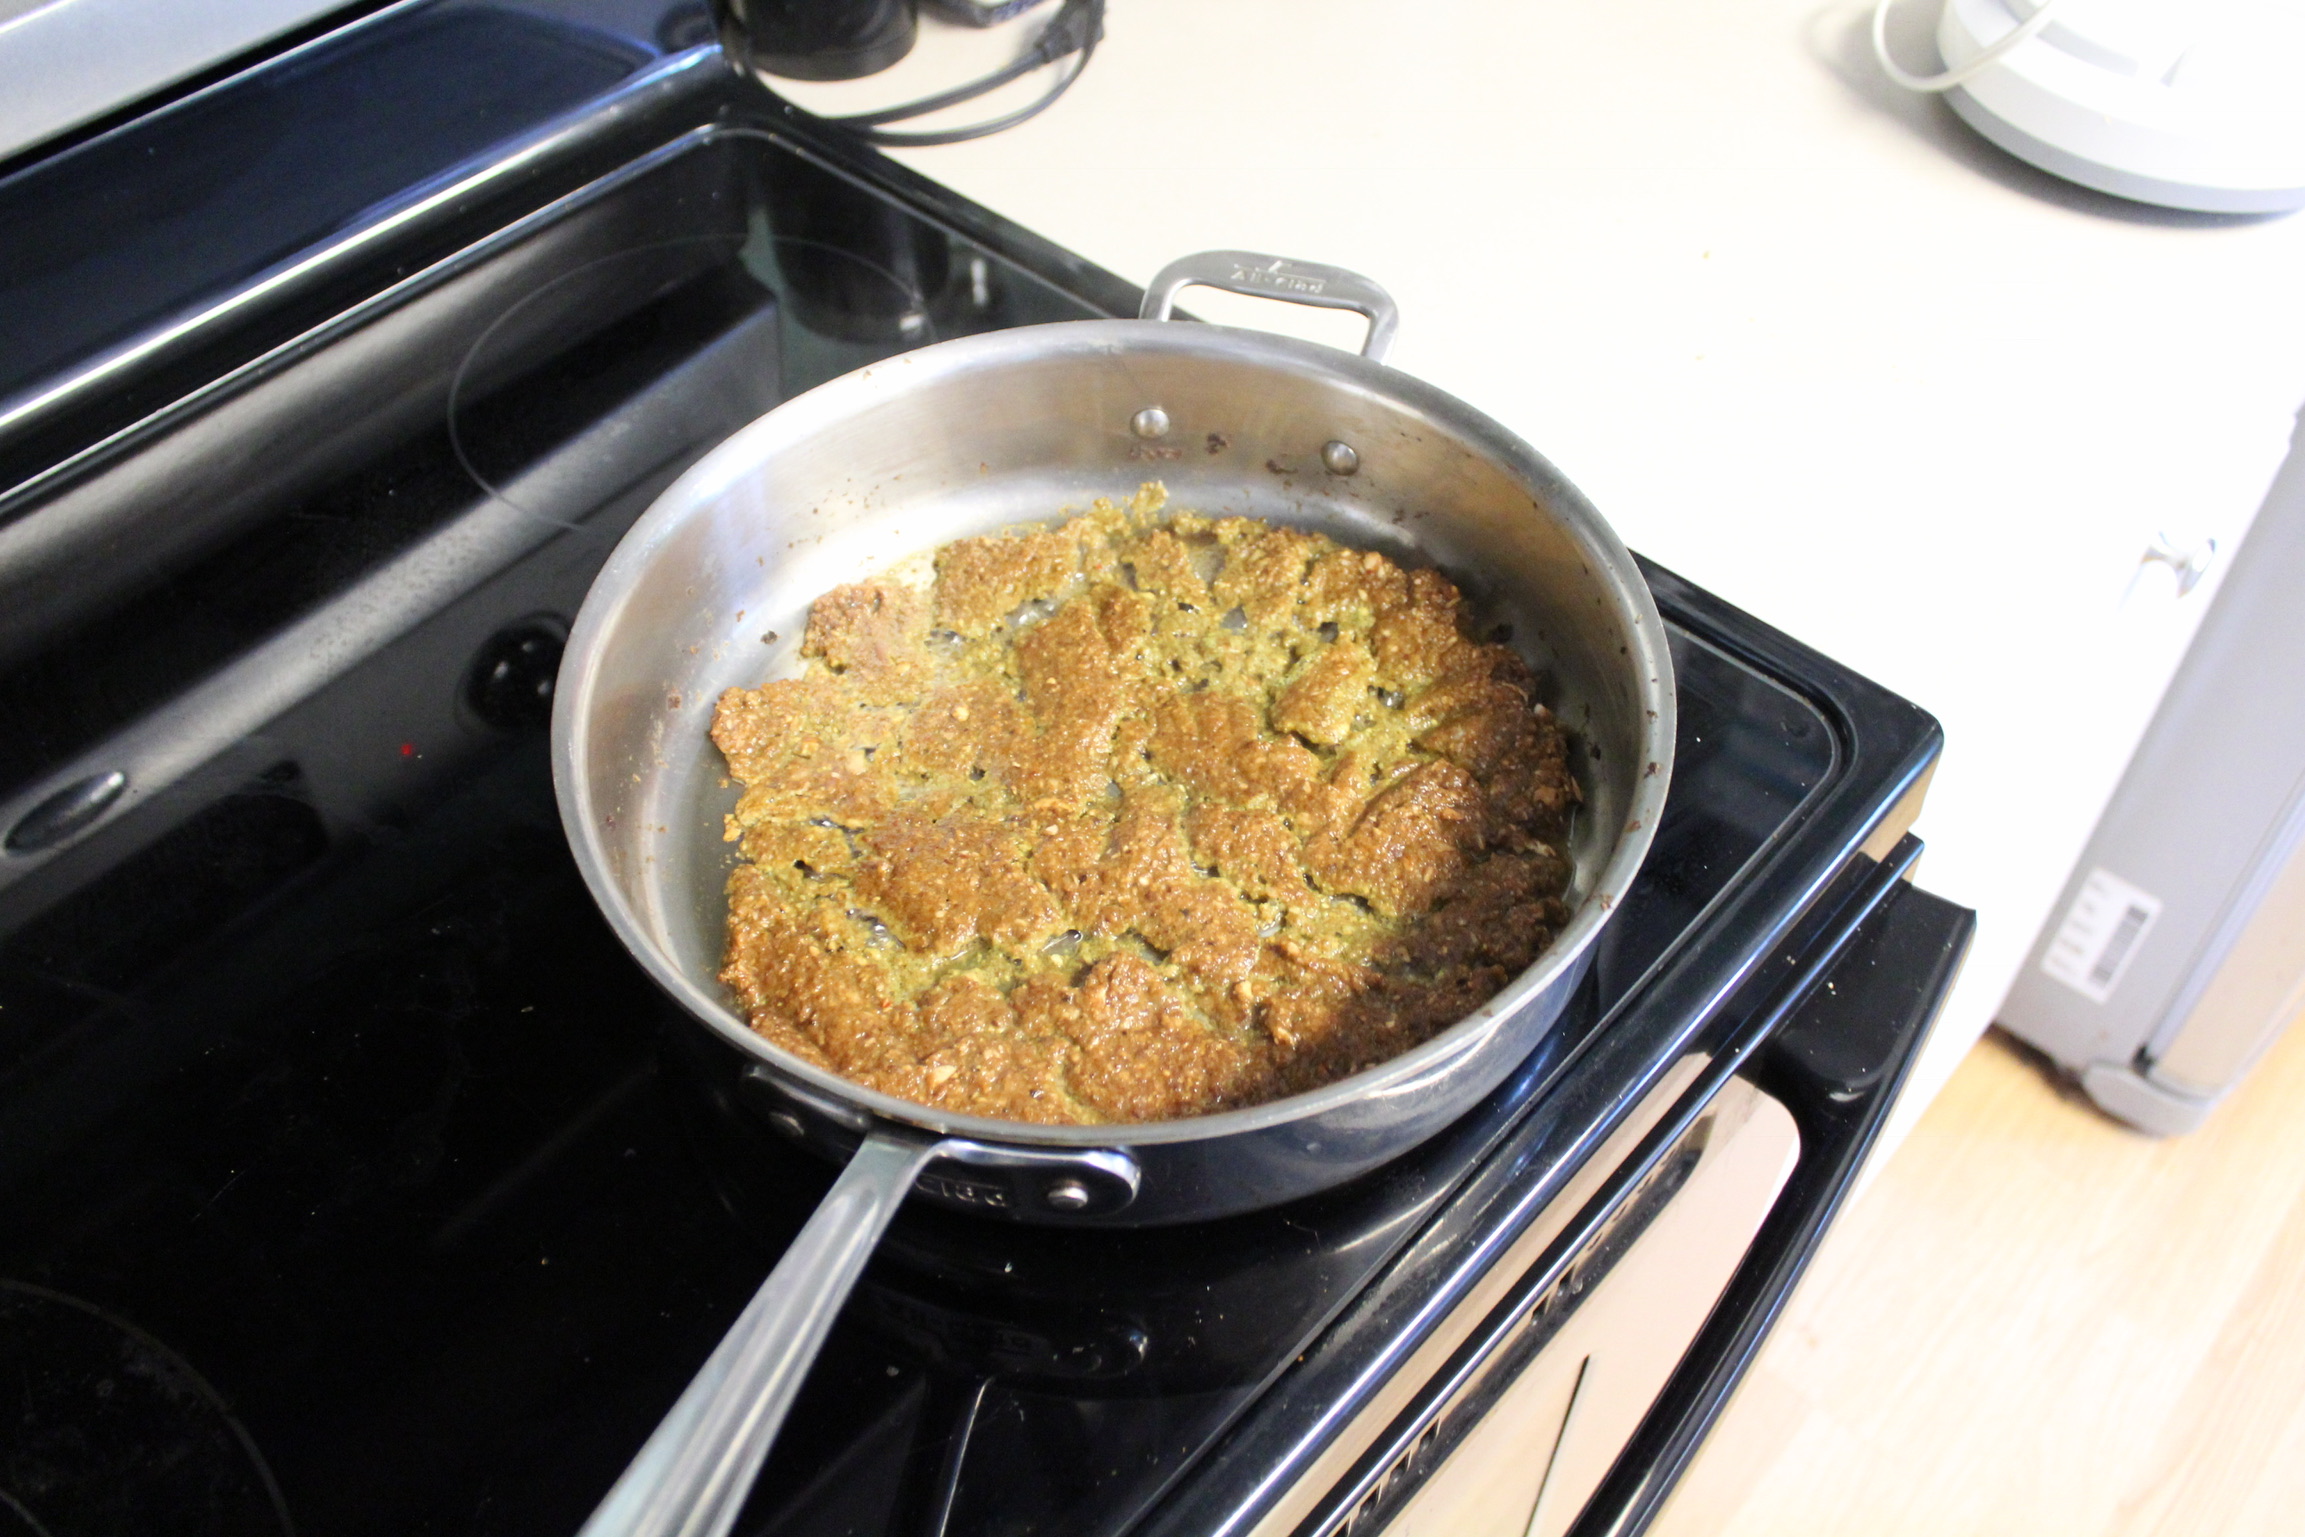
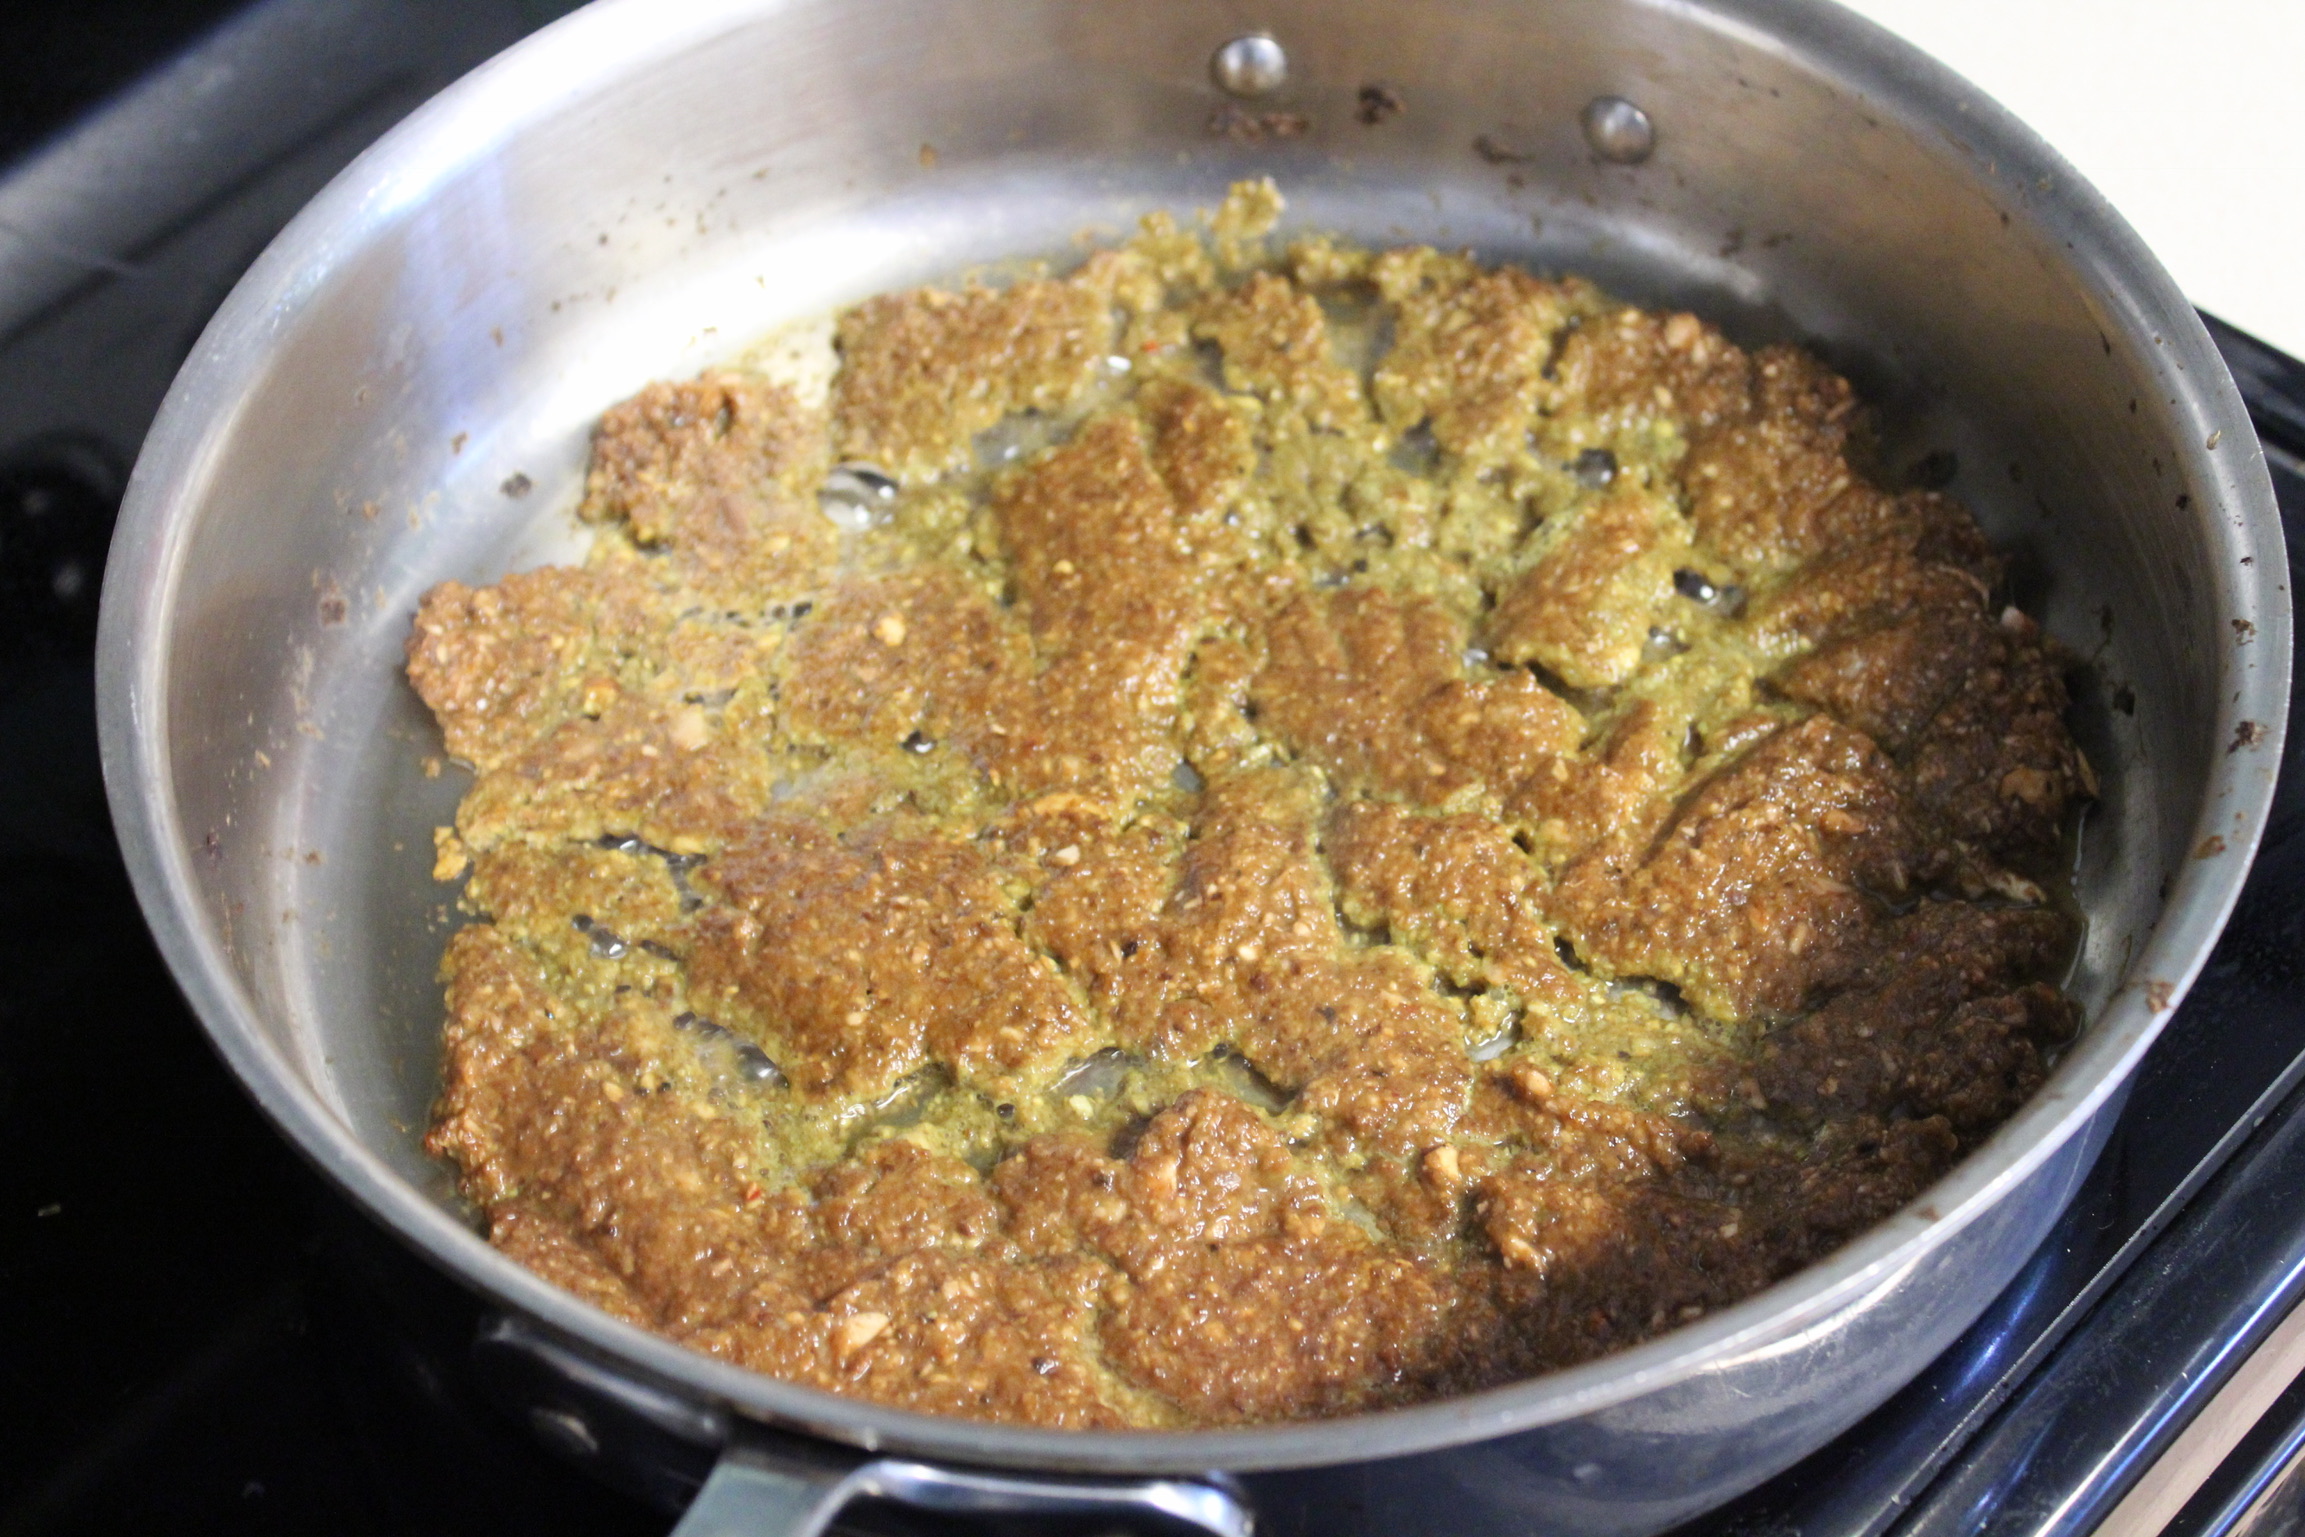
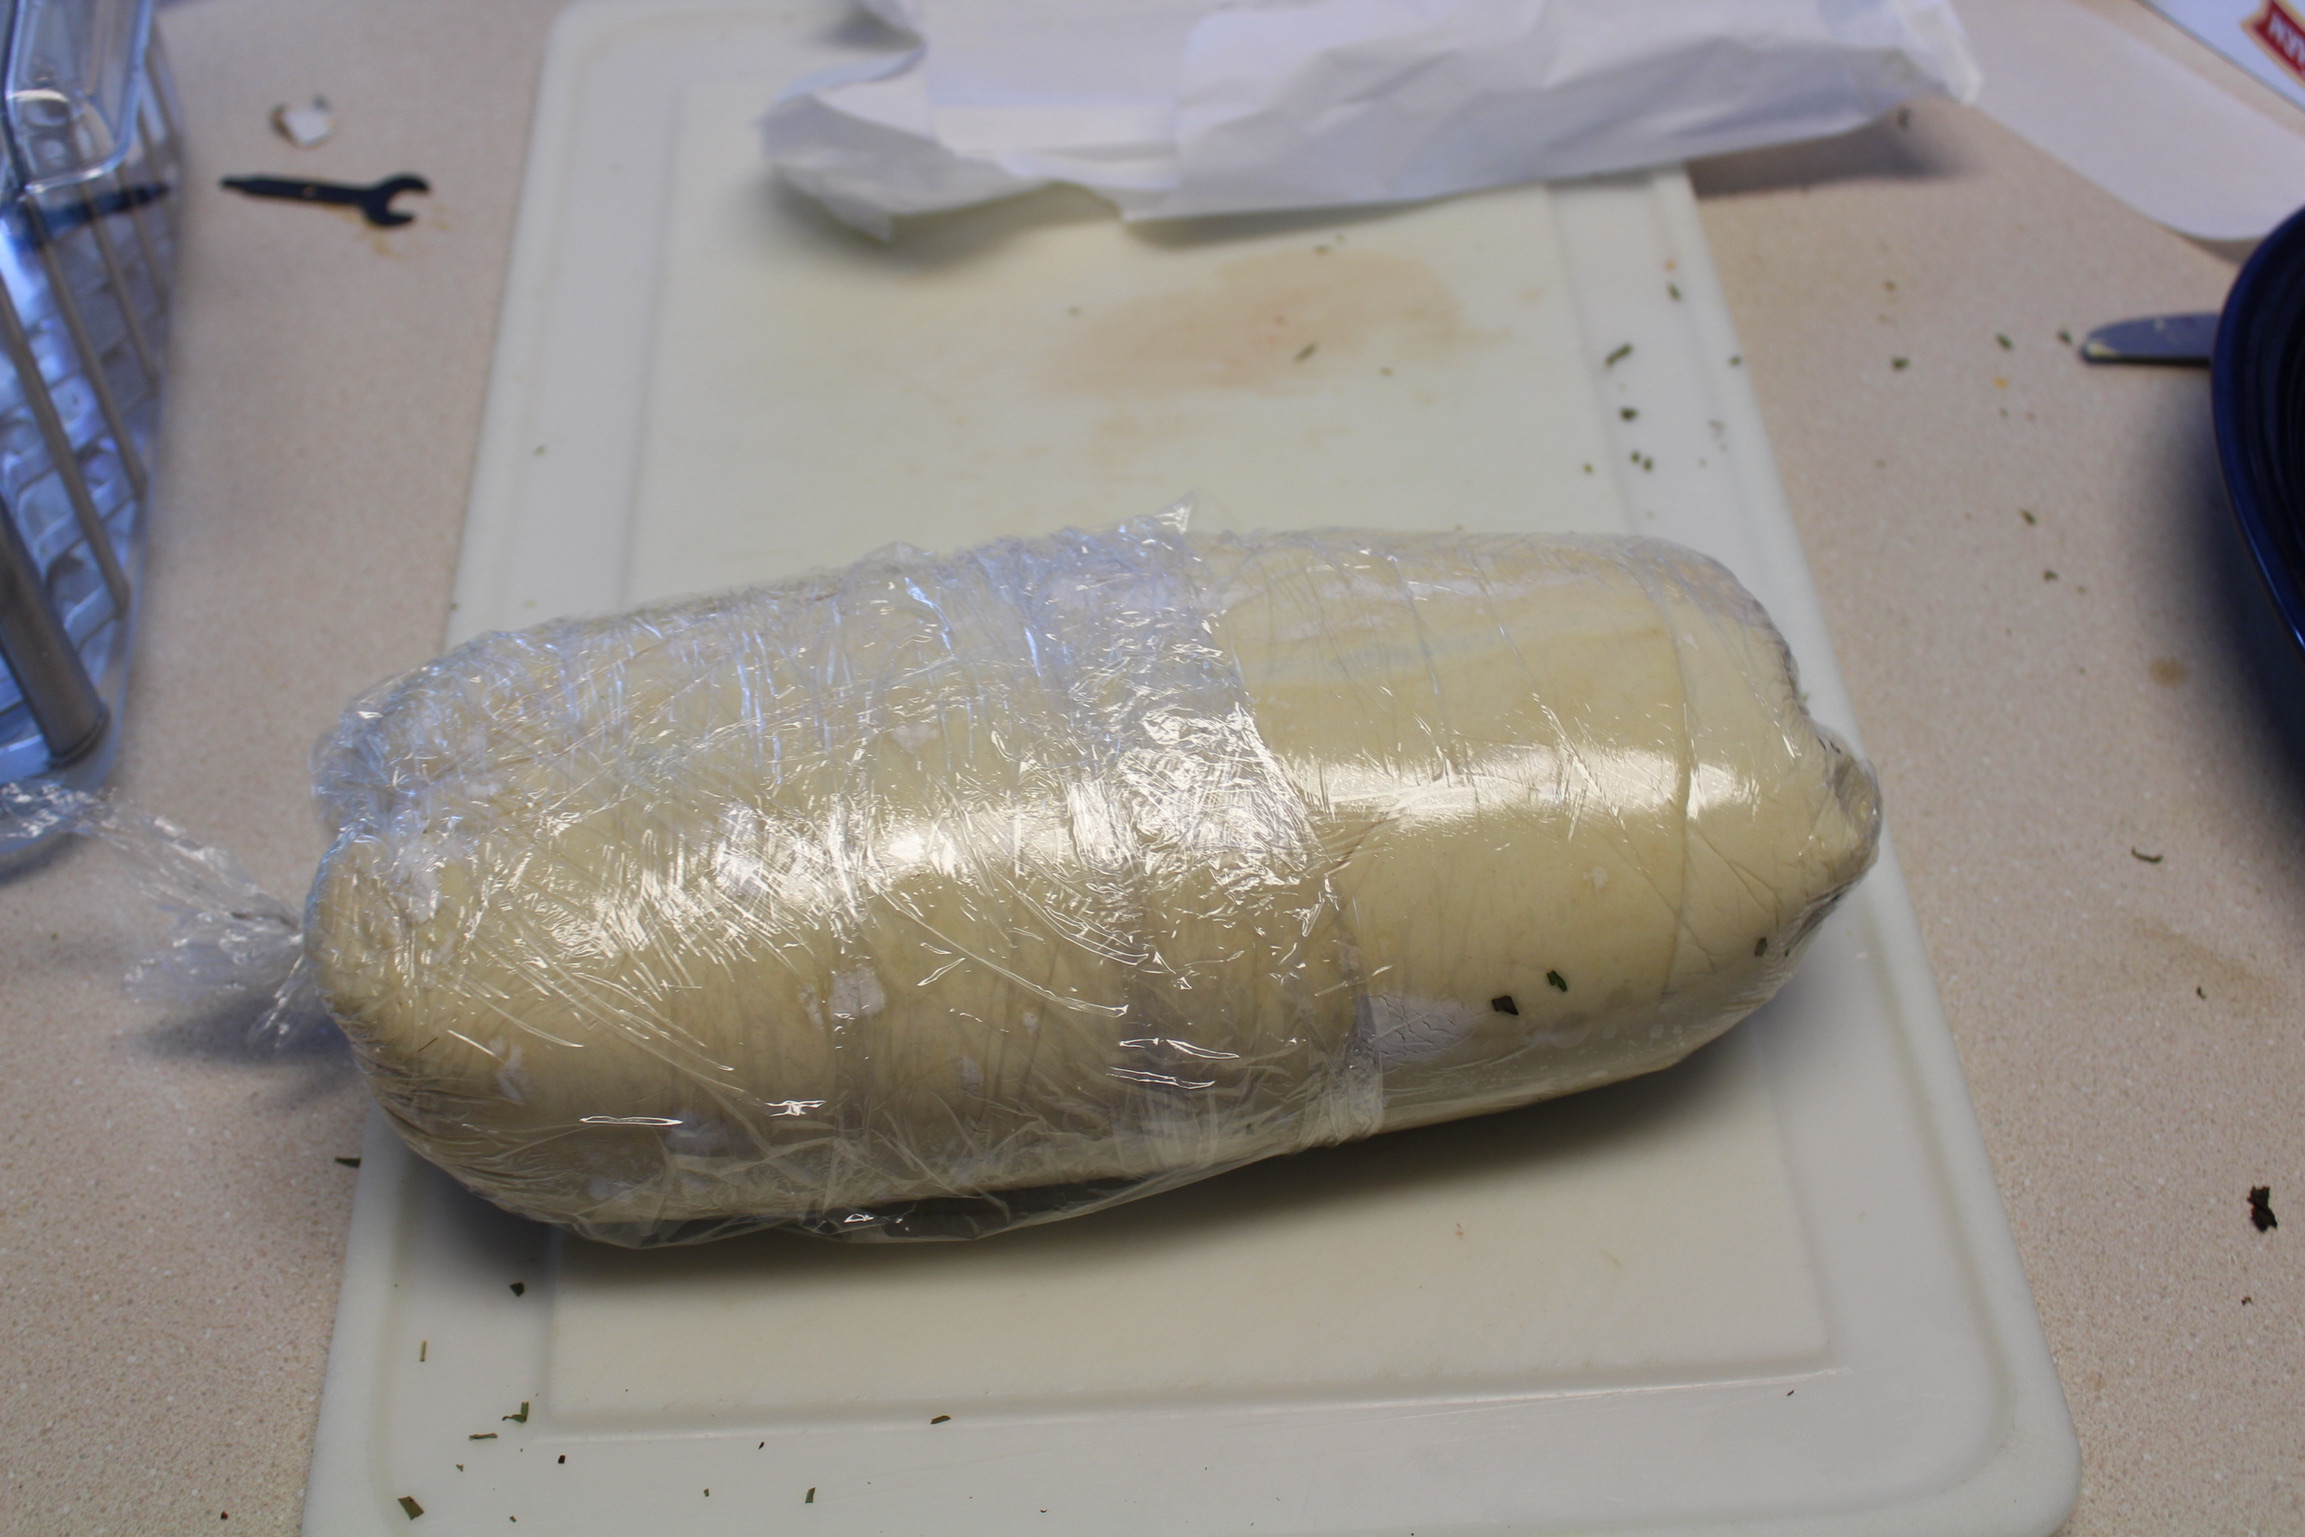
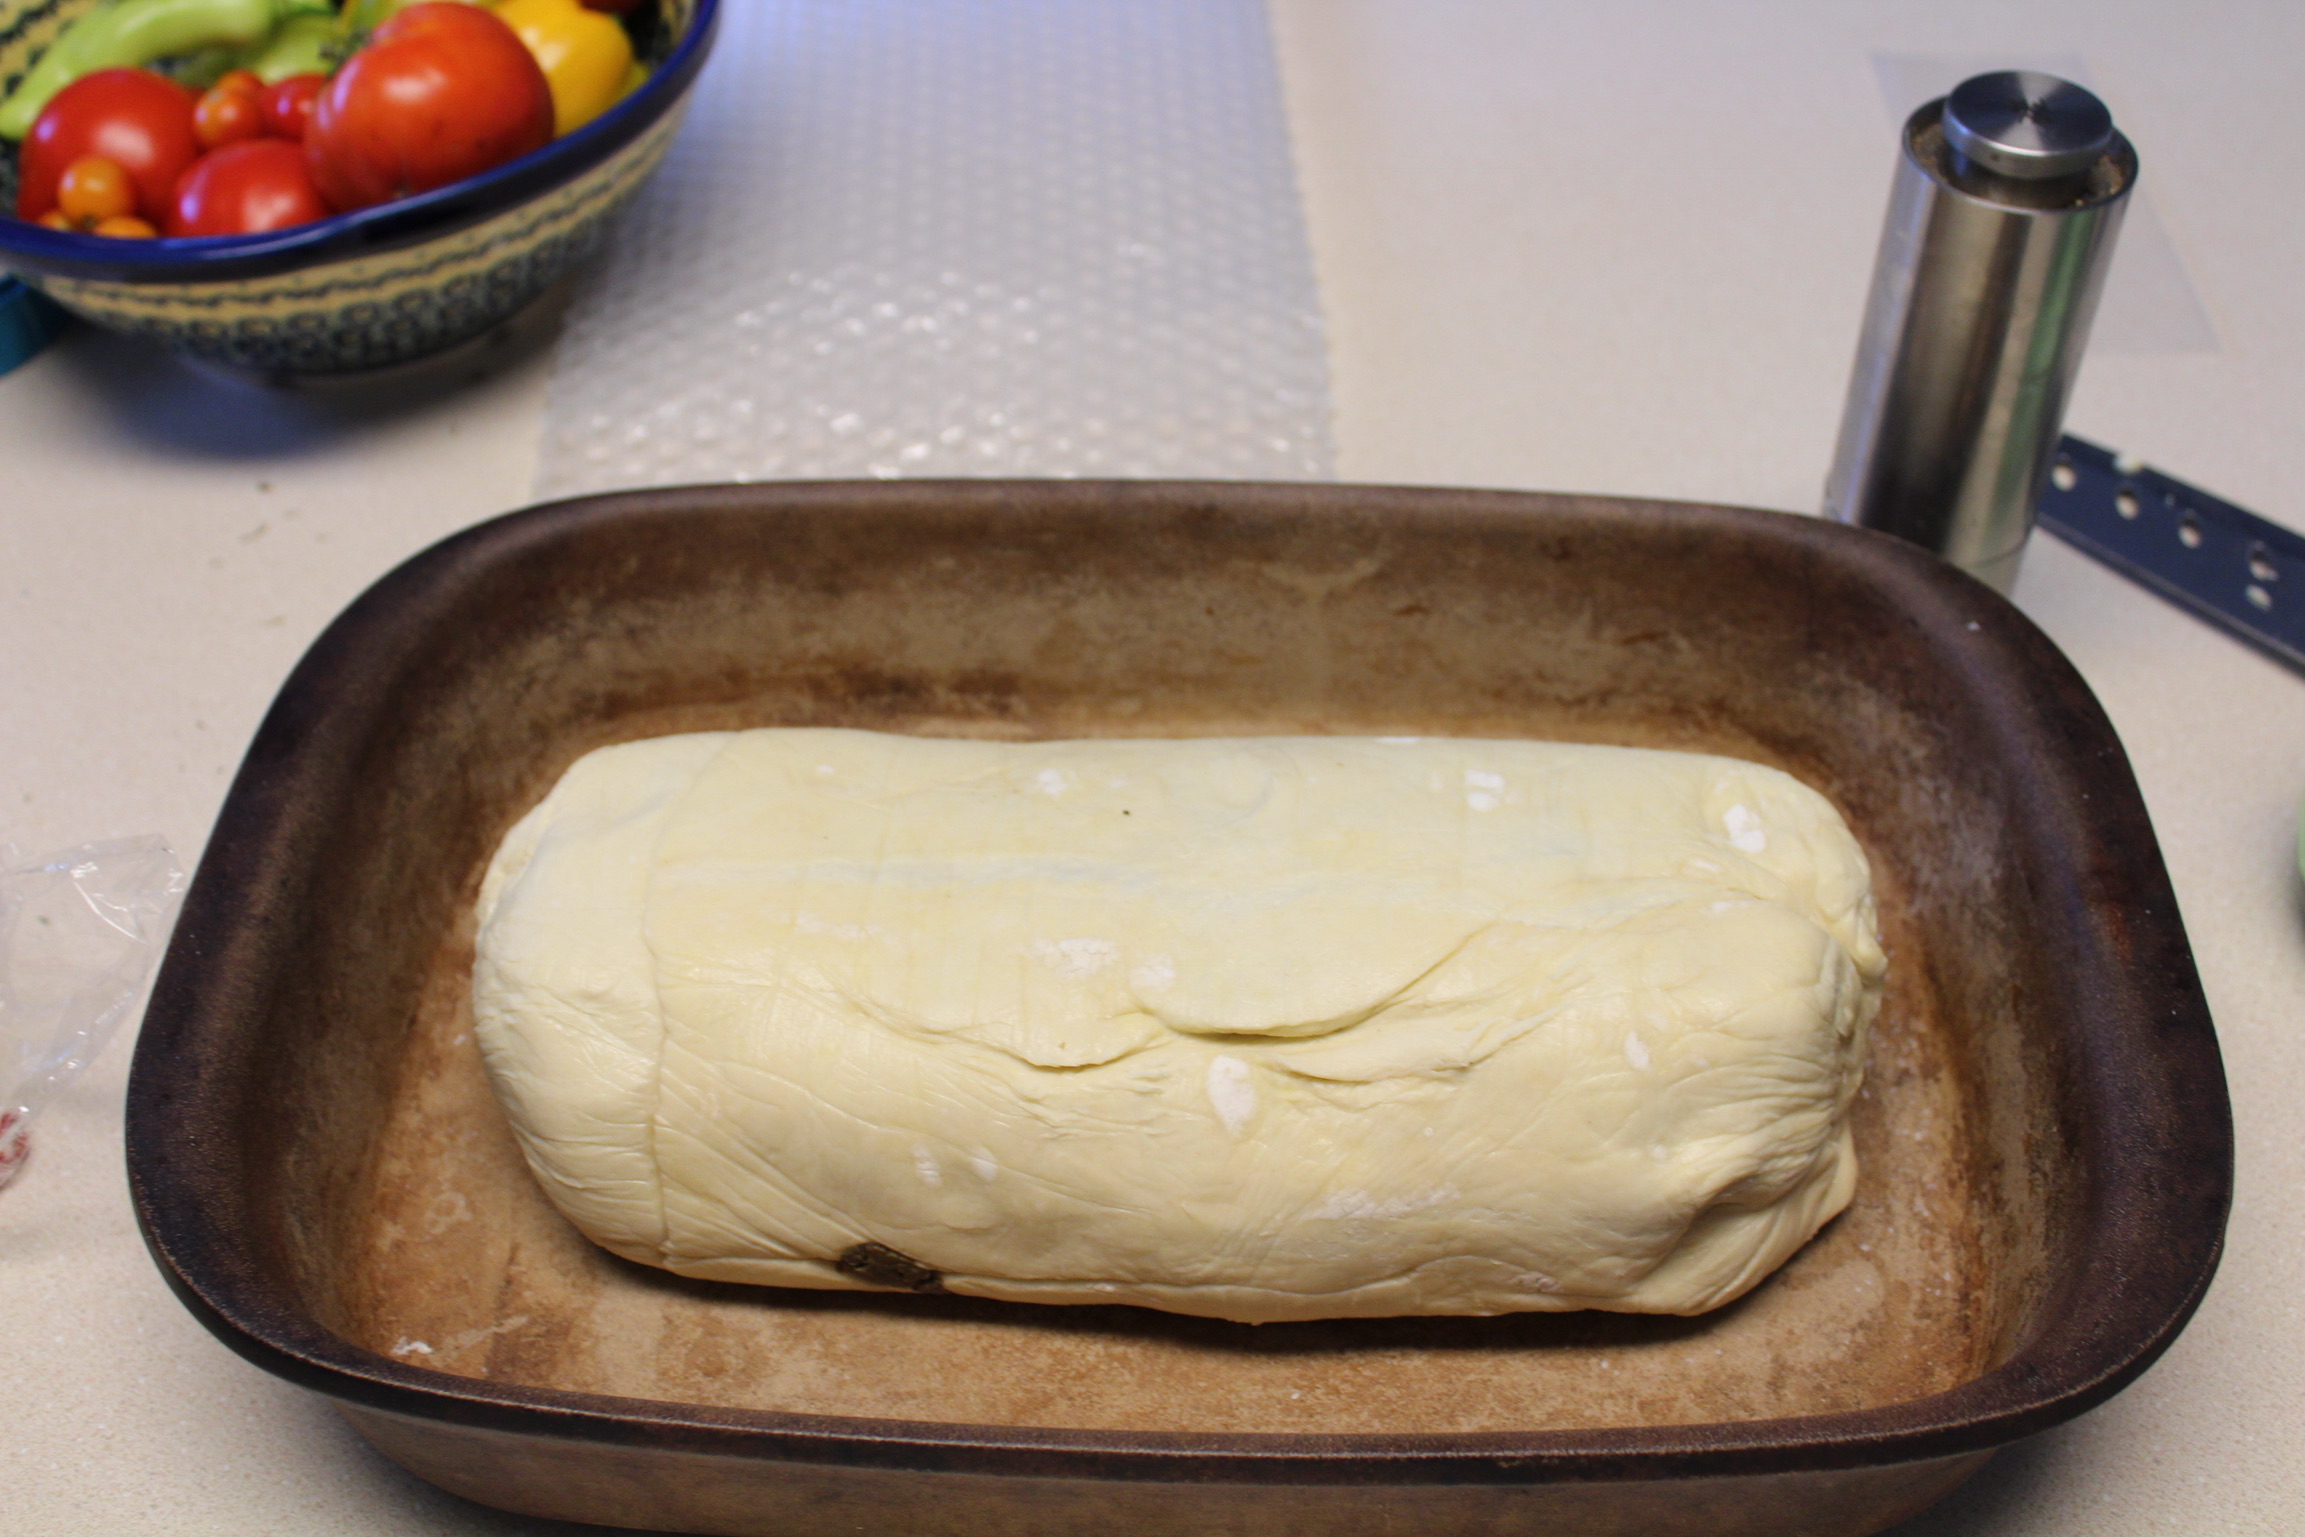
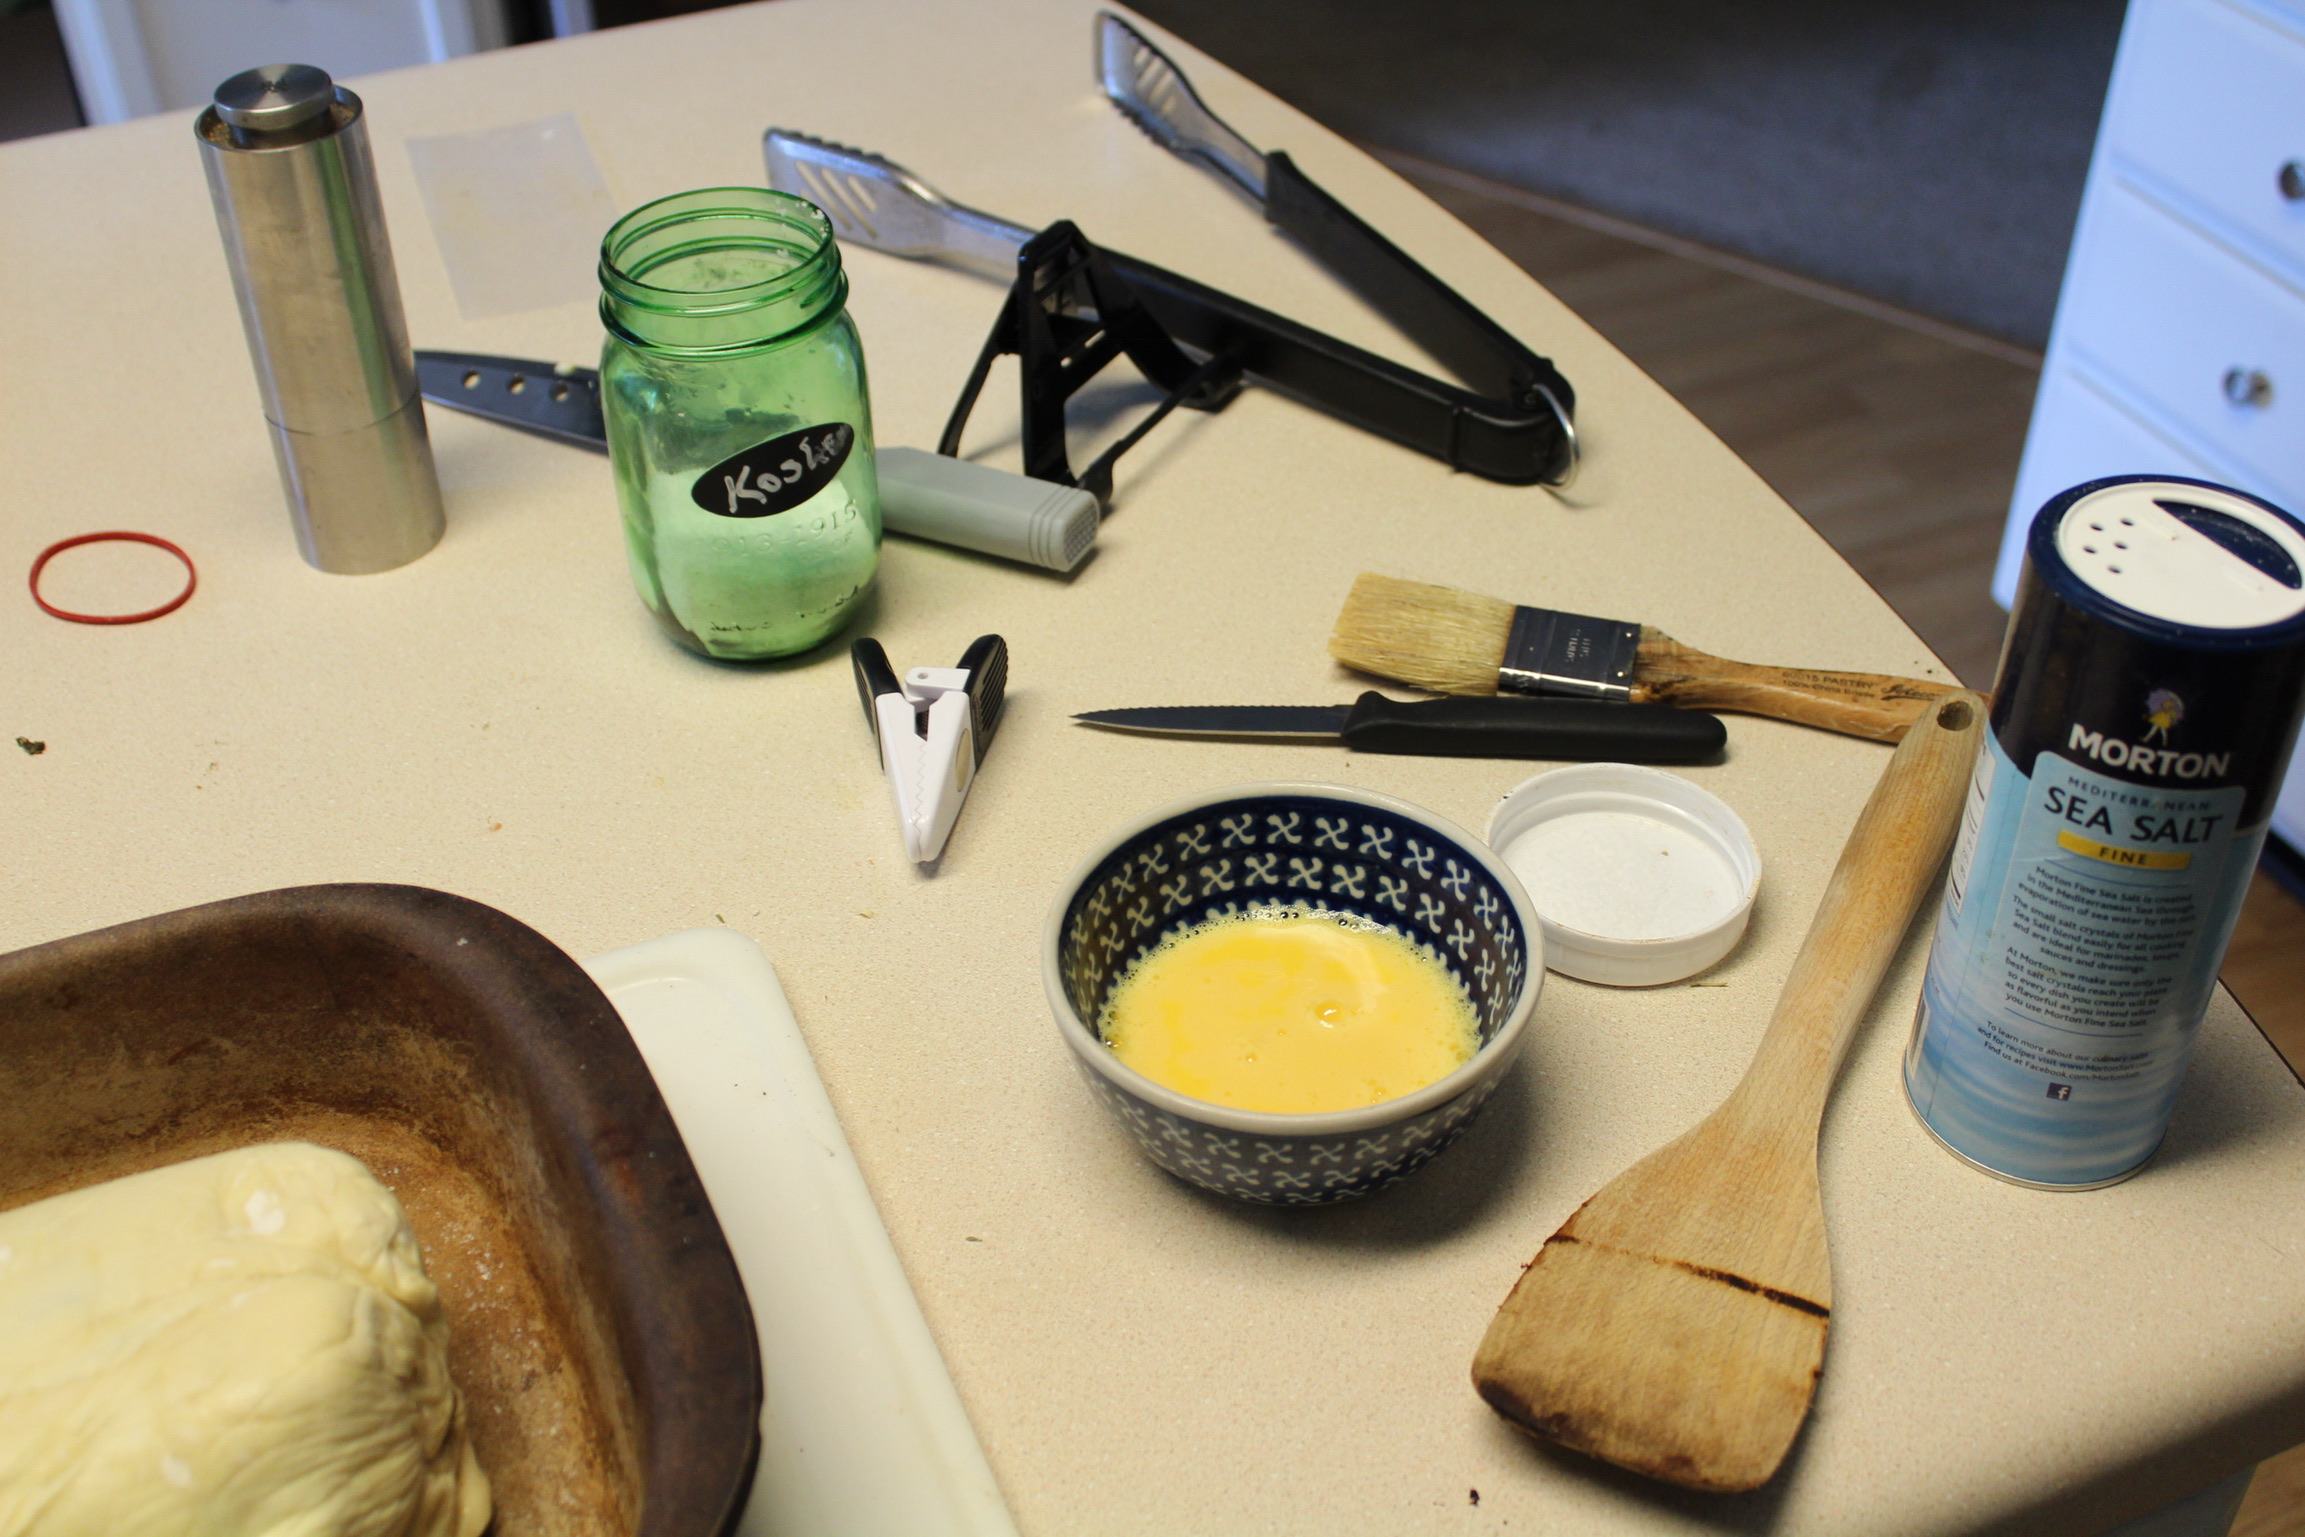
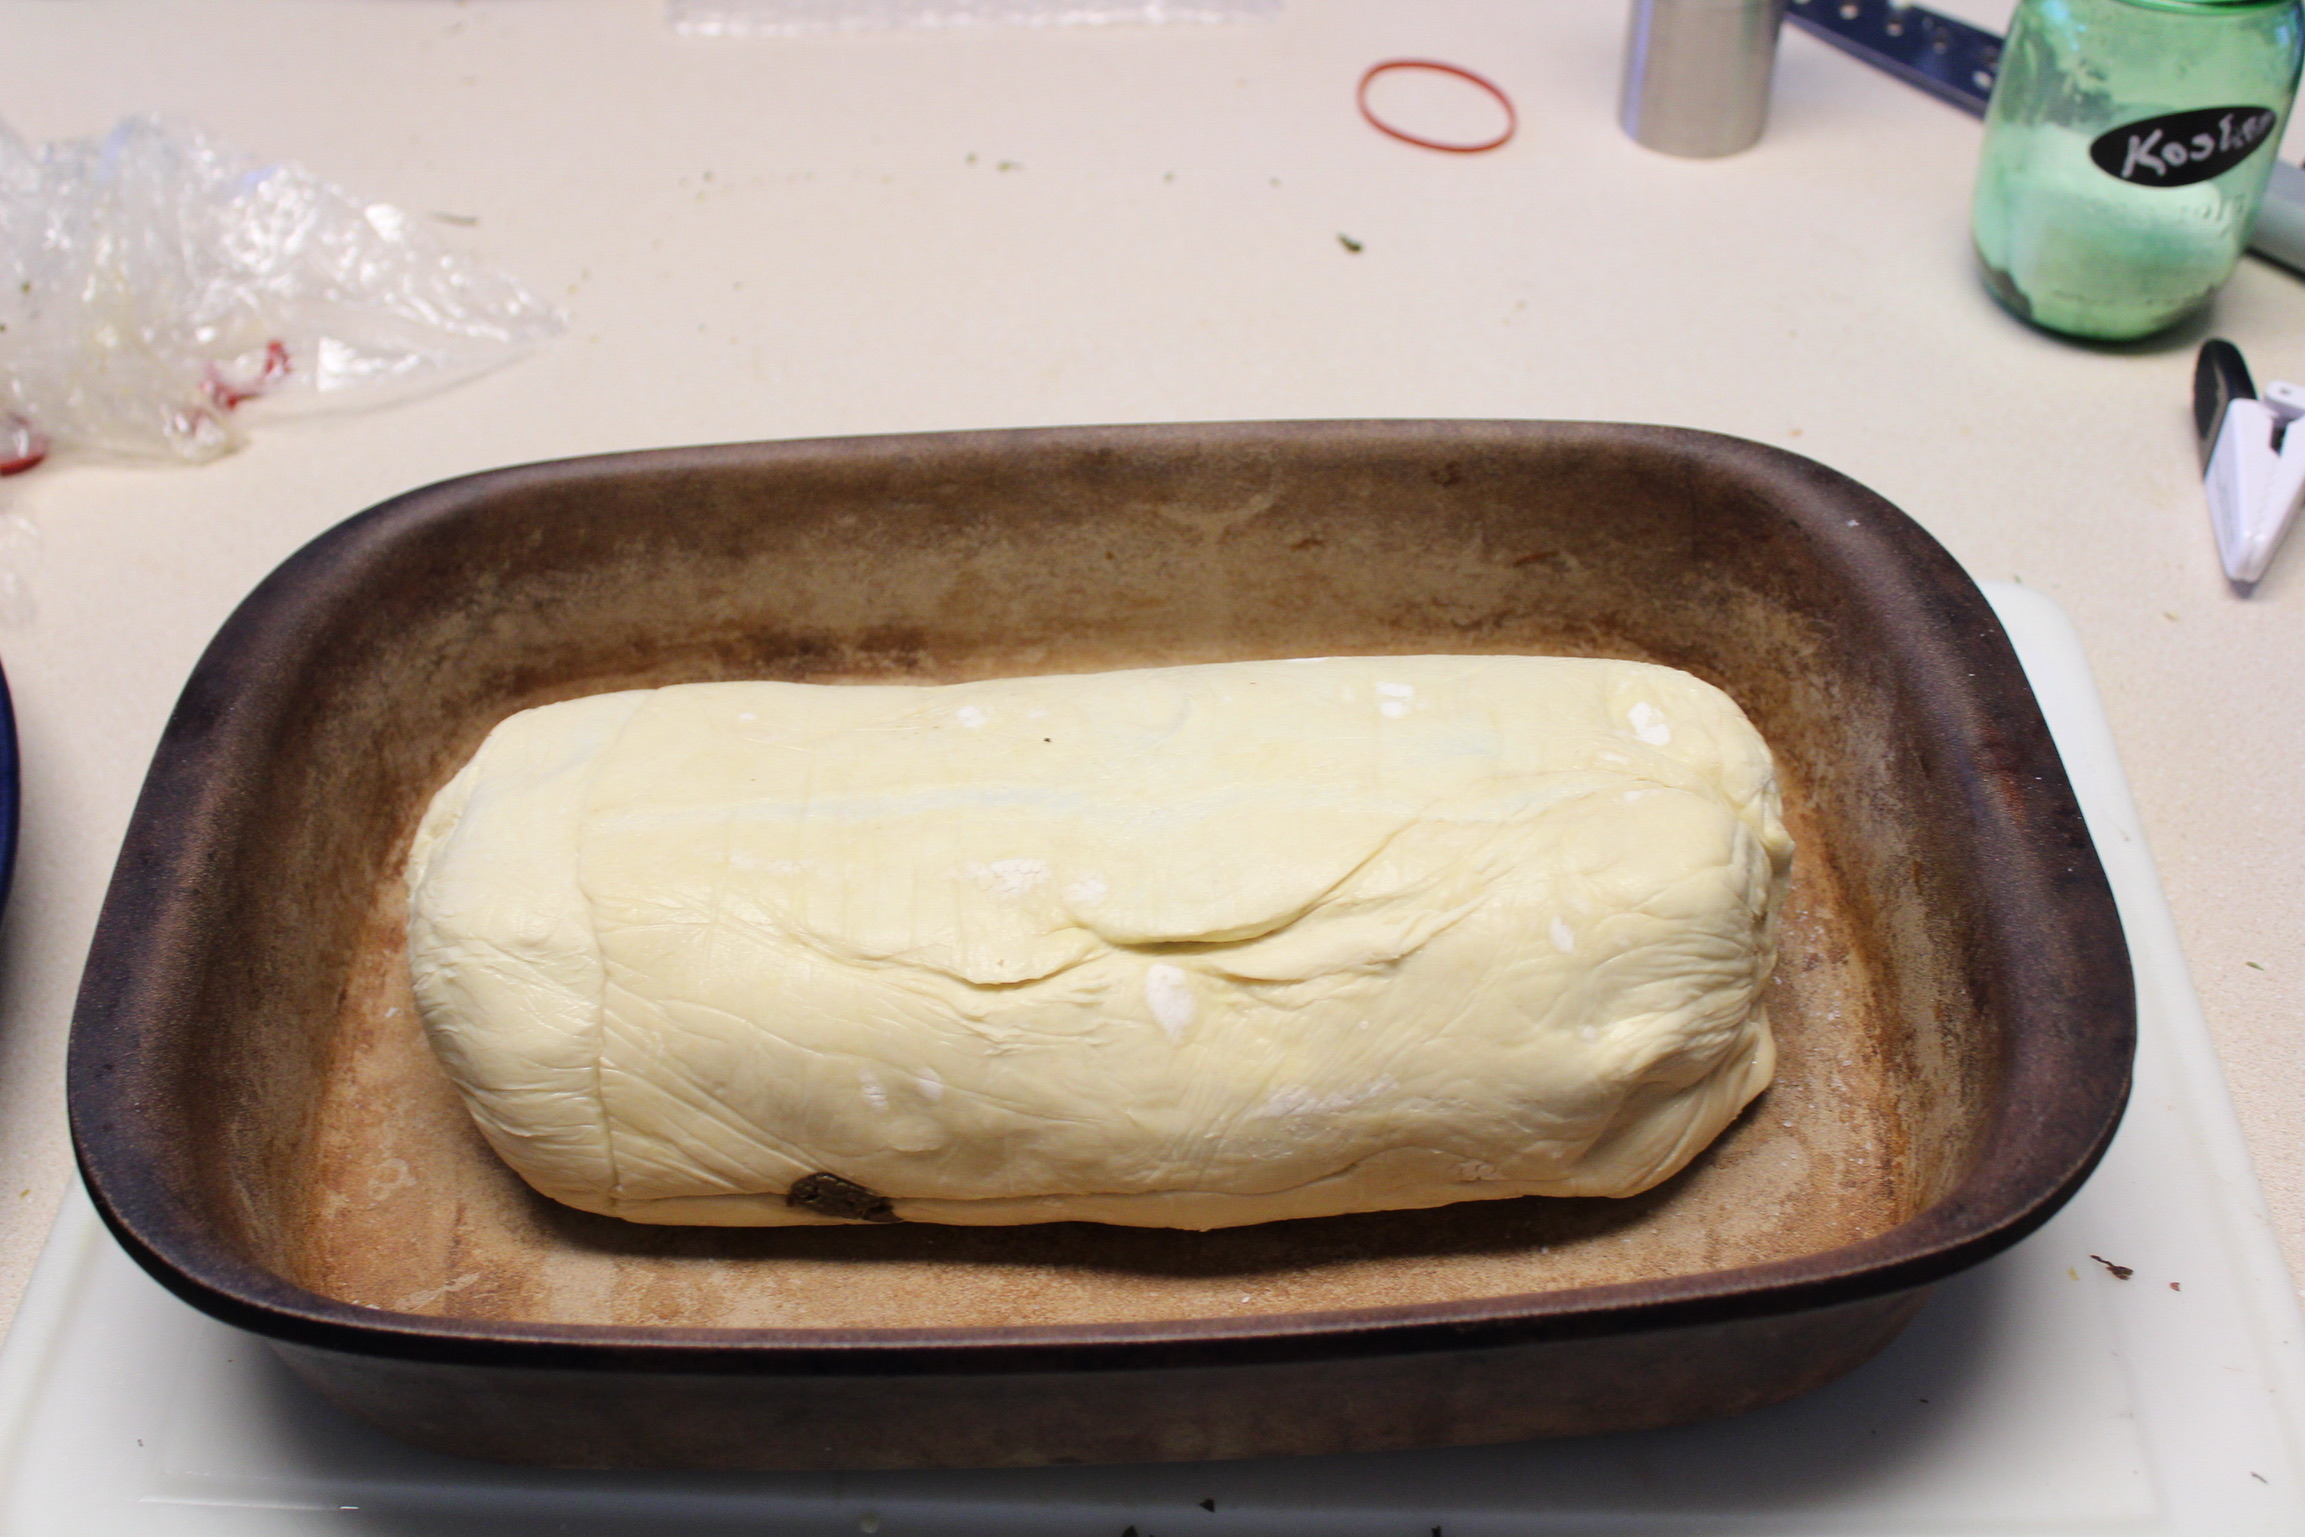
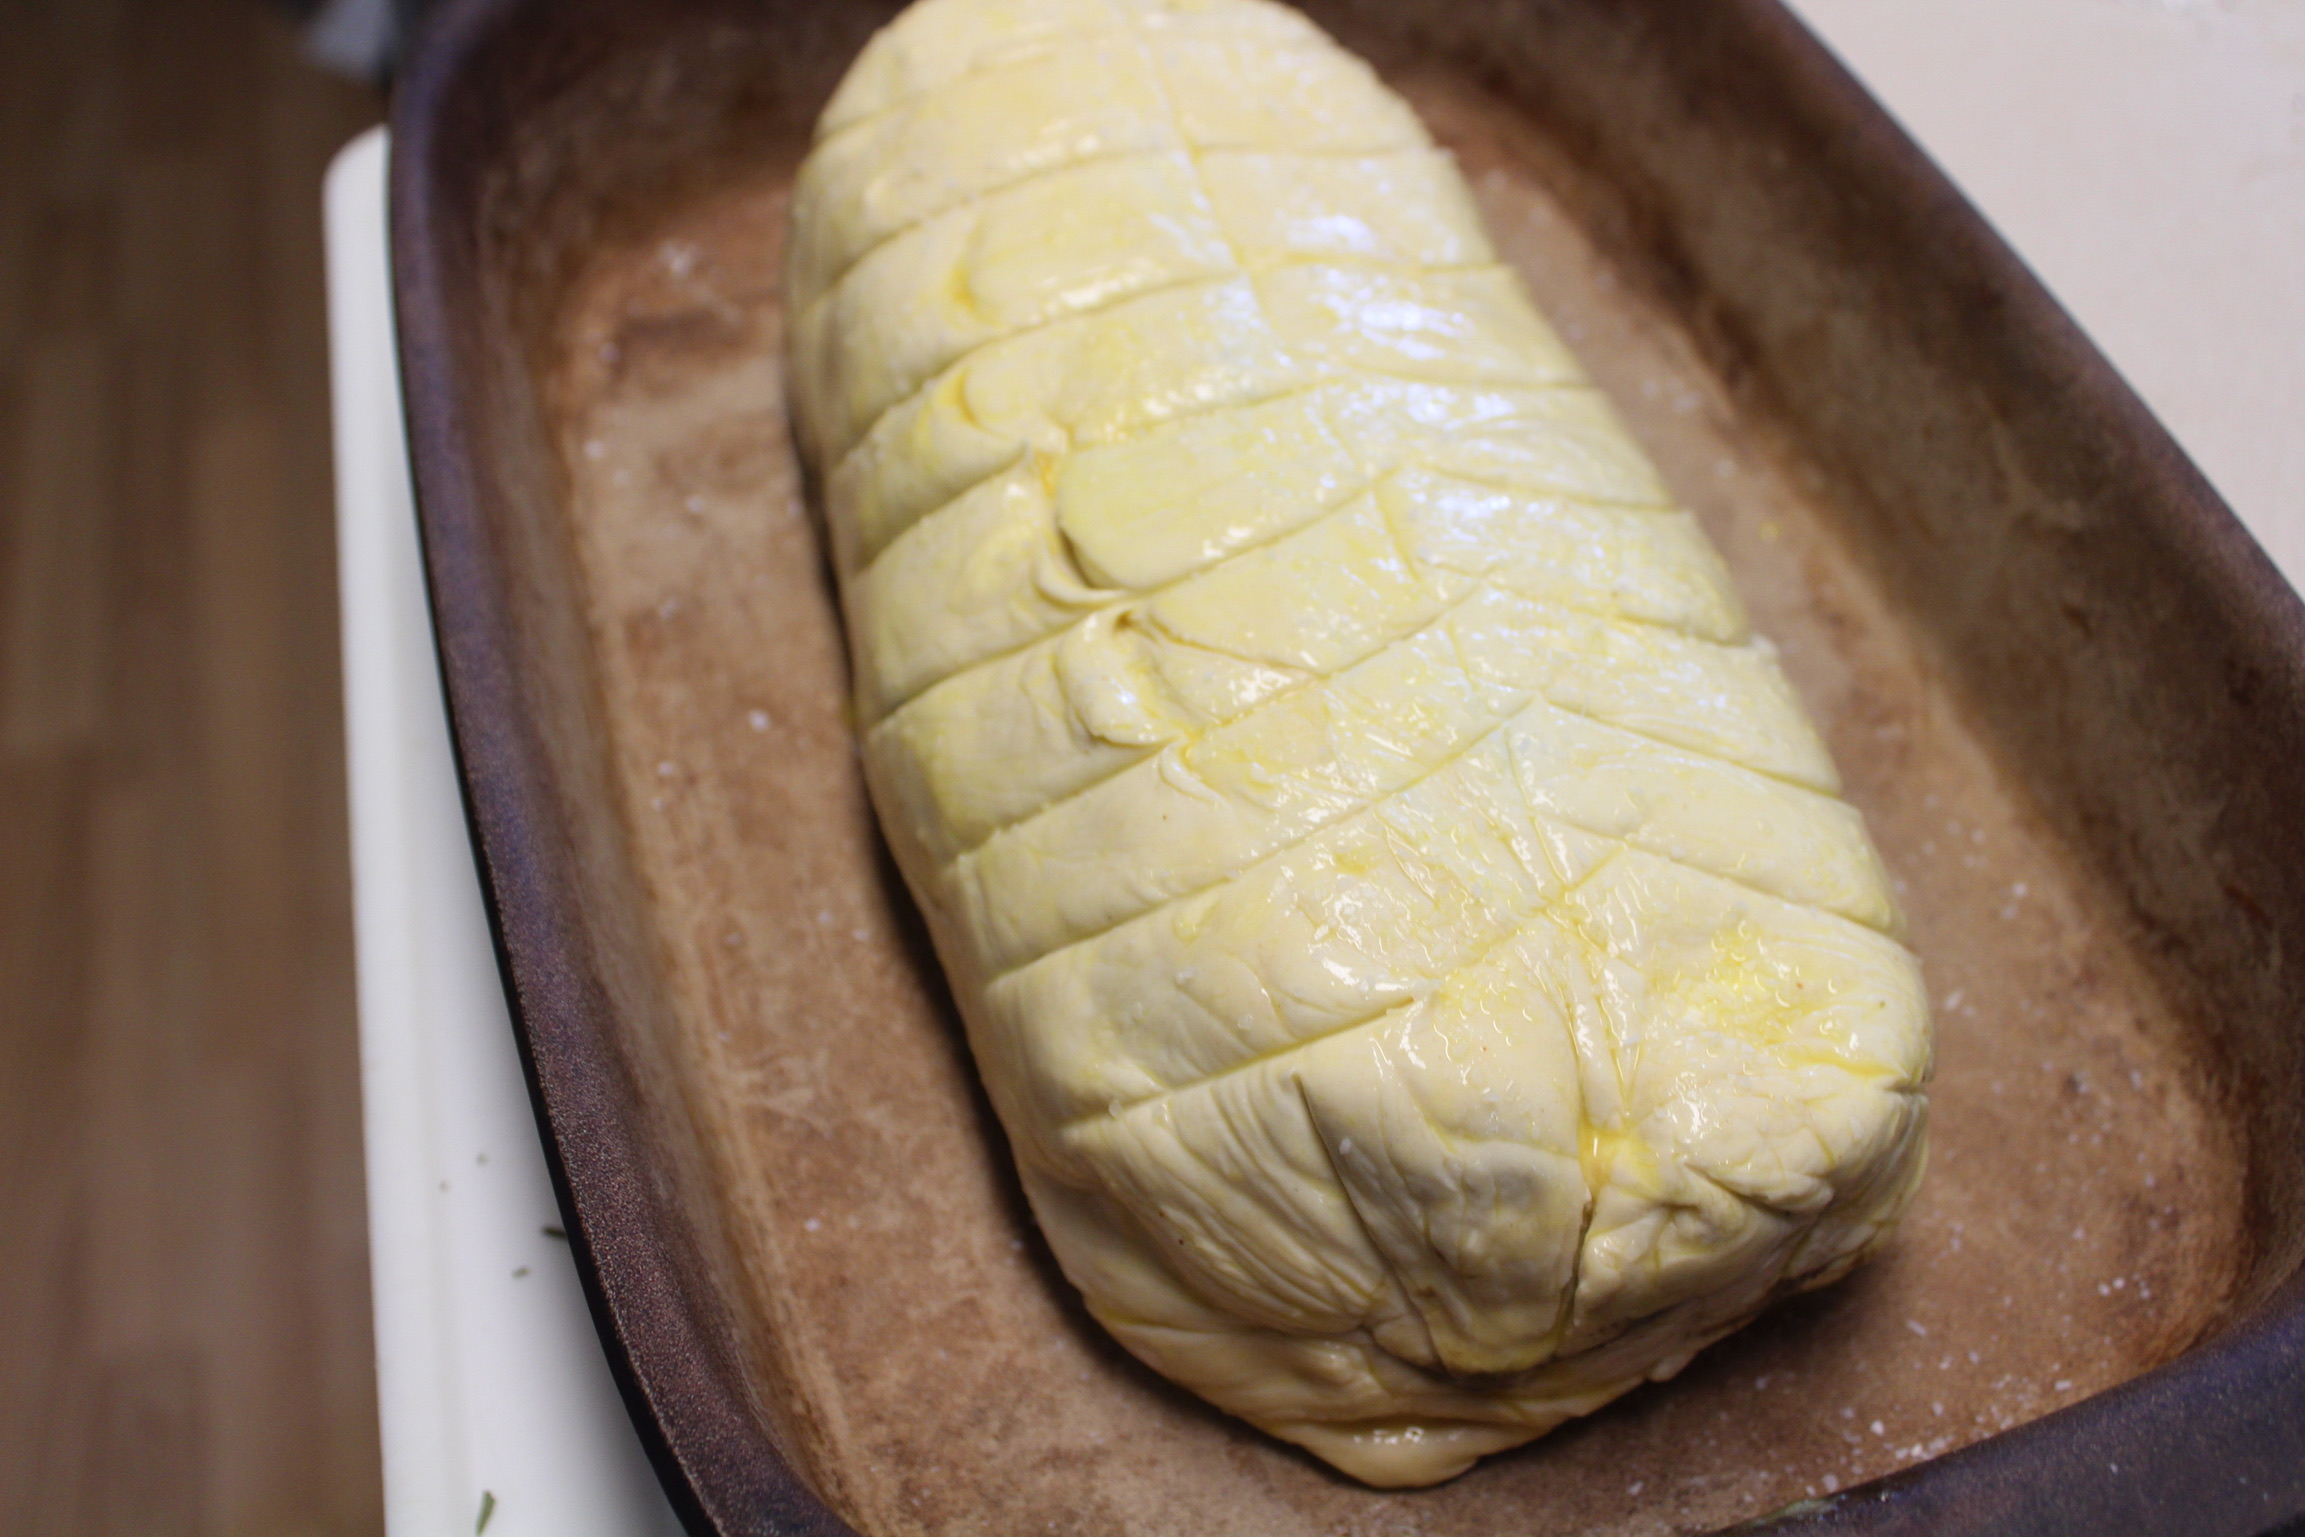
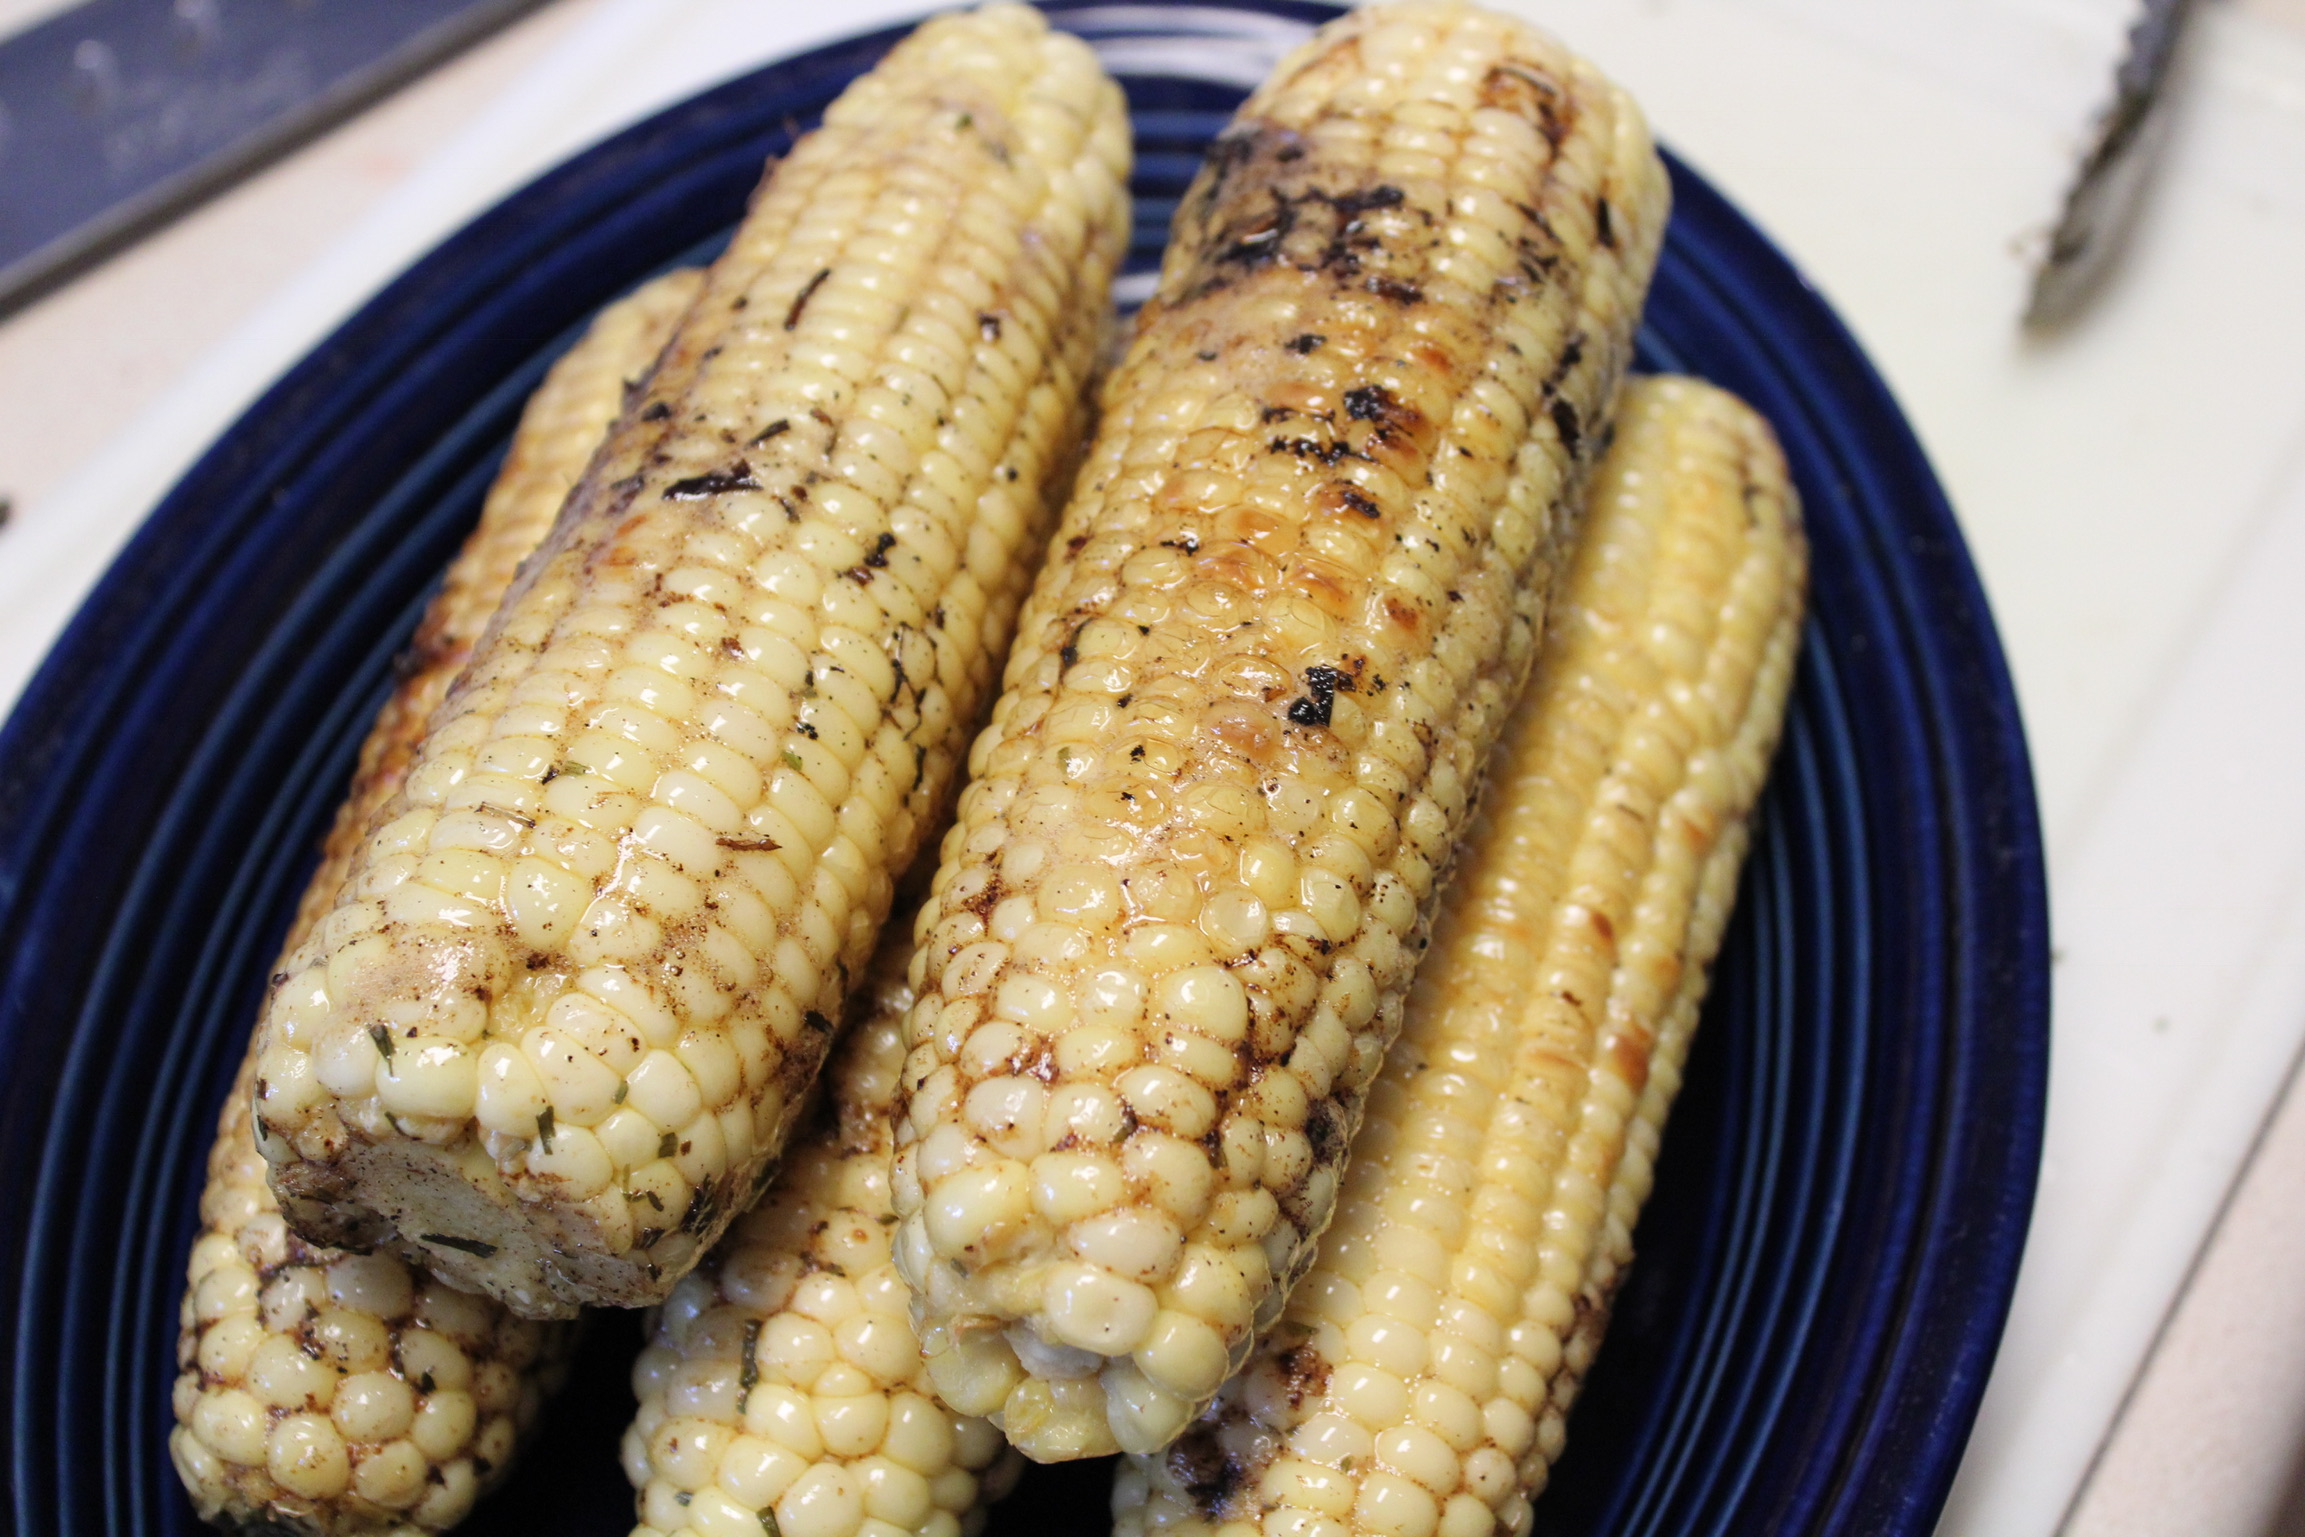
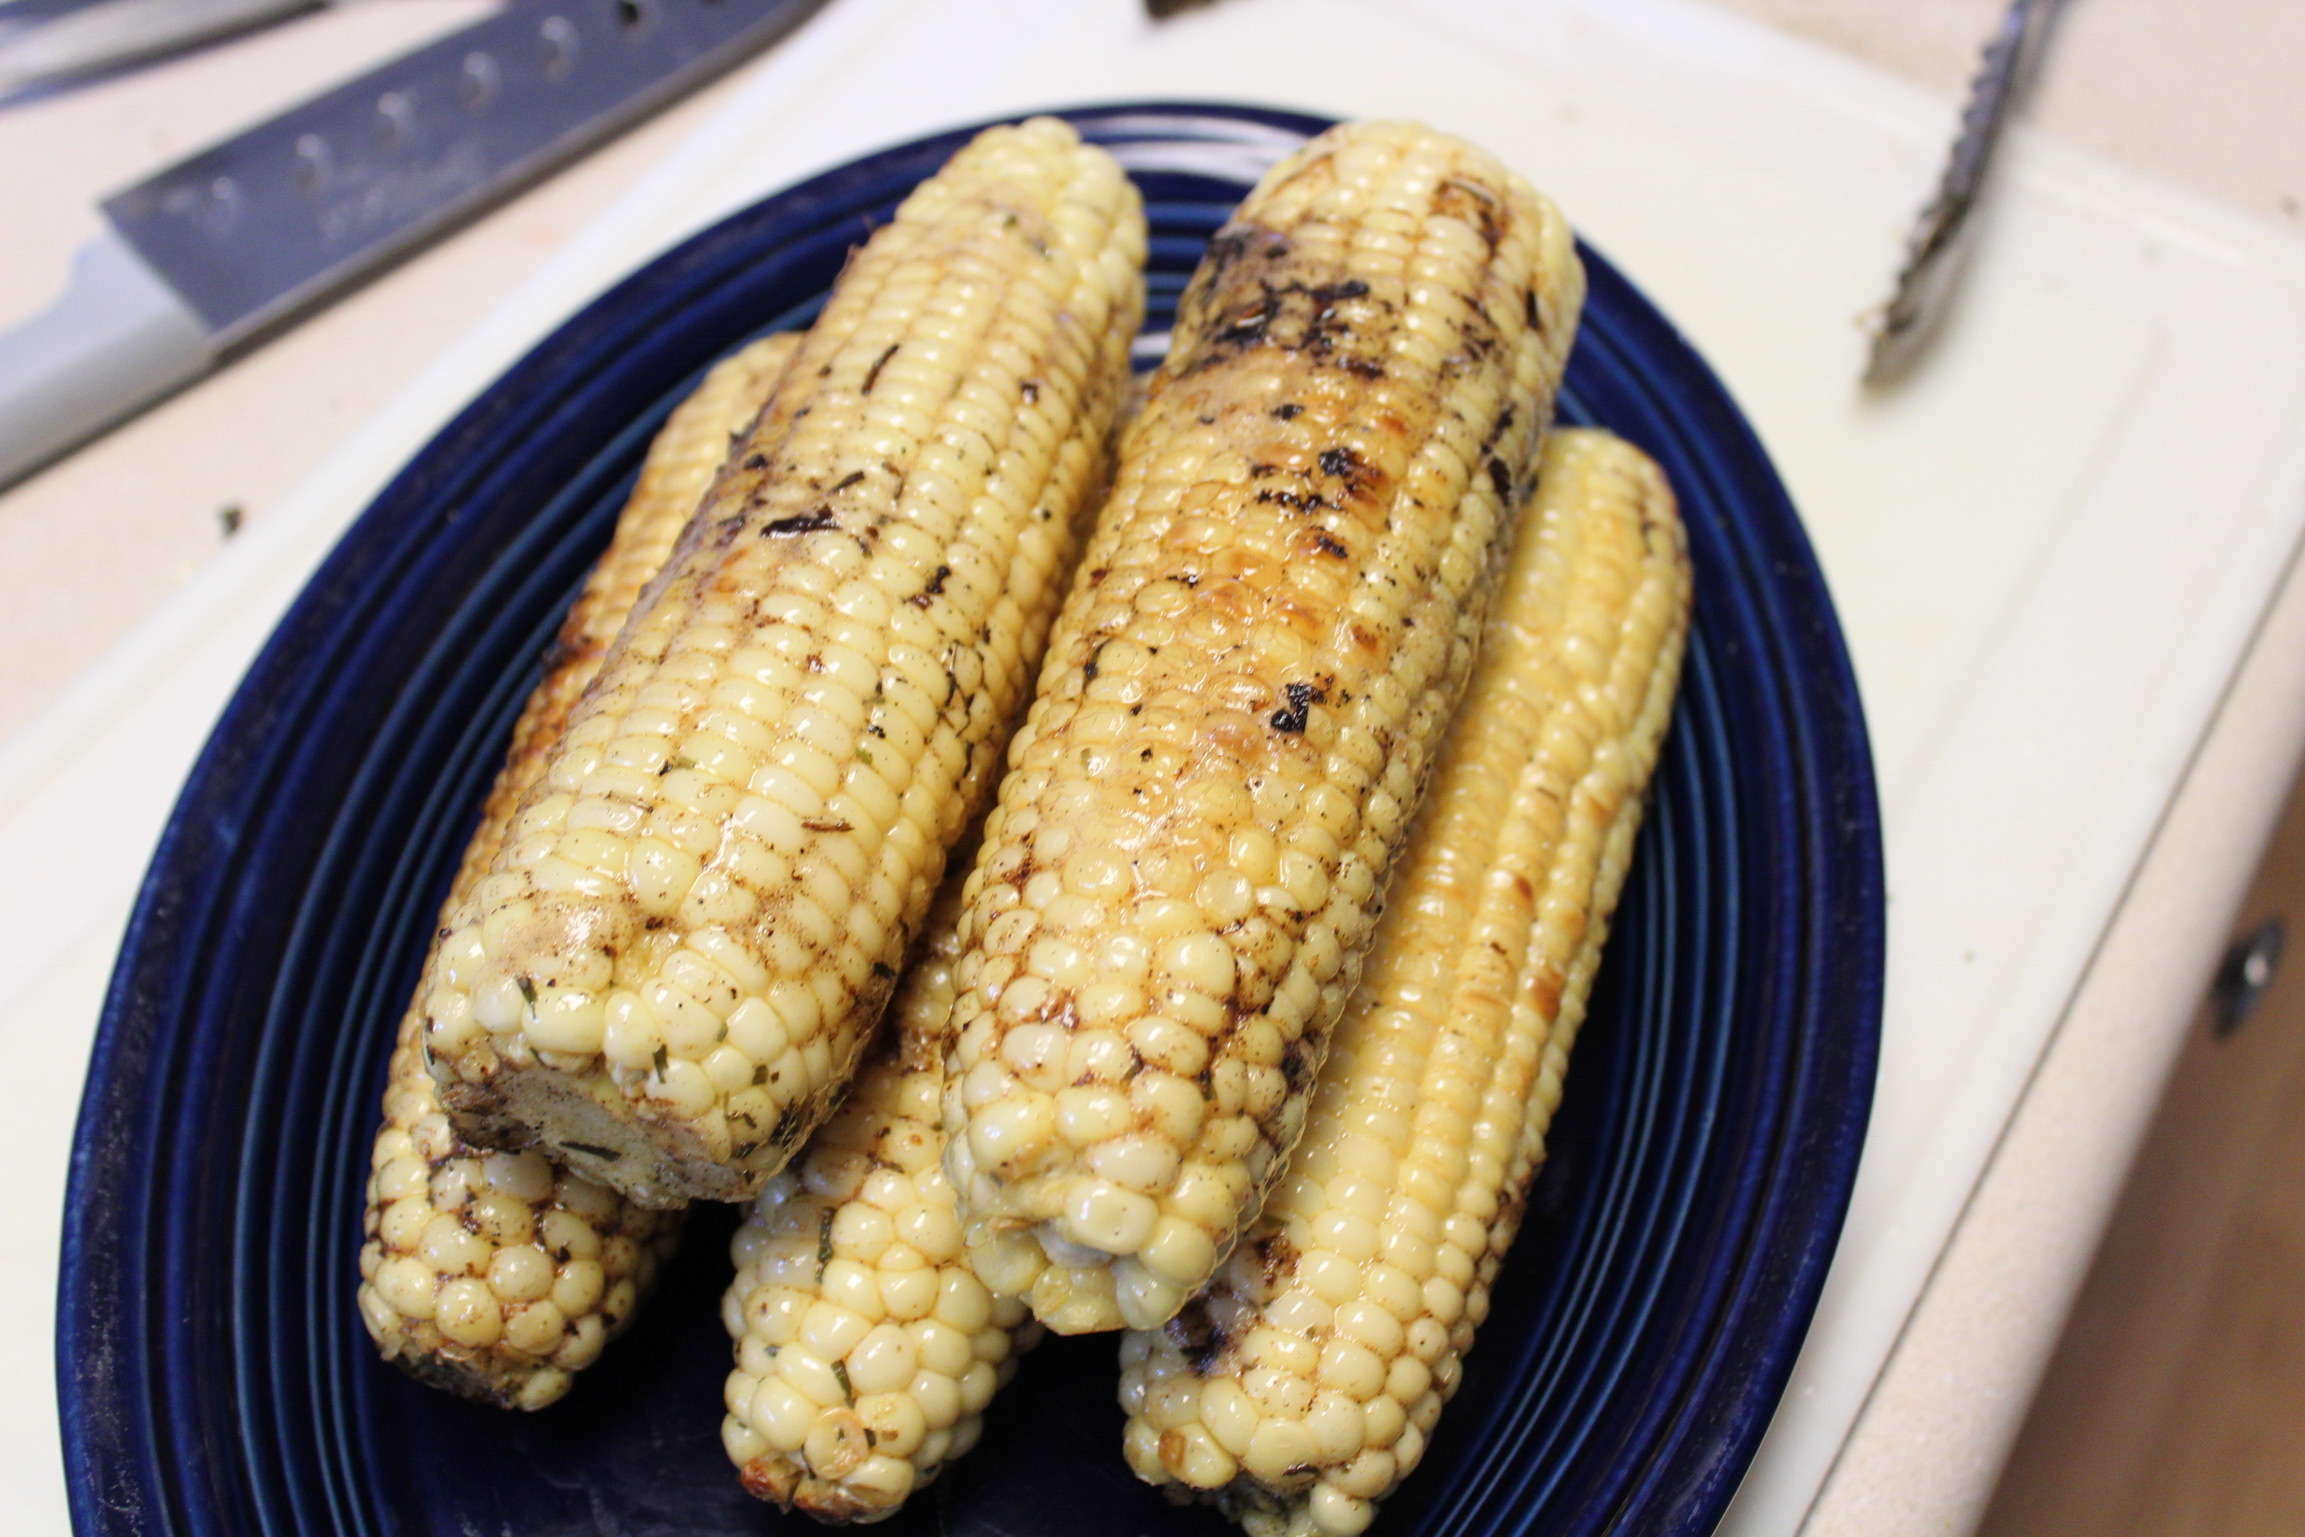
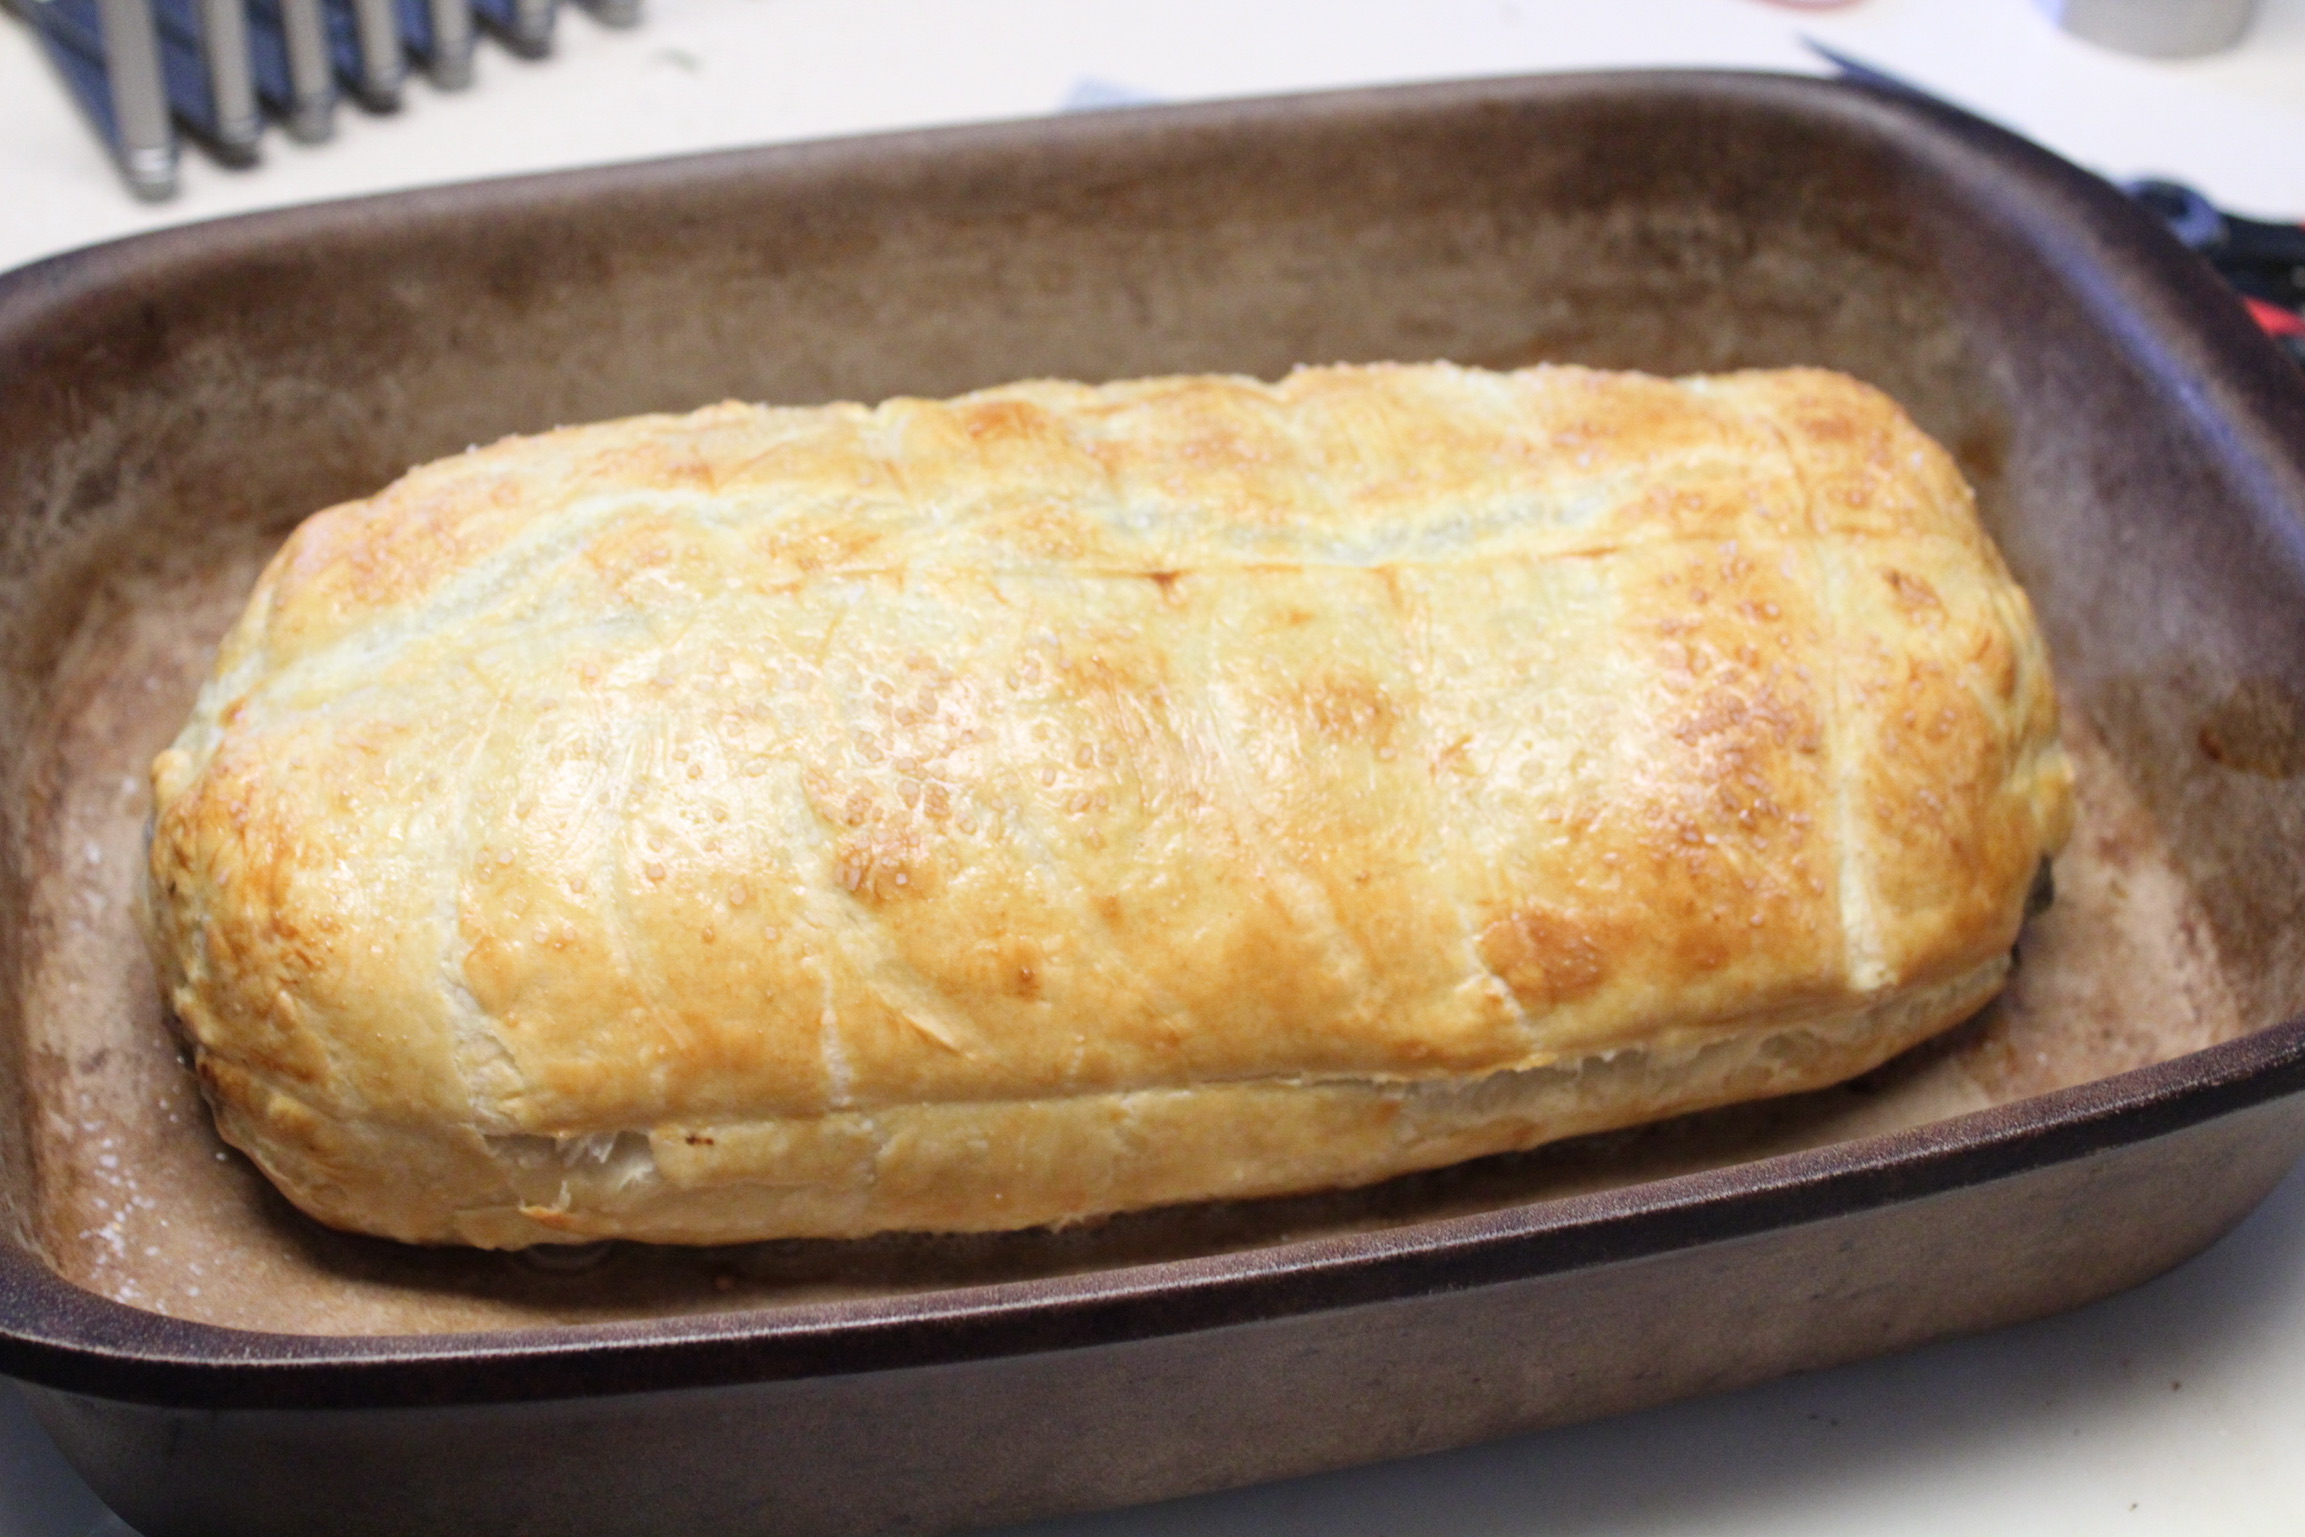
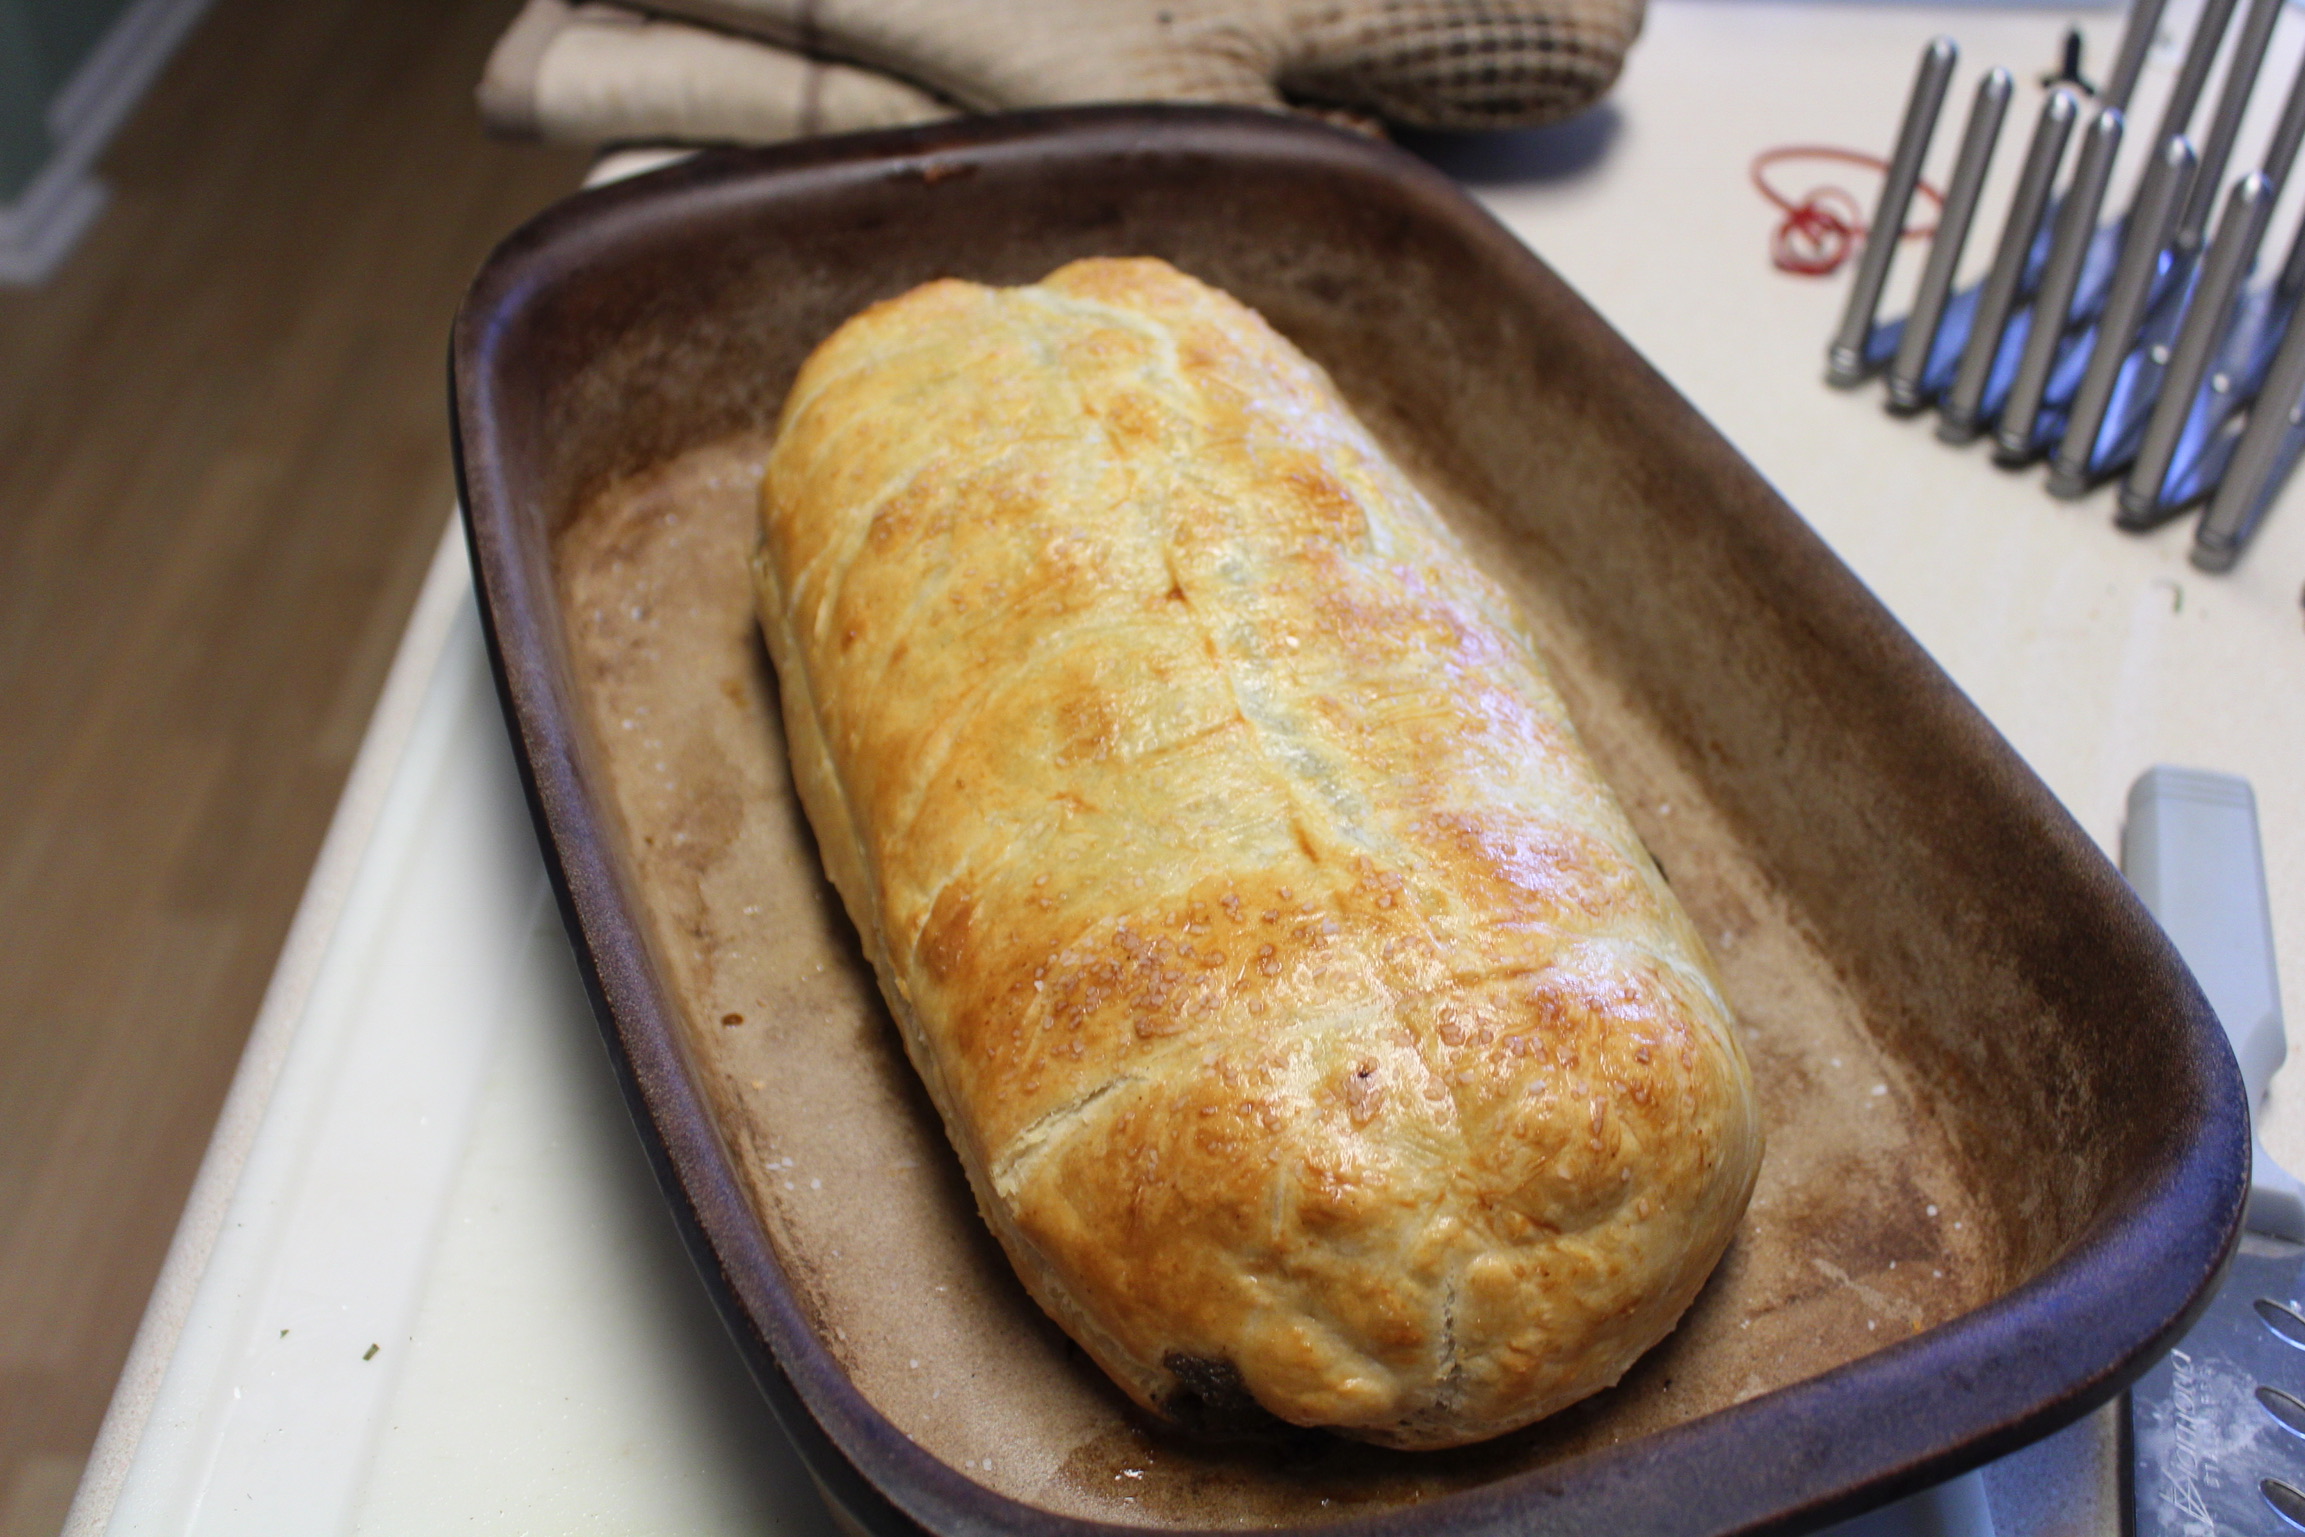
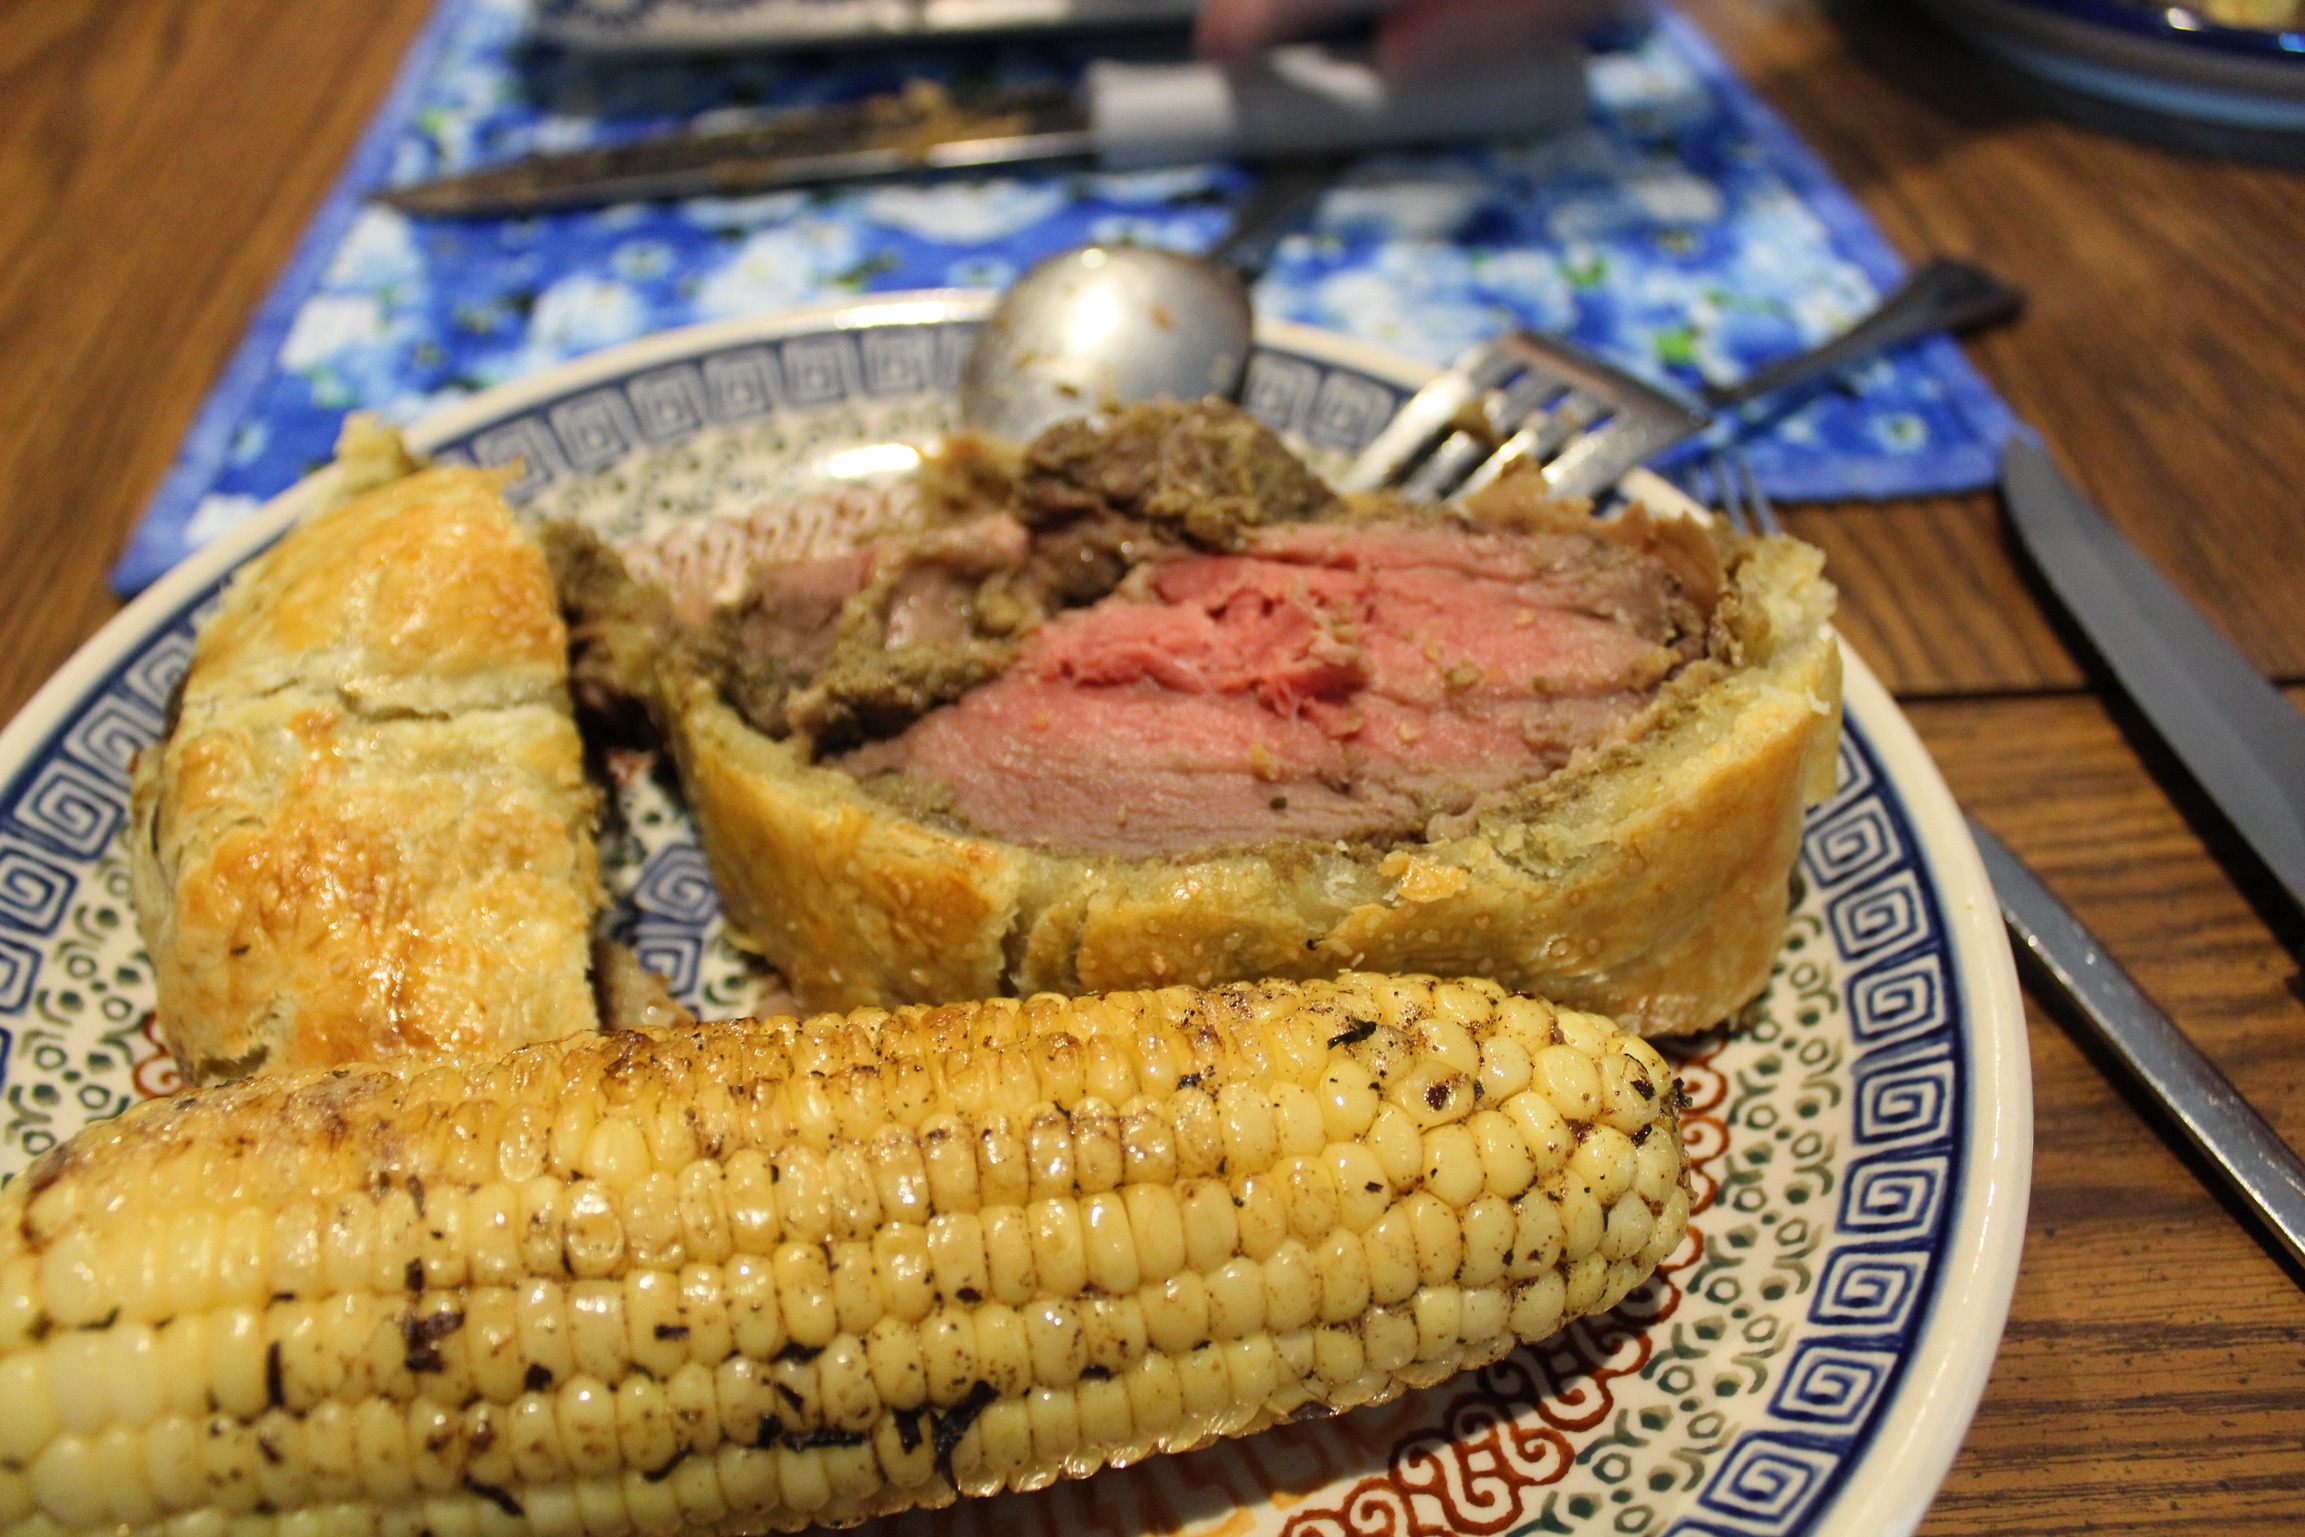
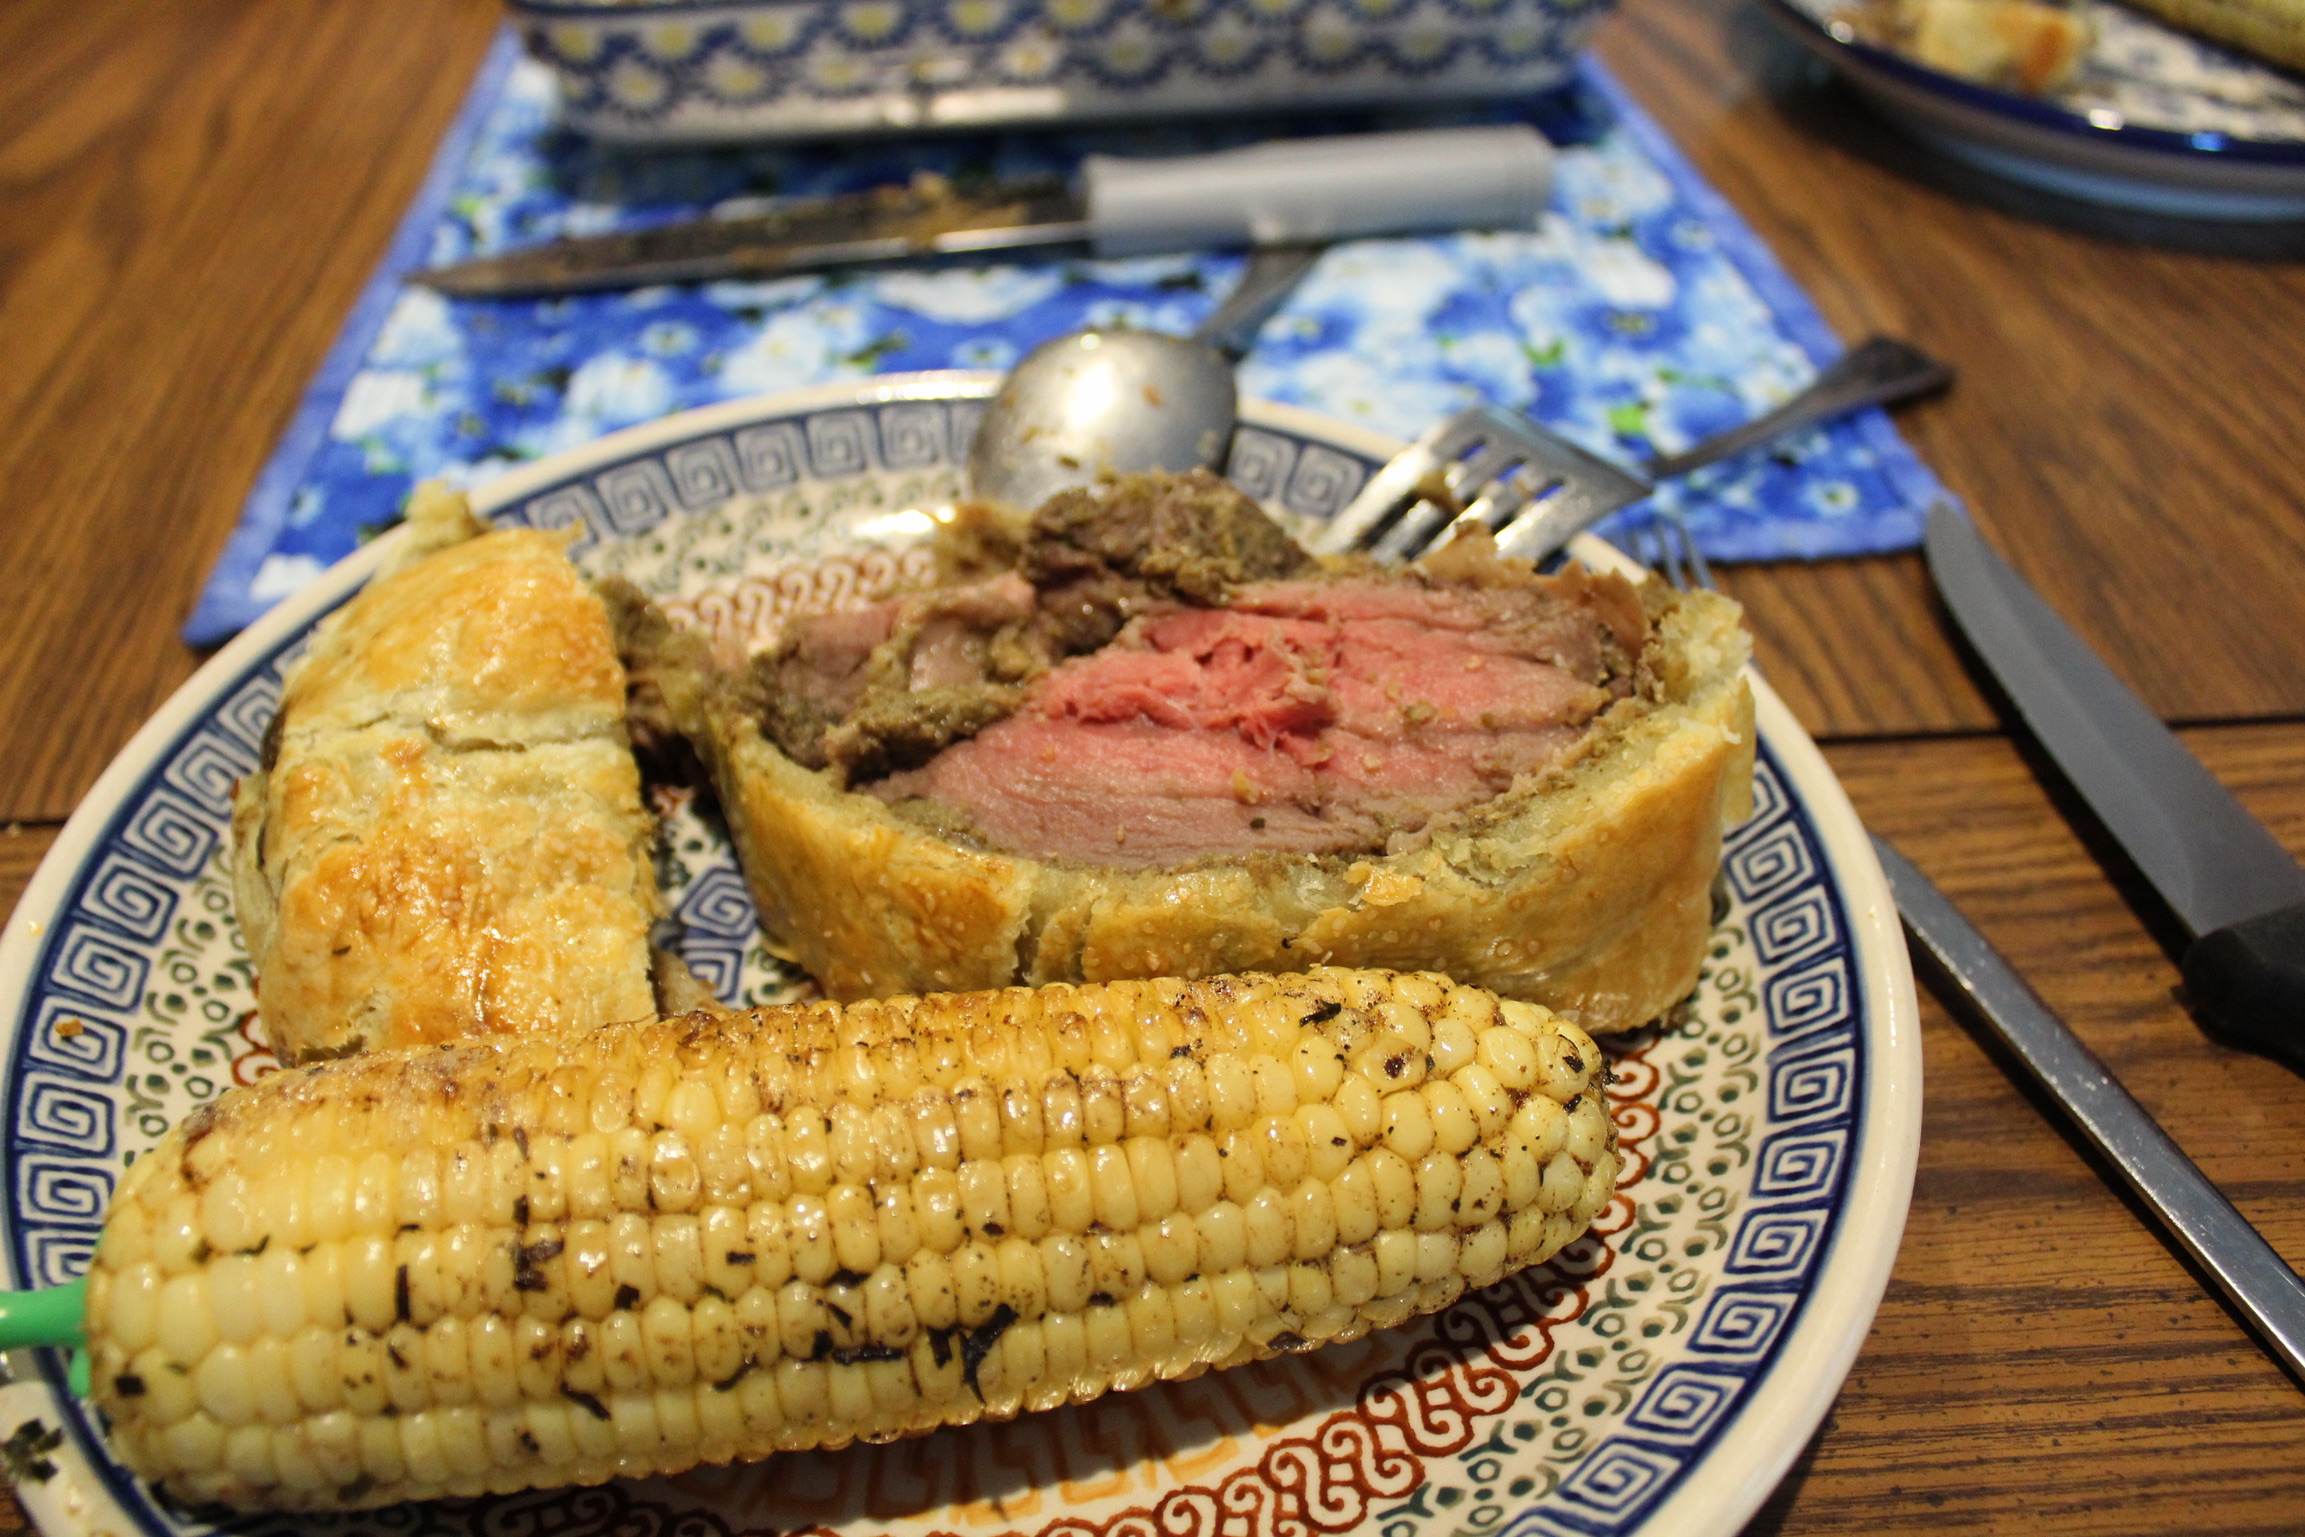
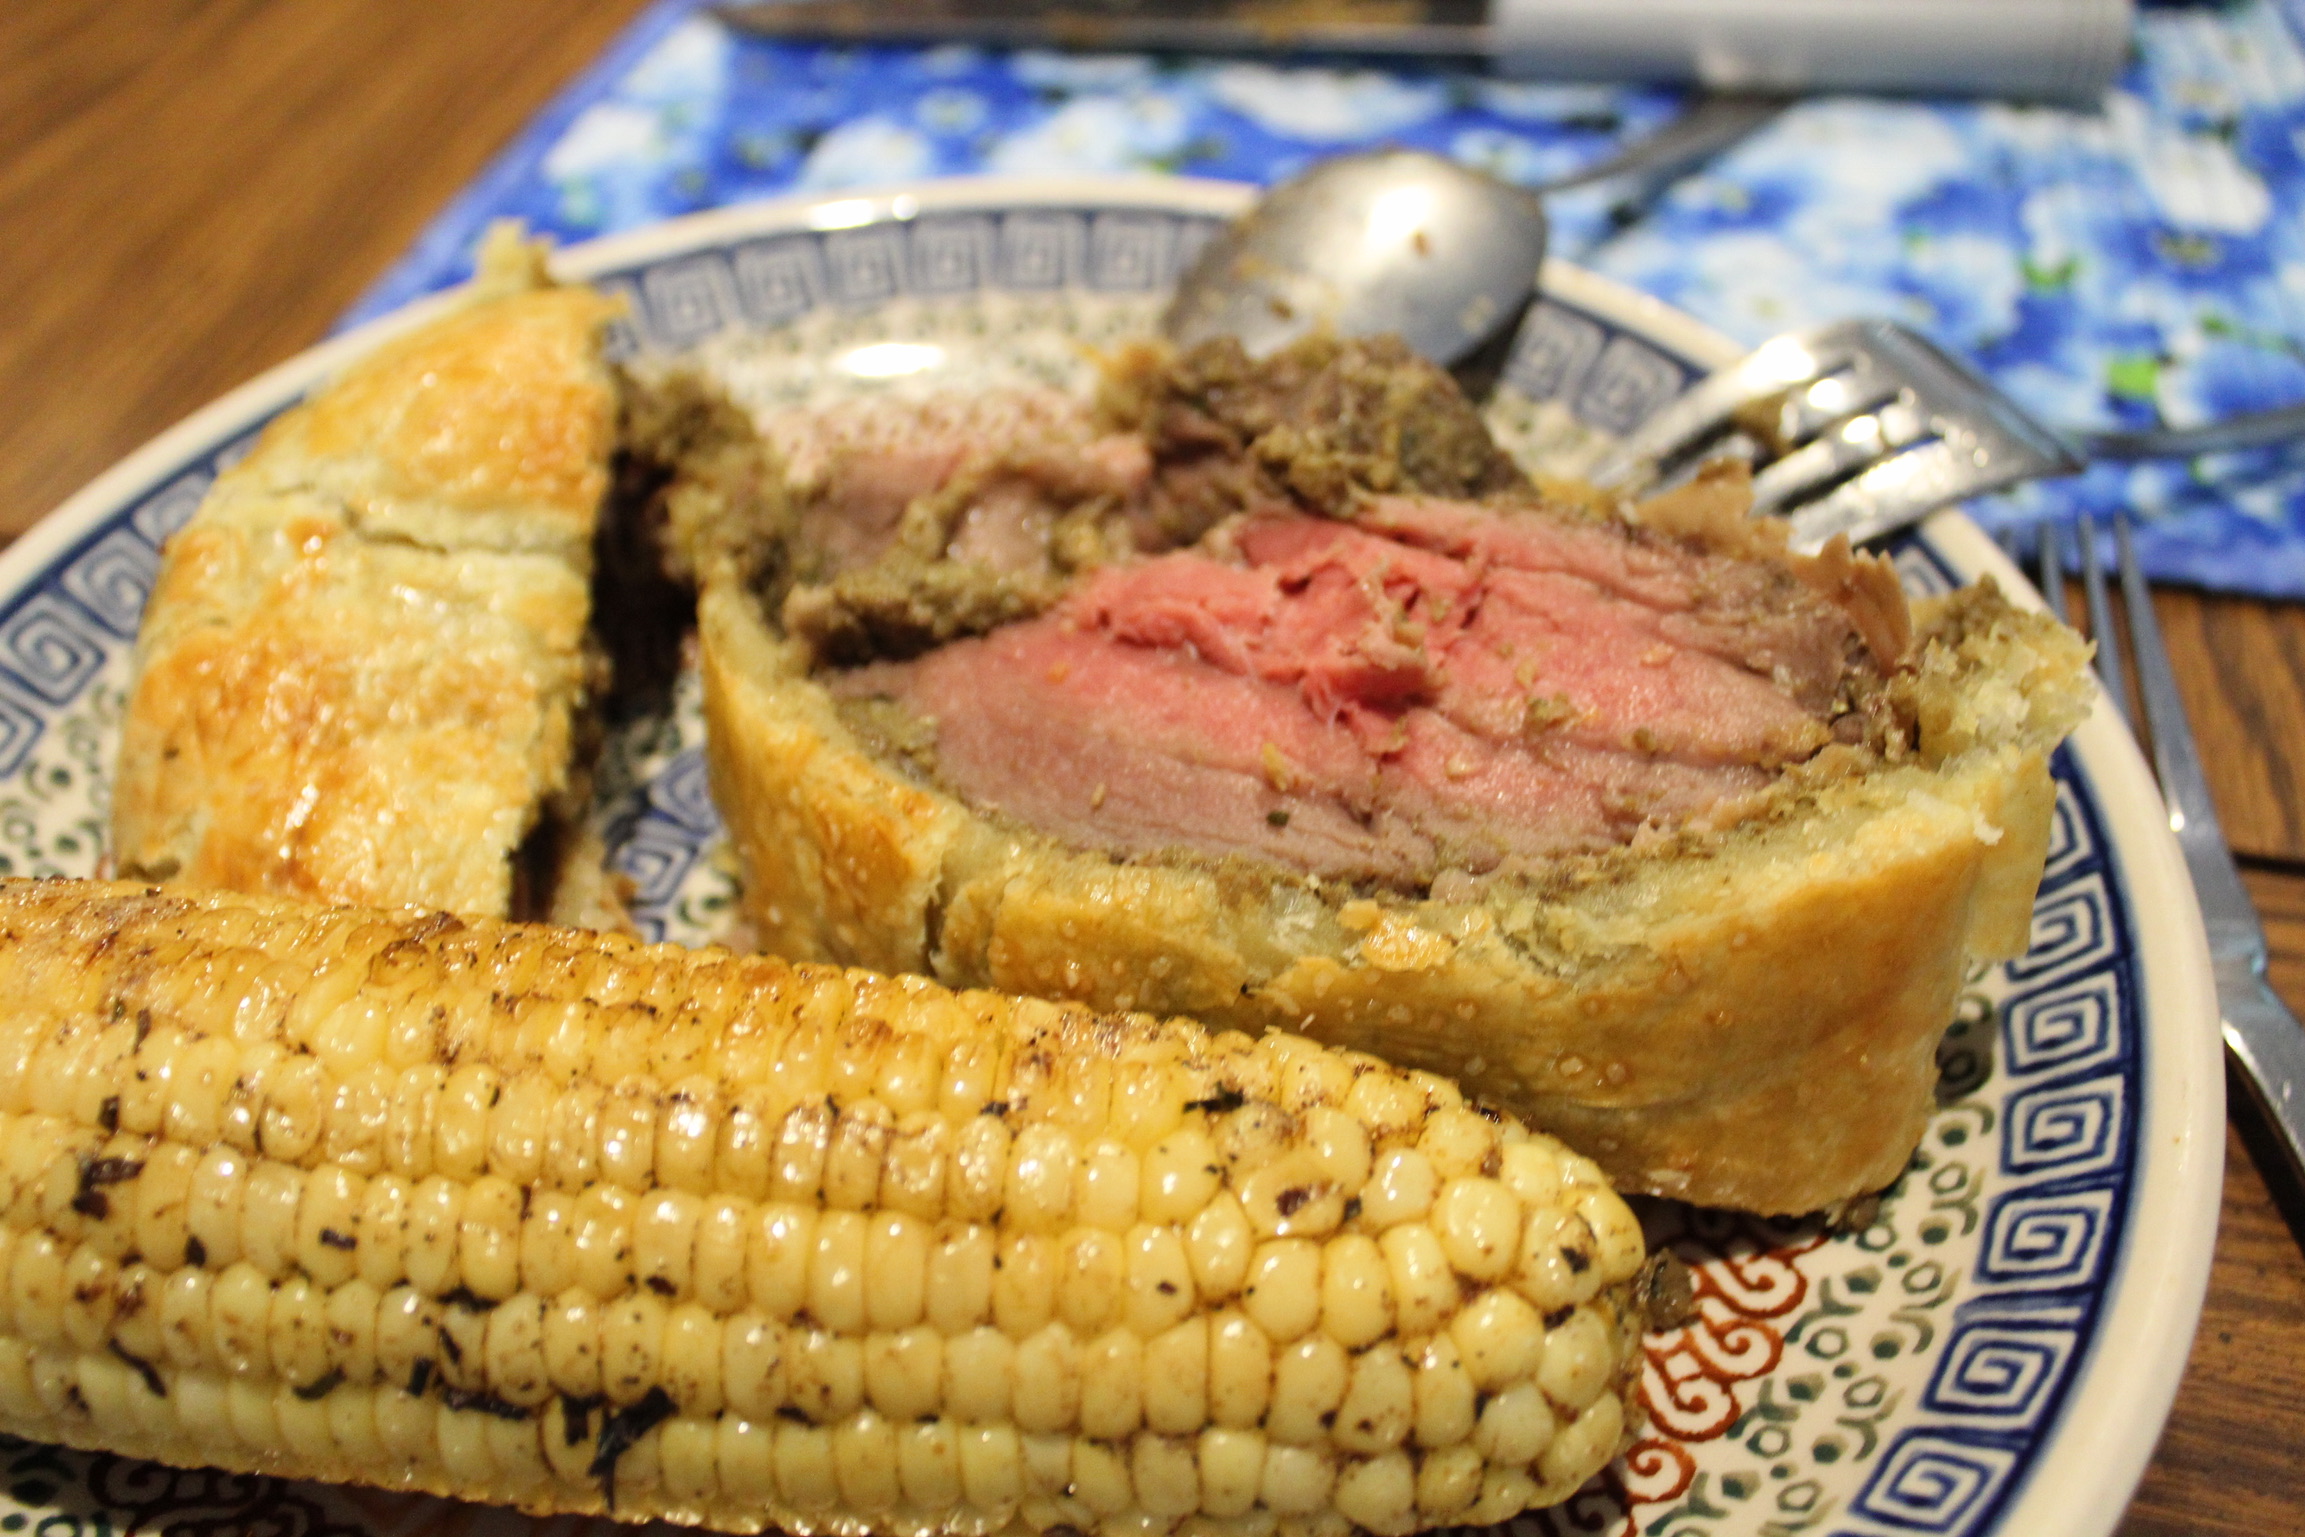
Now it was time to put a generous coat of fresh ground Pennsylvania Pepper, rosemary, and a sprinkle of Santa Maria Steak Rub on and vacuum seal this beast. It went into the HTTM at 130F for 3 hours as well. When it came out I added the drippings to those I reserved from the steaks earlier in the week, plucked the larger bits of rosemary off the beef, and gave the tenderloin a quick sear in olive oil in a pan. I pulled the steak out and immediately brushed it with a stone ground mustard that had a touch of horseradish in it. Next it was time to wrap the tenderloin with prosciutto, Gordon Ramsey's recipe called for Parma Ham but we did not find any so we sent in a sub. I laid the prosciutto down, ground some PA pepper over it and wrapped it tightly around the beef, sealing it. It went into the fridge to set. While the beef set I worked on the mushroom stuffing, 8 ounces of regular button mushrooms and 8 ounces of baby portobellos went into a food processor with salt, PA Pepper, turmeric, thyme, and celery seed. Then the mushroom mix went into a pan to get as much water out as possible. I set the mushroom mix aside to cool in a container raising one end so that any remaining water would drain to the end. It was time to pull out the puff pastry. As it turned out, I had just enough pastry to cover the beef (lesson learned). I laid out the pastry dough, spread the mushroom mixture on it evenly and wrapped it tightly around the tenderloin making sure to seal the ends tight. Then it went into the refrigerator to set until it was closer to dinner time. I took the drippings from searing, added the reserved drippings from the HTTM cooks, added water, worcestershire, salt and beef stock and whisked in some flour along with some red wine. I also had some leftover mushroom mix so I added that as well. Once those ingredients had married but not yet thickened, I put it all in a blender to smooth out the texture. I vacuumed sealed corn on the cob with tarragon and butter and set the HTTM to 184F. I turned the oven to 420F. When they both reached temperature the wellington received an egg yolk wash and generous dusting of sea salt and it went into the oven. The corn went into the HTTM. The corn came out 30 minutes later and went into a pan to be seared, caramelizing the sugars in the corn and making it the perfect bite. After the corn finished (five minutes) the wellington was ready and it was time to serve dinner at the table for a proper family meal.


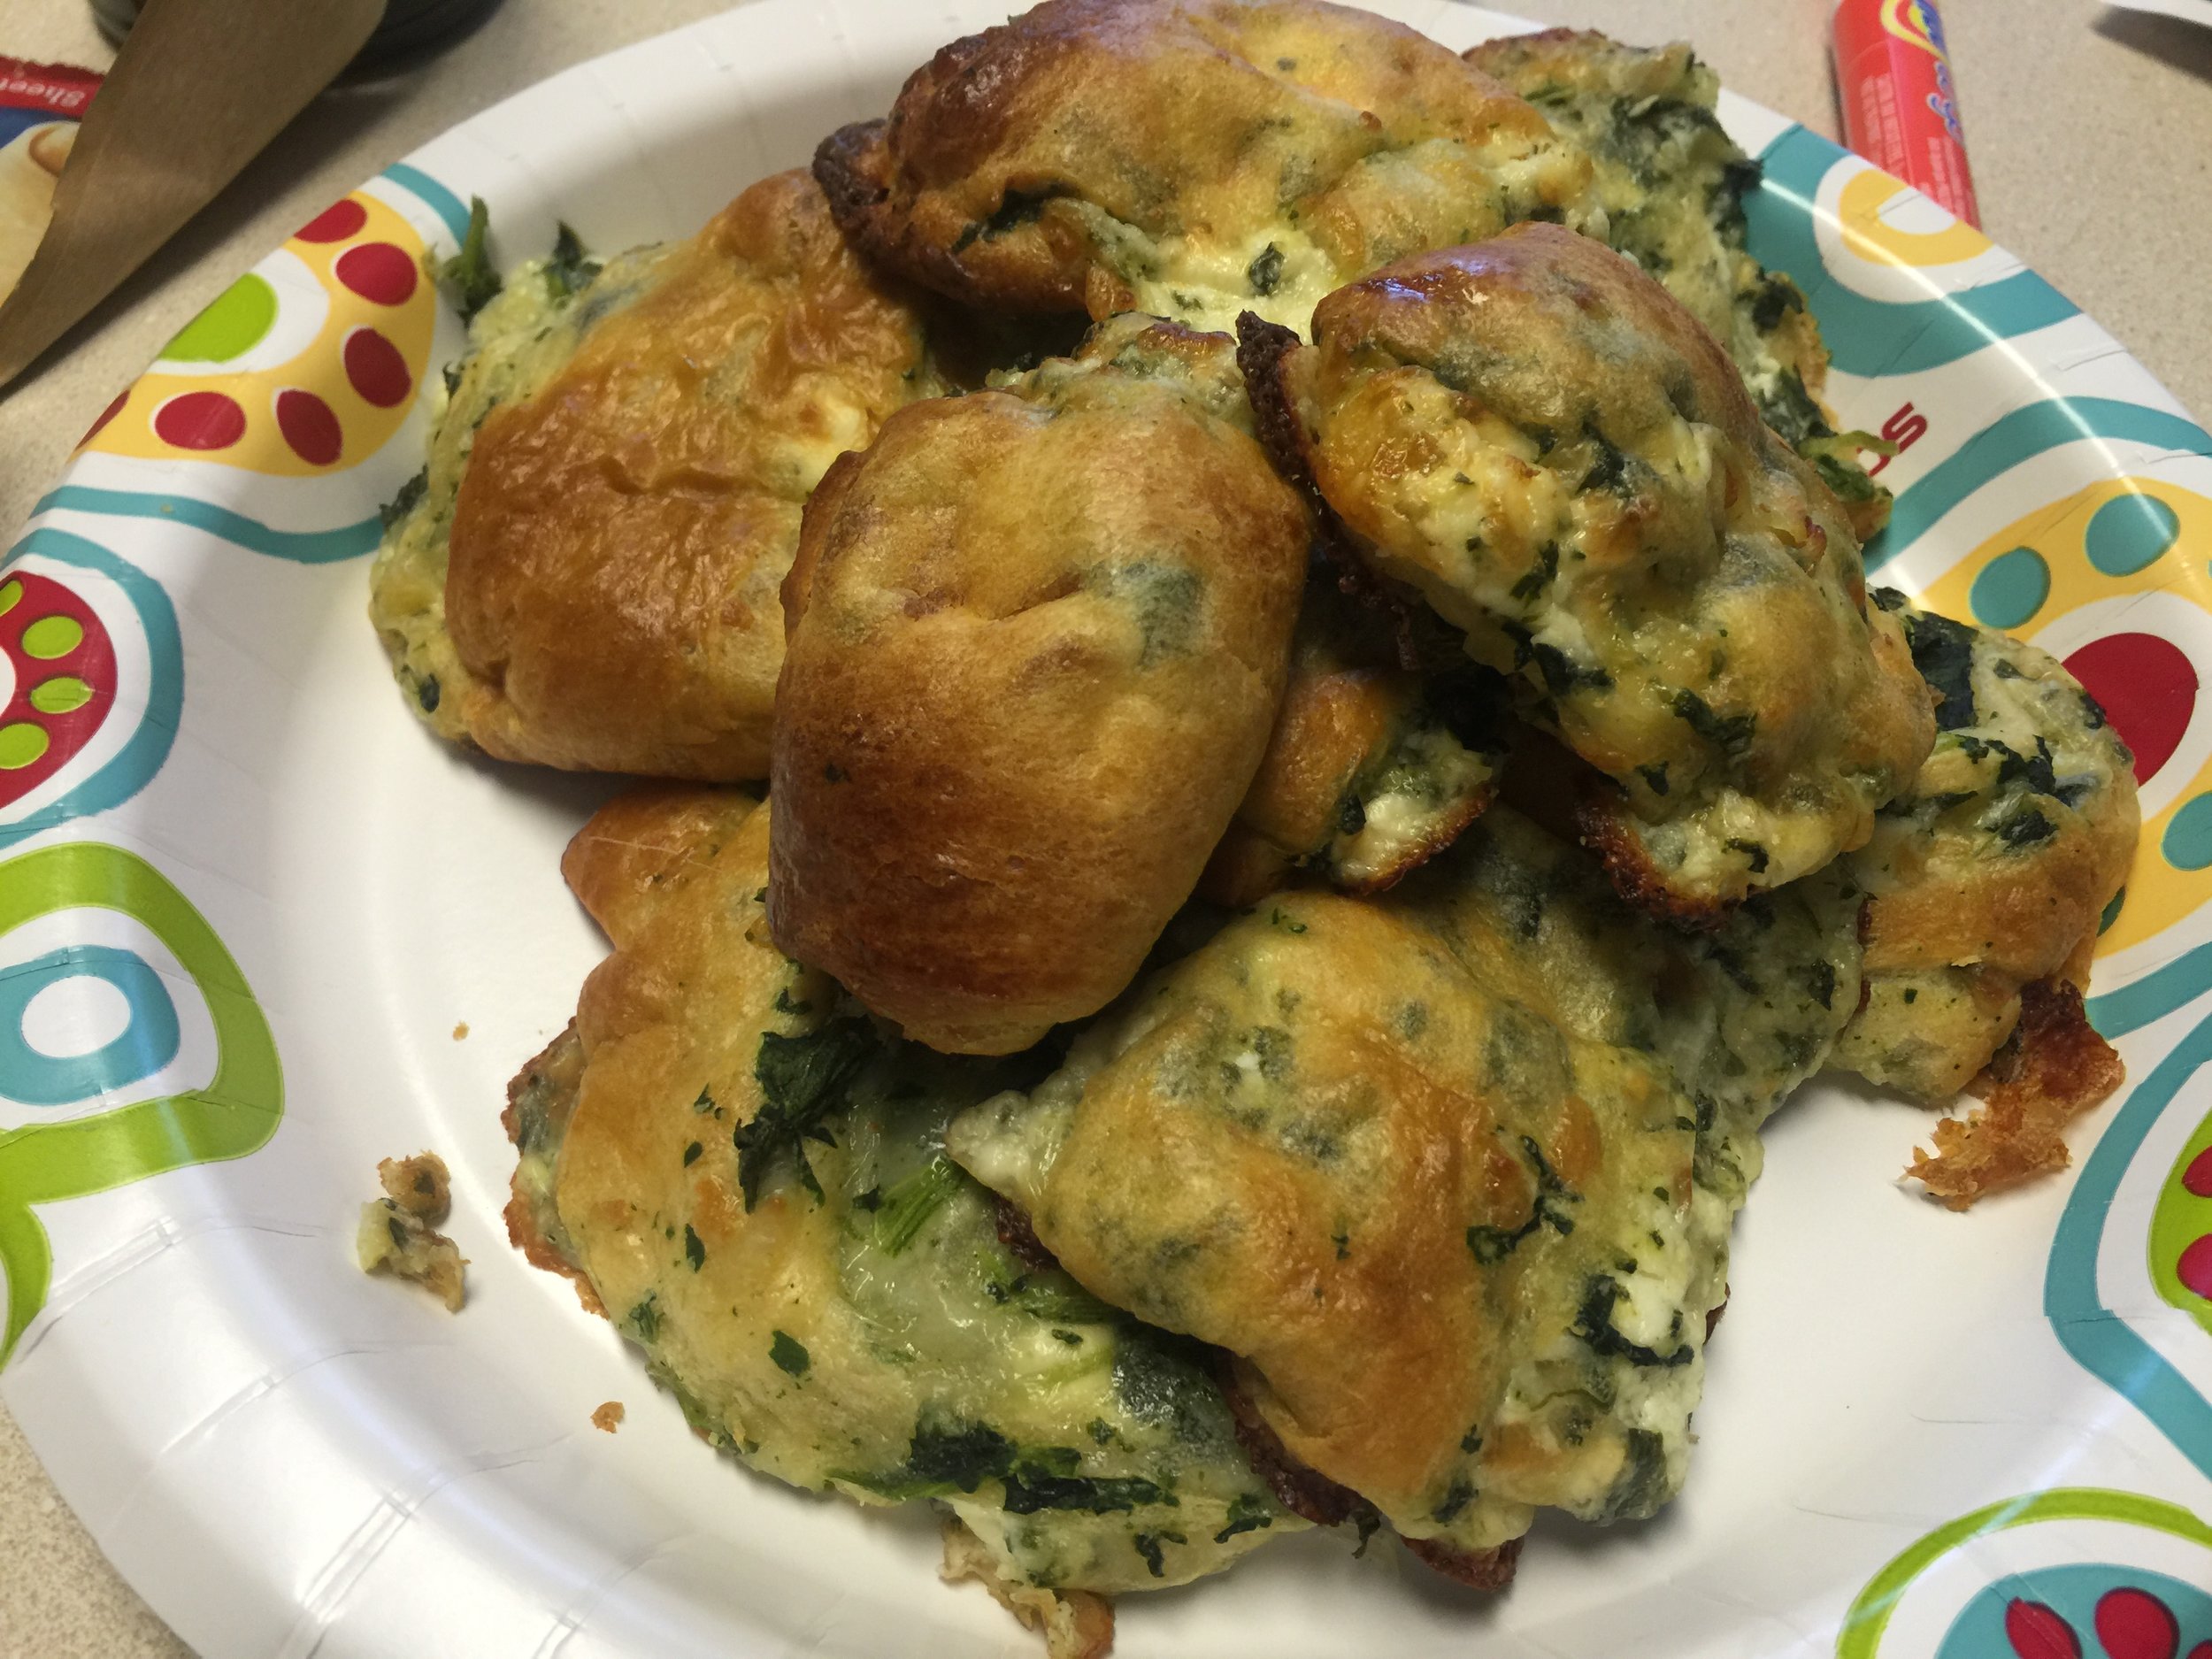
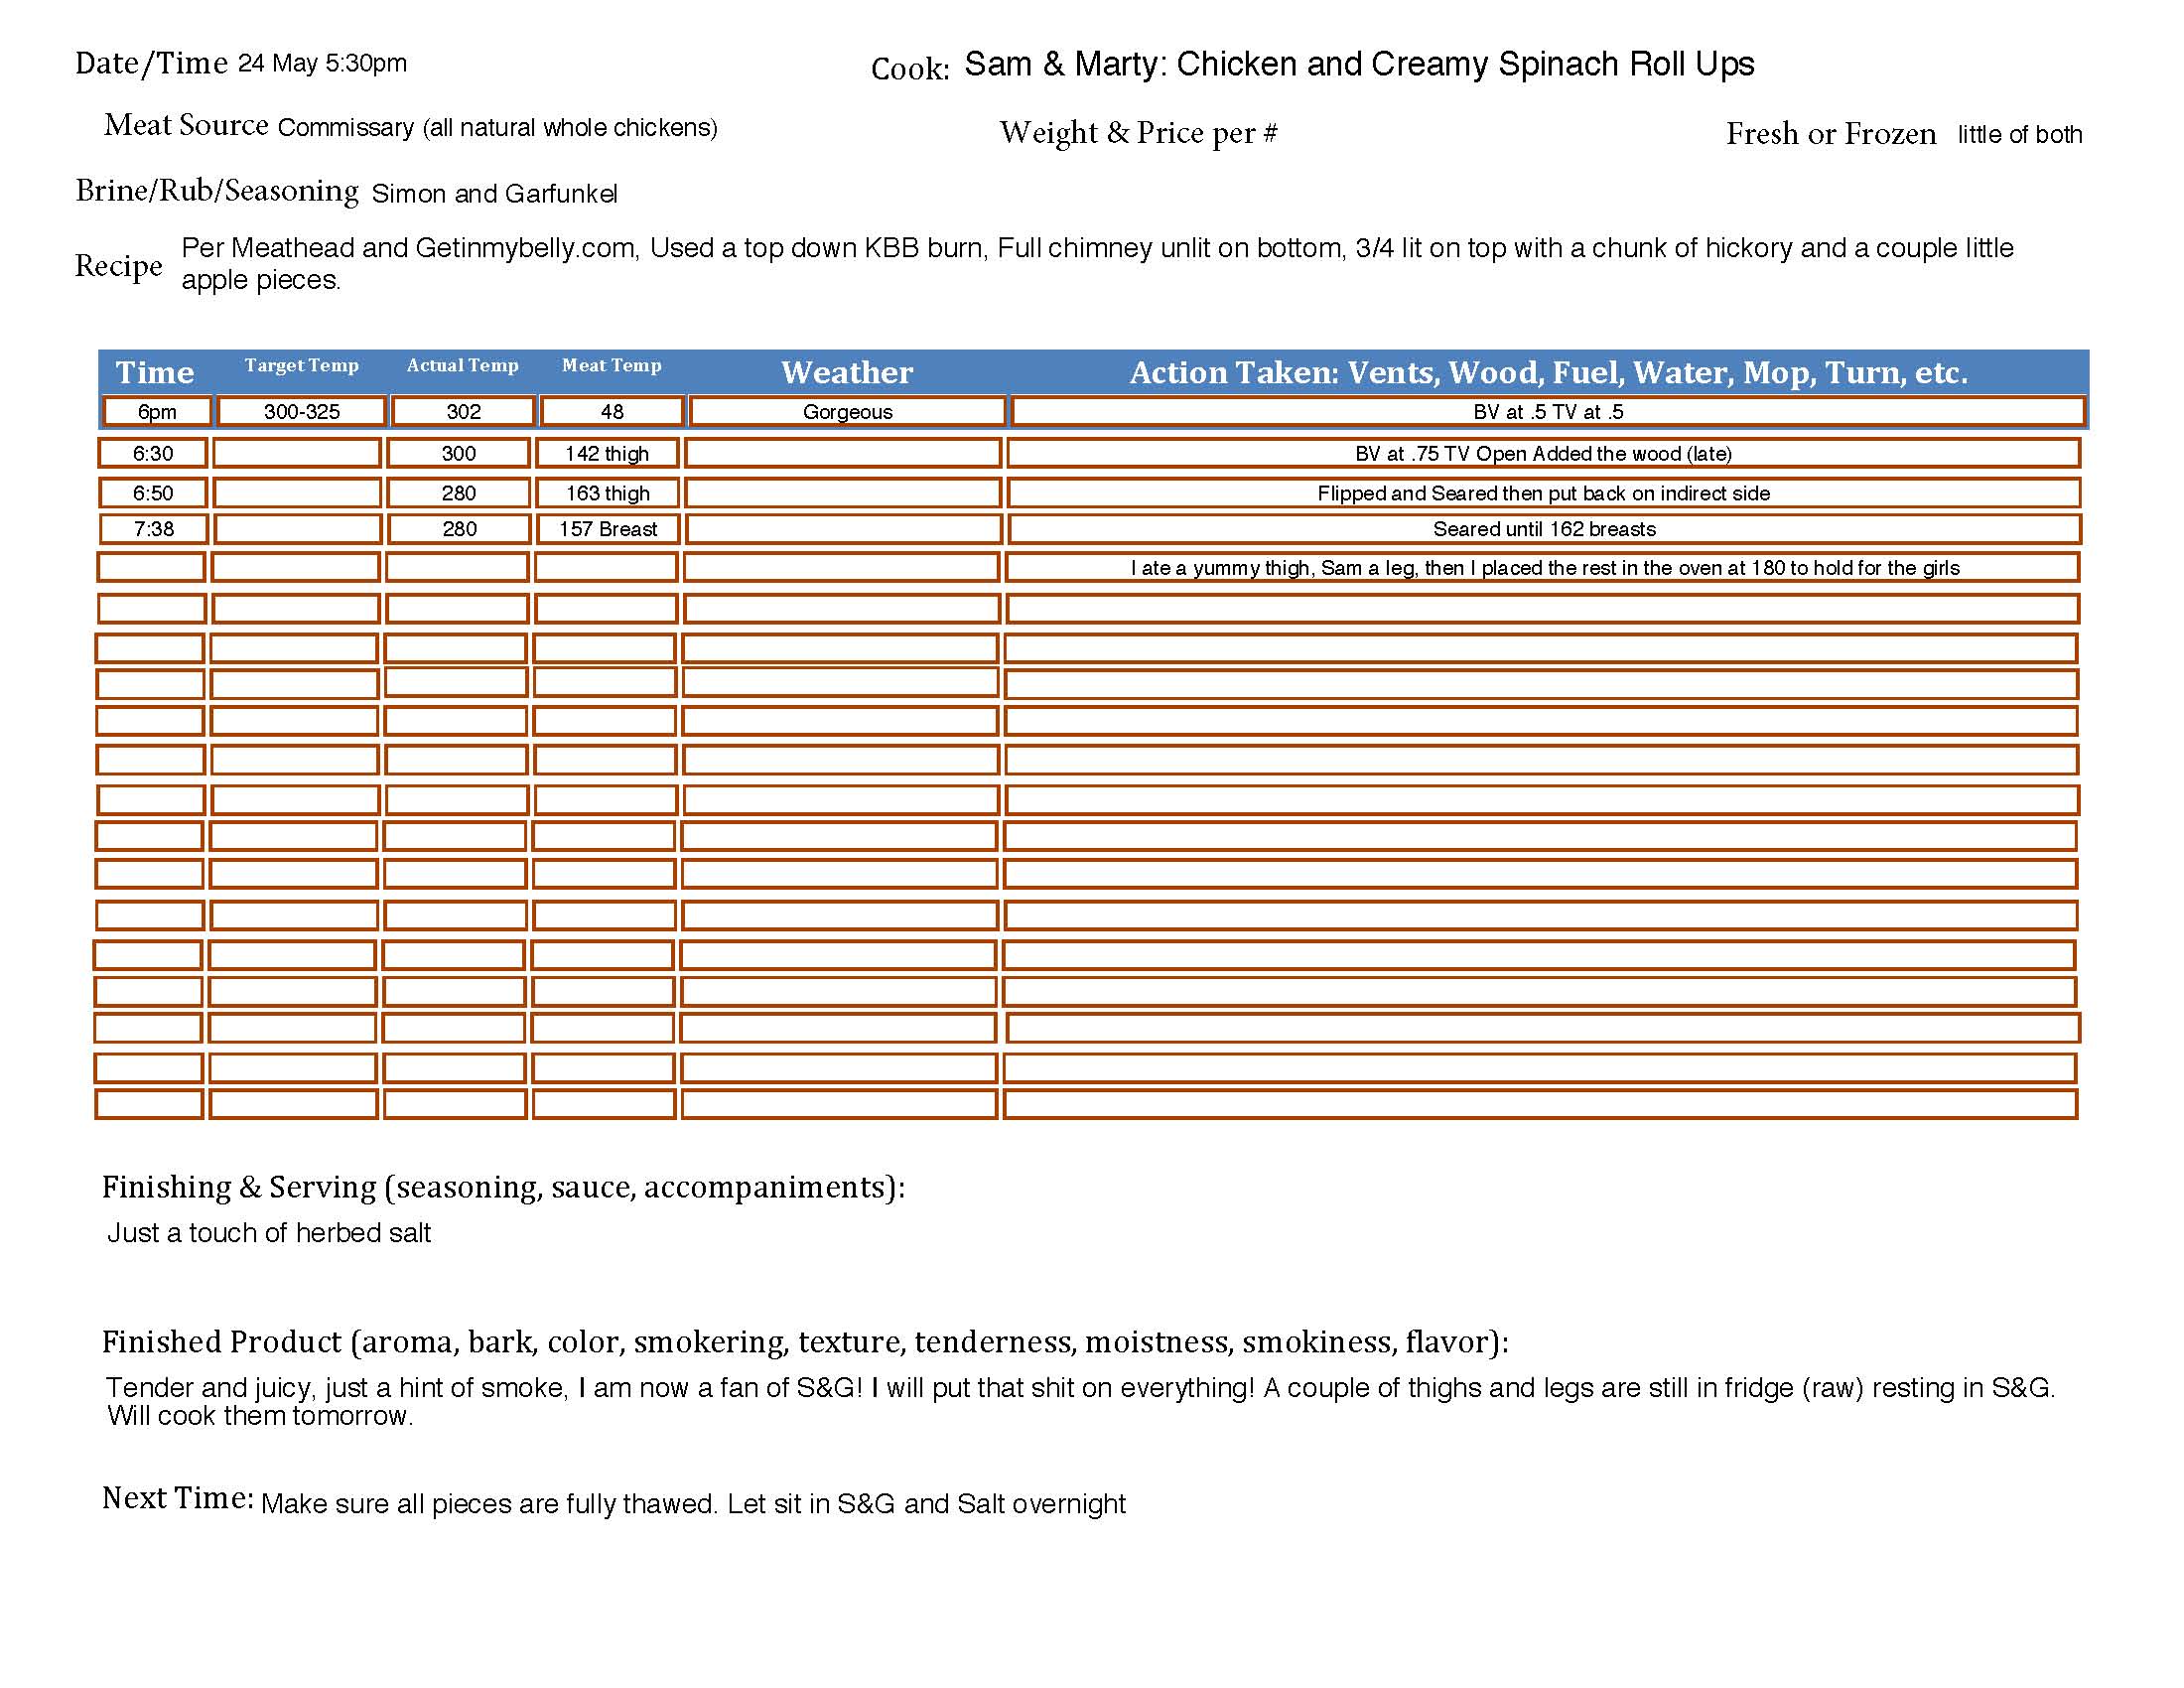
Simon & Garfunkel Chicken w/Creamy Spinach Baked Roll Ups
Simon and Garfunkel Chicken Courtesy of The Science of Great Barbecue and Grilling Get the book or join The Pit for the recipe kids!
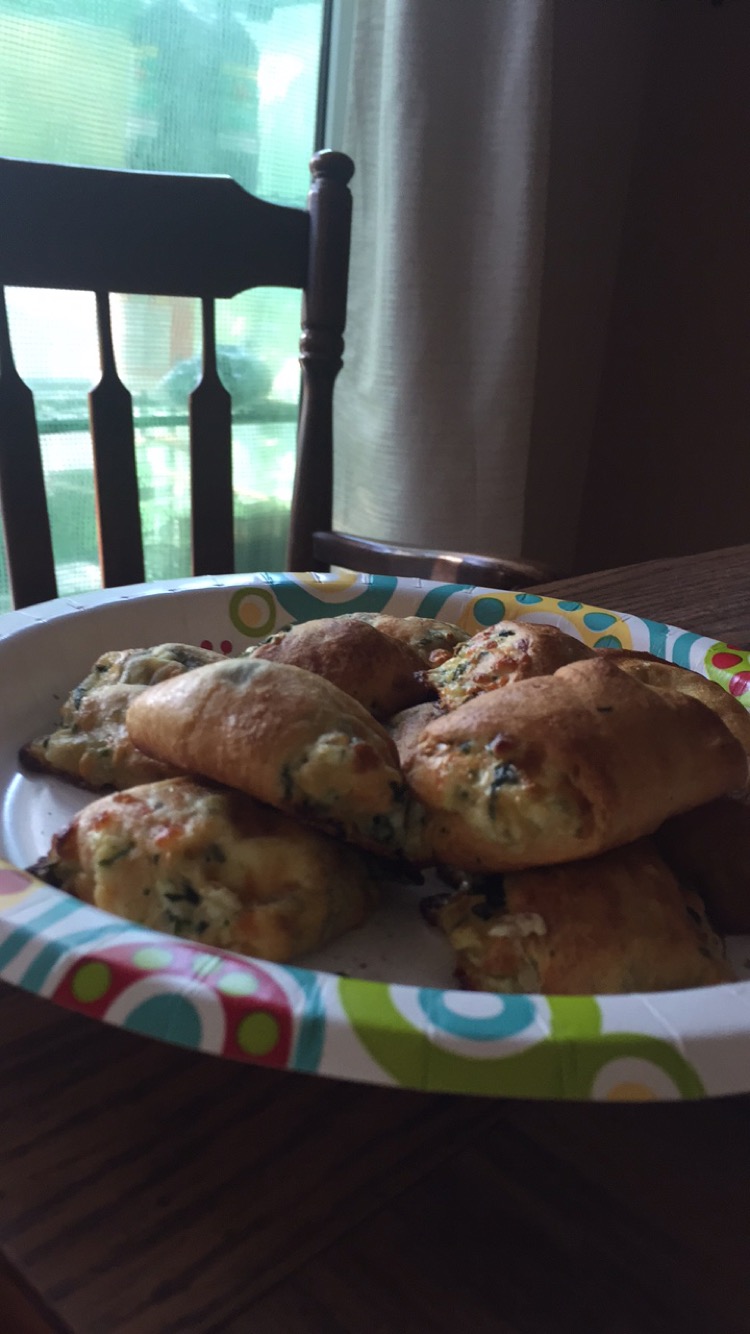
Thanks to child #4 @That_Stud_Sam for making the CSRUs!
Creamy Spinach Roll Ups Courtesy of GetInMYBelly
Ingredients:
- 8 oz. Cream Cheese
- 8 oz. Monterey Jack Cheese Shredded
- 1/4 tsp Garlic Powder
- 1/4 Yellow Onion Diced Smal
- 1 10 oz. Package of Frozen Spinach, Thawed and Drained Really Well
- 1 Box of Puff Pastry Sheets (2 Sheets)
- 1 Egg
- 1 Tbsp. Water
DIRECTIONS:
1. Combine the Egg and Water and Beat until well mixed.
2. Combine Softened Cream Cheese, Monterey Jack Cheese, Garlic Powder and Onion in a bowl and mix well.
3. Add Spinach into the Cream Cheese Mixture and stir.
4. Unroll Puff Pastry Sheets and Brush both sides with Egg and Water Mixture.
5. Spread Cream Cheese and Spinach Mixture over one side of the Puff Pastry.
6. Roll Up the Puff Pastry and Slice.
7. Place rolls on a Baking Sheet and bake at 400°F for 20 Minutes or until the Puff Pastry turns a golden color.
8. Enjoy!
Monday is Meatloaf and Taters Day
We decided on meatloaf for Monday over the weekend. Next time we are going to use Kathryn's Recipe (sorry it is a secret of the pitmaster club) adaptation of this ORIGINAL RECIPE.
But today we went with a simpler version that of course included bacon. You can view the cooking log HERE it includes the recipes.
Here's some pics:


Thursday: Last Meal Ribs and Center Cut Round Roast


Pictured above are the finished products. Of course you can click them for a larger view you meat perv, you didn't have to ask. Here is how we got there.
On Tuesday the meat was finished defrosting and I gave them both a nice dry brine of kosher salt, then wrapped them up nice and tight and they went into the fridge. For the pork ribs I followed this recipe Last Meal Ribs: The Best Barbecue Ribs Ever. For the beef roast I followed these guidelines Recipe: Secrets Of Cooking Beef Prime Rib Roast, Strip Loin Roast, Tenderloin, Chuck Roast, Round, Rump Roast, And Other Beef Roasts On The Grill. And This Method Works Indoors If It's Too Cold For You, Wimp.
This meal was cooked on my 22.5" Weber with a Slow N Sear. If you have a kettle grill I cannot recommend too strongly that you get one of these. The grill was "set" to 225 degrees and I added apple wood and a touch of hickory. The ribs were given a nice rub of Meathead's Memphis Dust. The beef was rubbed with MMD and BBBR (Big Bad Beef Rub).
The pork went on at 12:30 and cooked for about 6 hours. At the six hour mark it passed the bend test but I left them on as I was keeping the lid raised to sear the beef. Weber's original classic BBQ sauce was served on the side, I did not baste the ribs with it.
The beef went on at 3pm and came off at 4:30. It was a 134 internally and so it was placed in a 150 degree oven to hold. At 6 pm the beef went back on the direct heat side of the grill to be seared.
I recommend serving the beef with beef butter. Feel free to experiment with the herbs, I did as I was out of tarragon. I use a 1/4 tsp garlic powder, 1/2 tsp basil, 1/2 teaspoon lemon thyme, and 1/2 tsp rosemary for a 1lb block of Kerry's Gold Butter.
Pizza on the Grill, by special request
Monday was a special day for us and the guest of honor requested homemade pizza. We all know the key to great pizza is the crust. We rely on the pros at Valenti's. For a mere $3 you can get a fresh ball of dough suitable to build a large pizza.
I removed the Slow'NSear from the Weber and started a full chimney of Kingsford Original. When the charcoal was ready I centered it on the charcoal grate. I then placed a cast iron searing griddle in the center of the top grate and put the pizza stone on top of it. Down went the lid and we waited for the top grate temperature to peak. It peaked and held at about 450 degrees but I know that the stone was hotter than that. The pizza was slid on off of parchment paper (someone buy me a pizza slide pls); you can keep the parchment paper on if you like just make sure you trim it as close to the edge of the pizza as you can. 12 minutes later the pizza crust was strong, crisp and thoroughly cooked and the toppings were beautifully melted.
For the pizza above we used bbq sauce instead of pizza sauce, and oregano, browned ground round, peppers, and mozzarella. It rocked!
First Brisket: The Flat

It is amazing how much you can learn in a single cook. There is no replacing experience! I feel much more confident and ready to cook the next one. Many thanks to all on http://pitmaster.amazingribs.com, and the author Meathead Goldwyn for putting together such a great book. I must have picked it up a dozen times today to check and recheck information. The cook log is accessible here.
The brisket was trimmed and separated into the point and flat on Friday night and then dry-brined in the fridge until it was cook time. I seasoned it with Big Bad Beef Rub and it went on the grill at 7:45am. At 4:18 it was pulled from the grill, wrapped and placed in a faux chambro. When the internal temperature dropped to 149 degrees I removed it and sliced it.


Breaking in the Weber: Chicken Kabobs and Pulled Pork
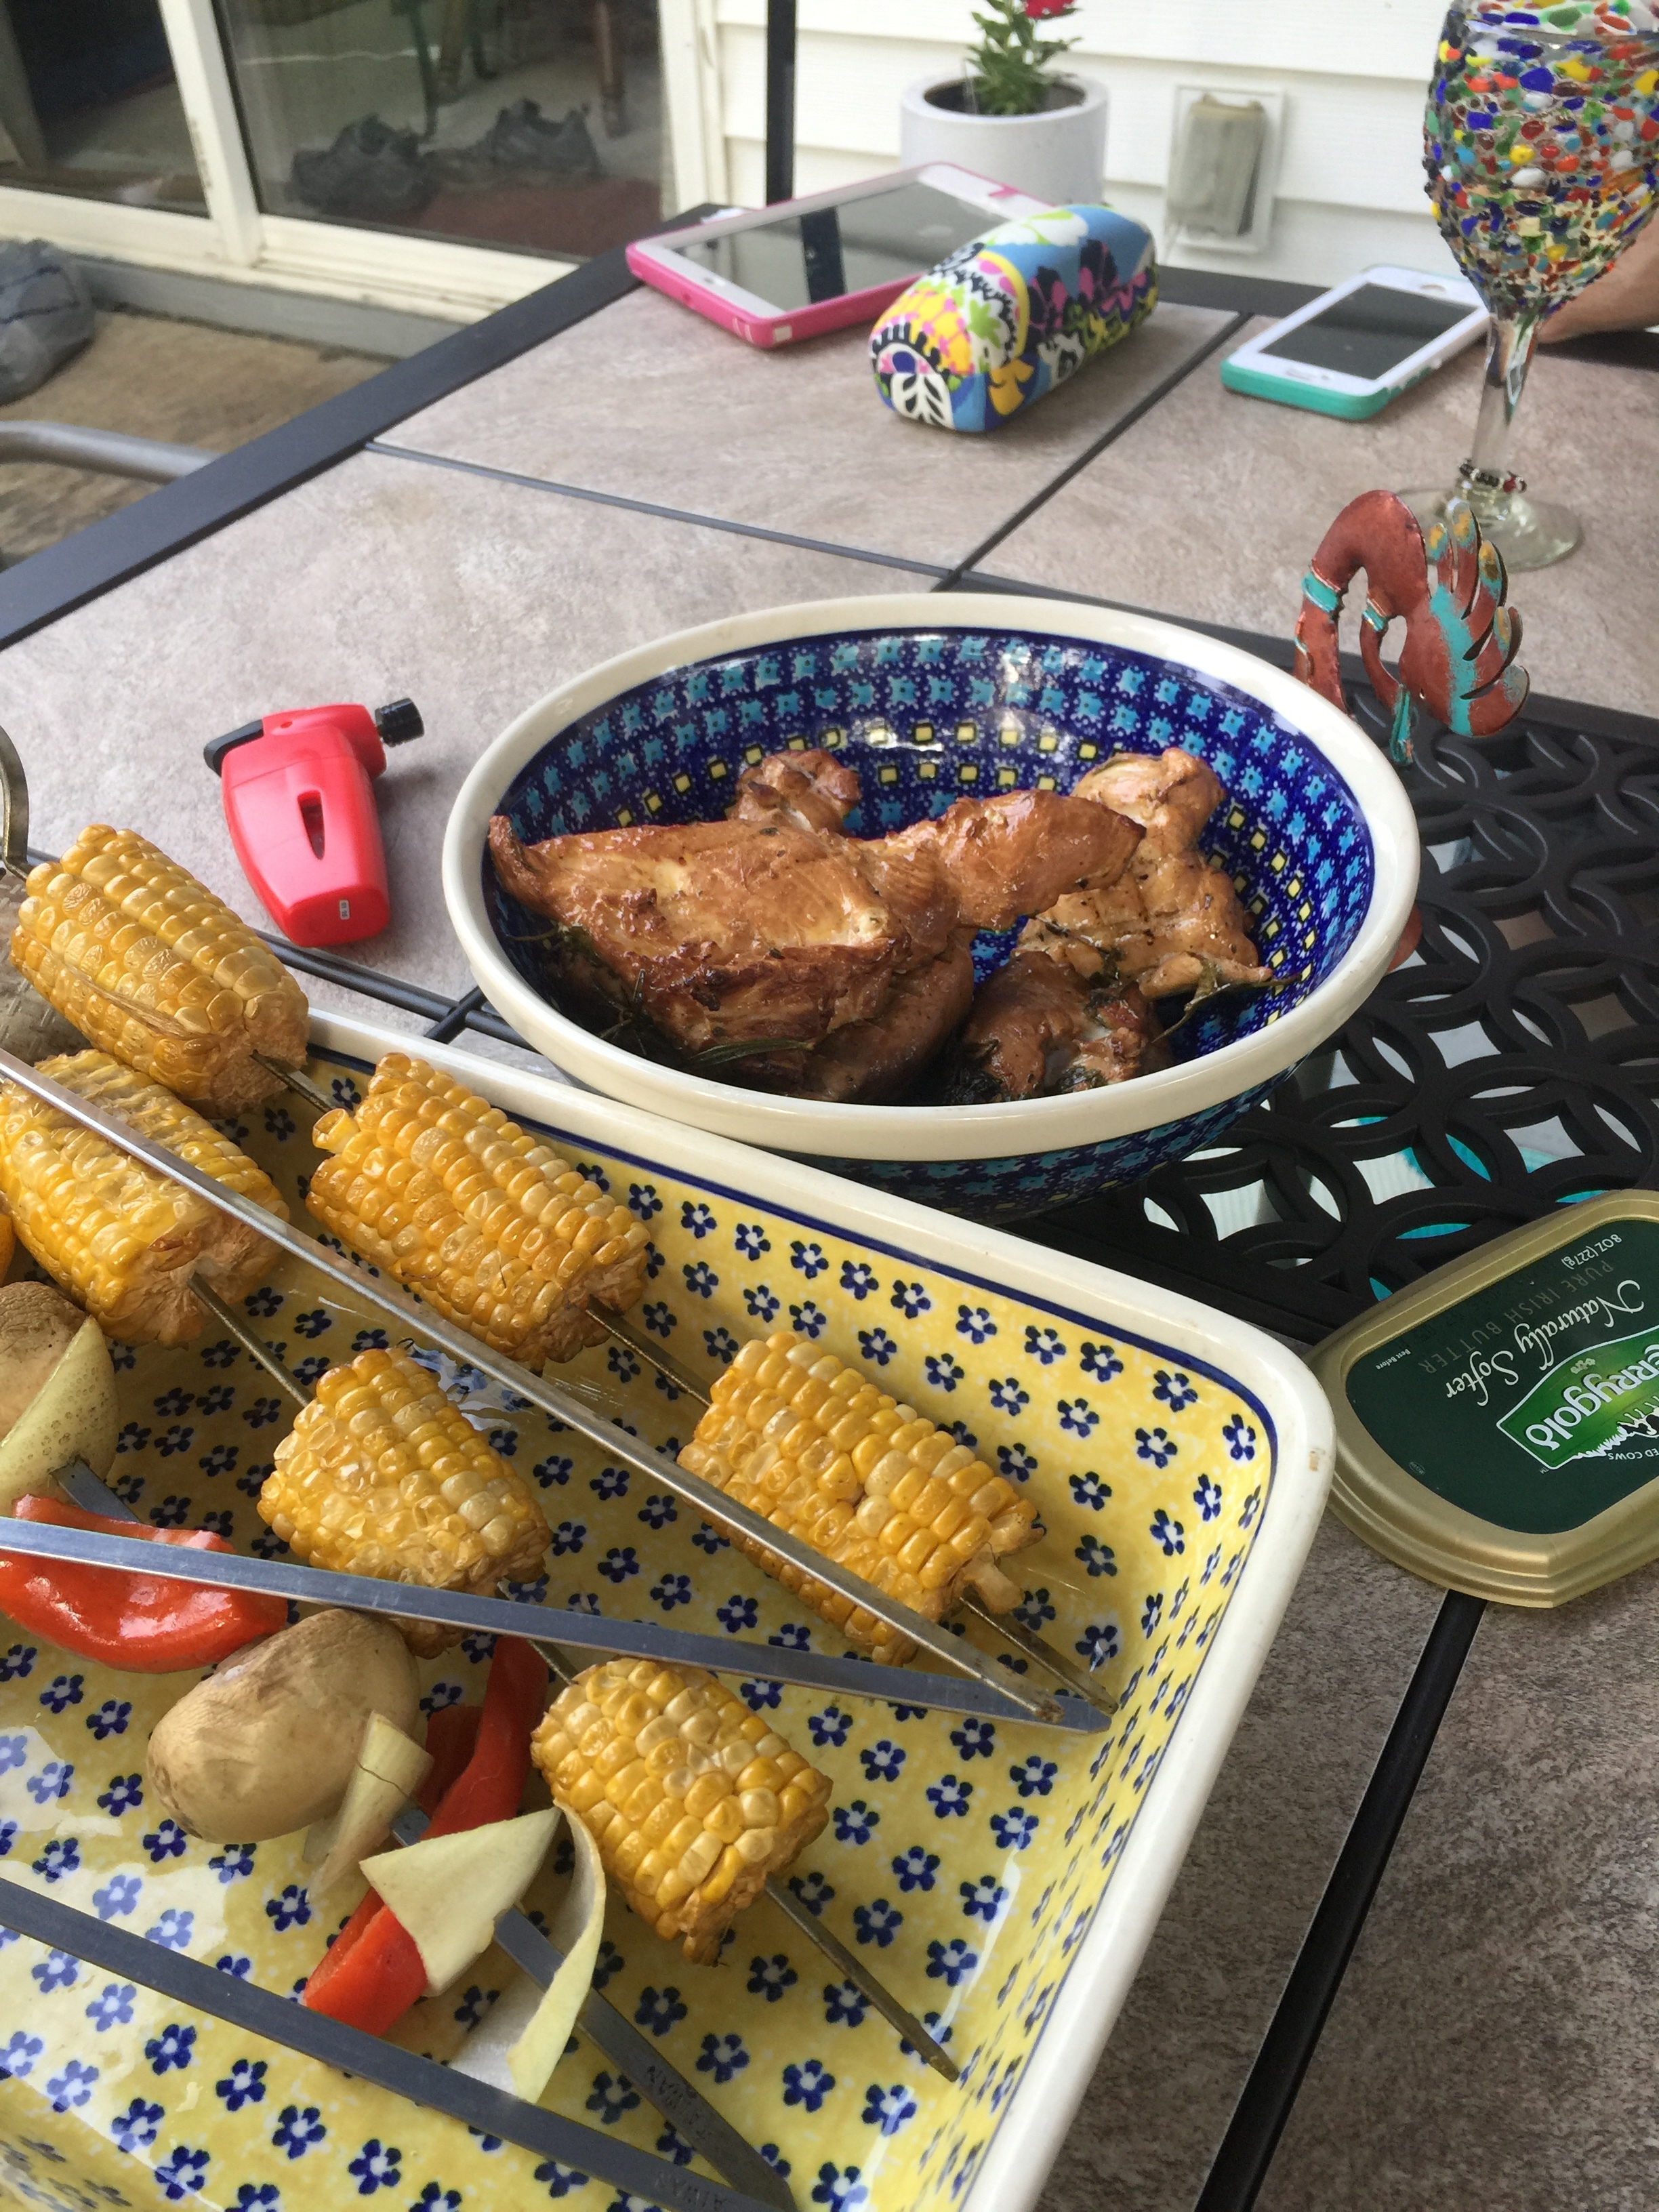


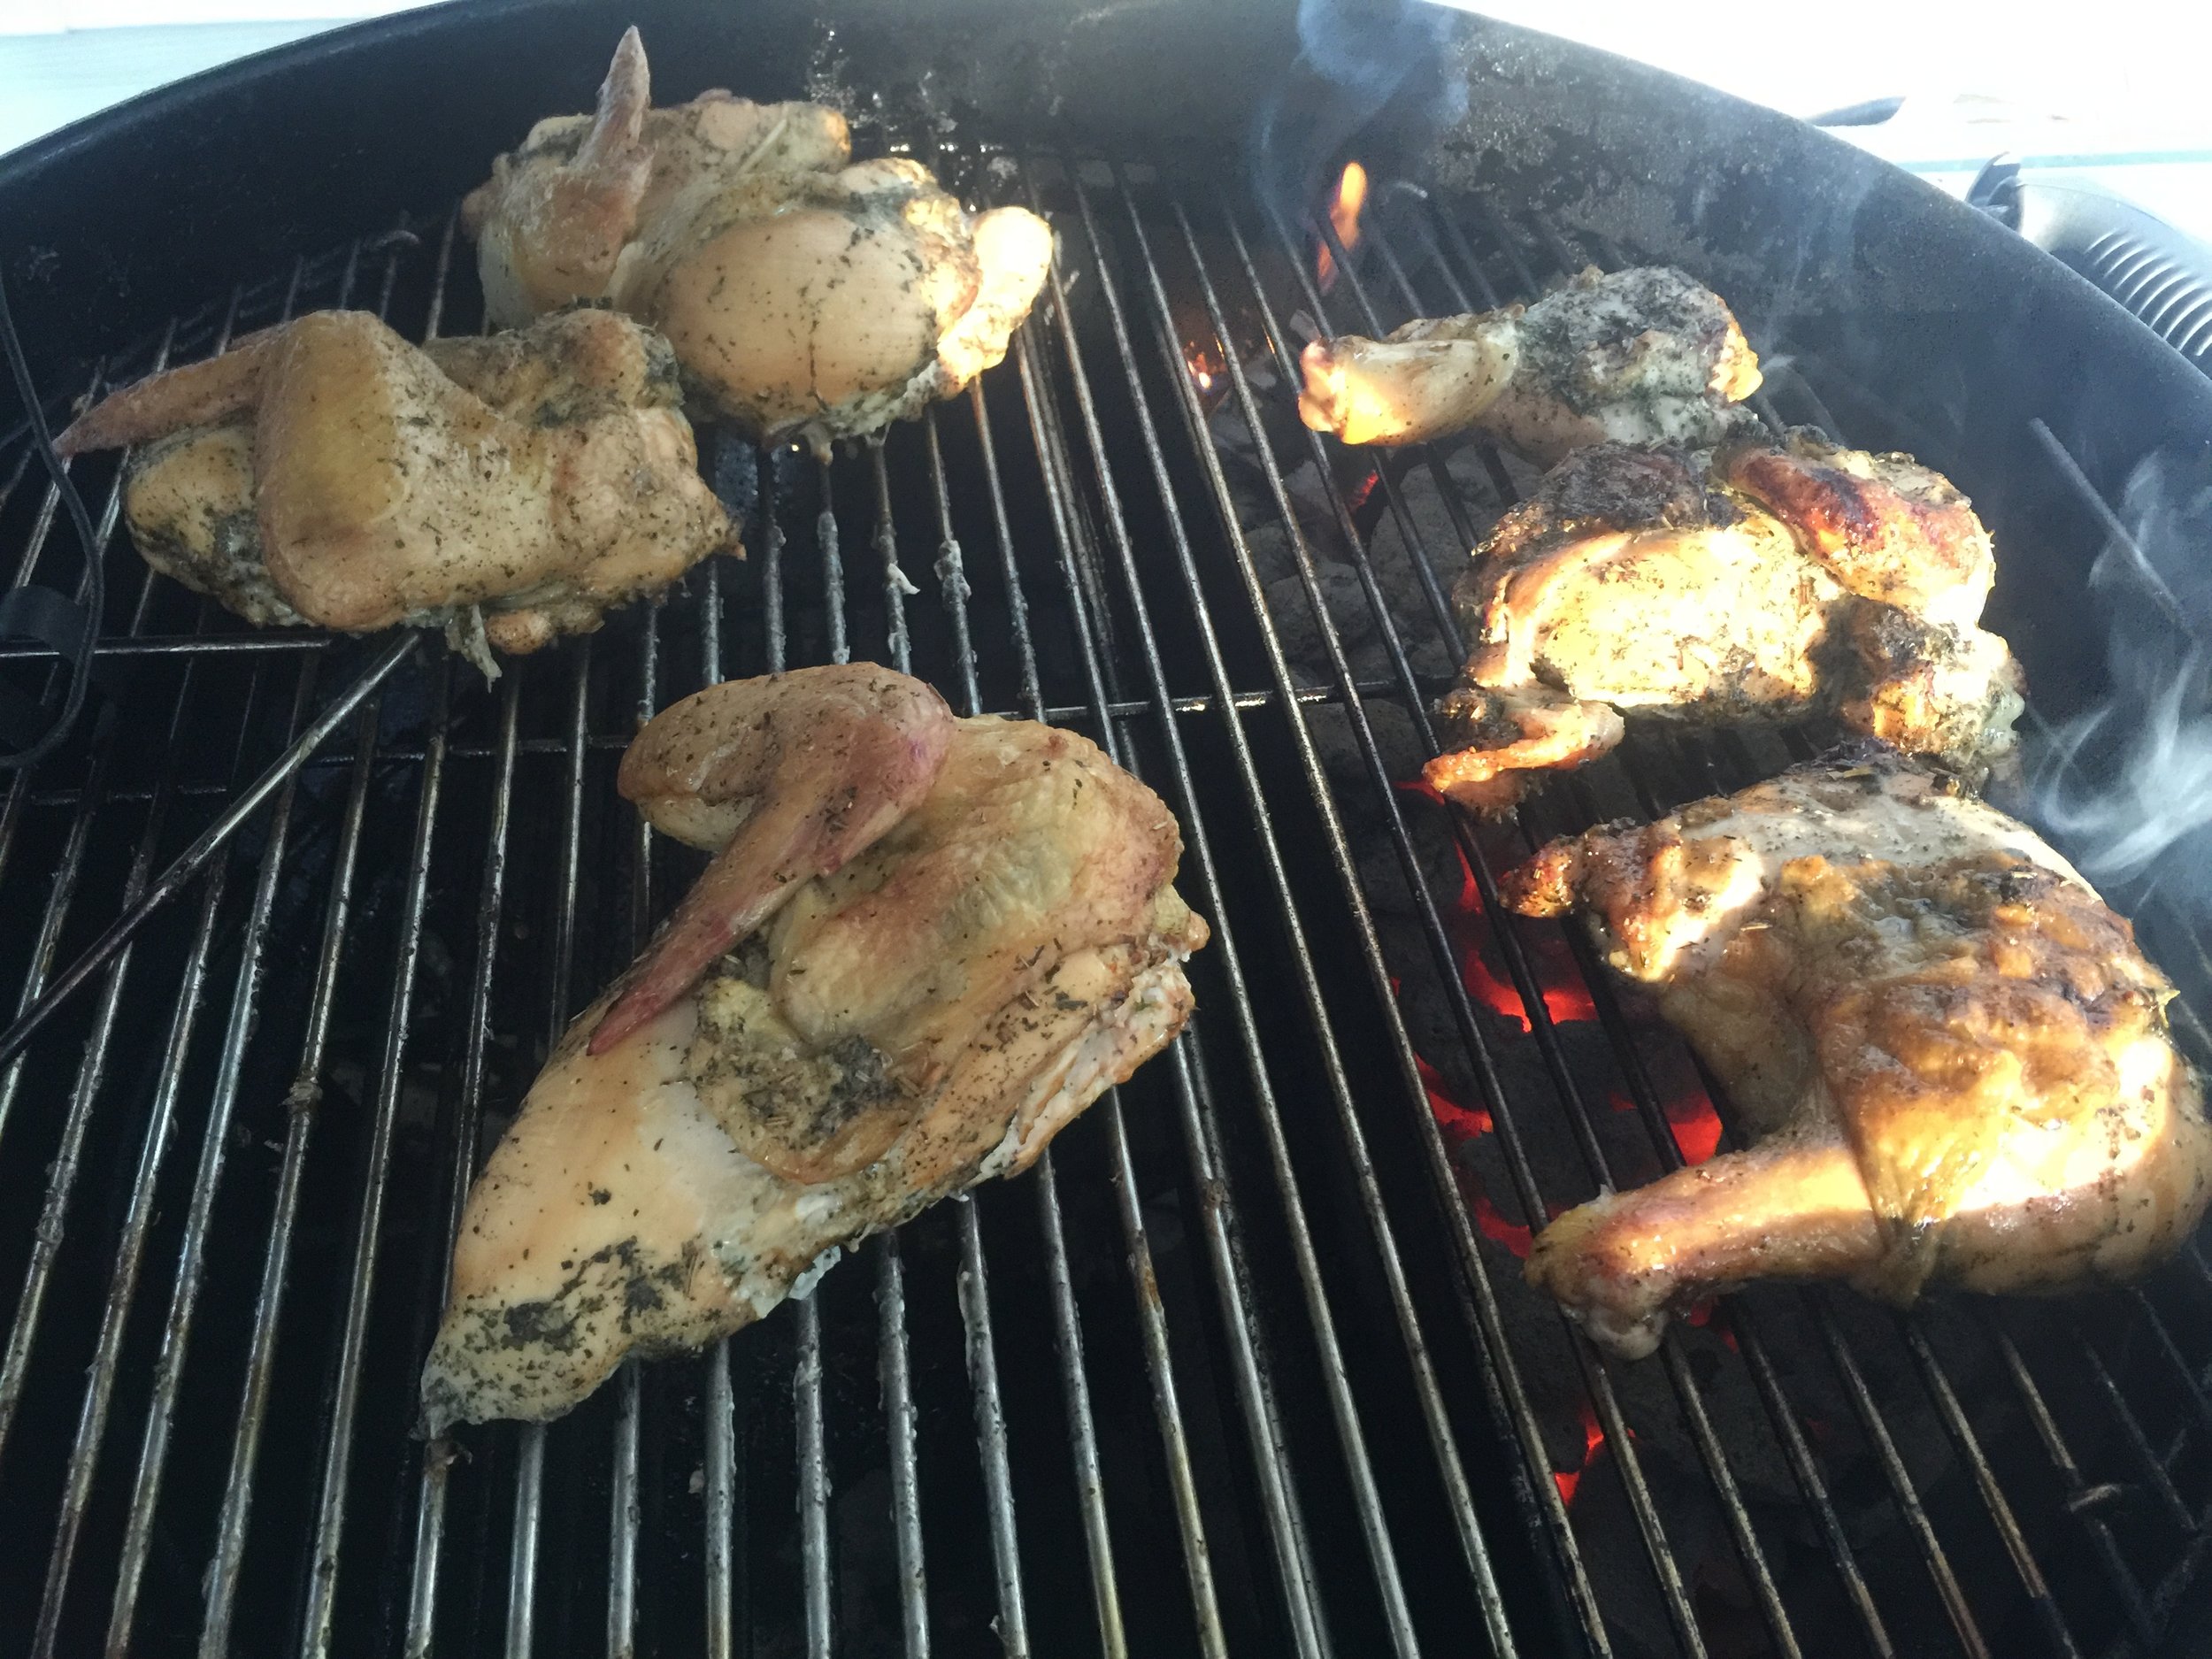
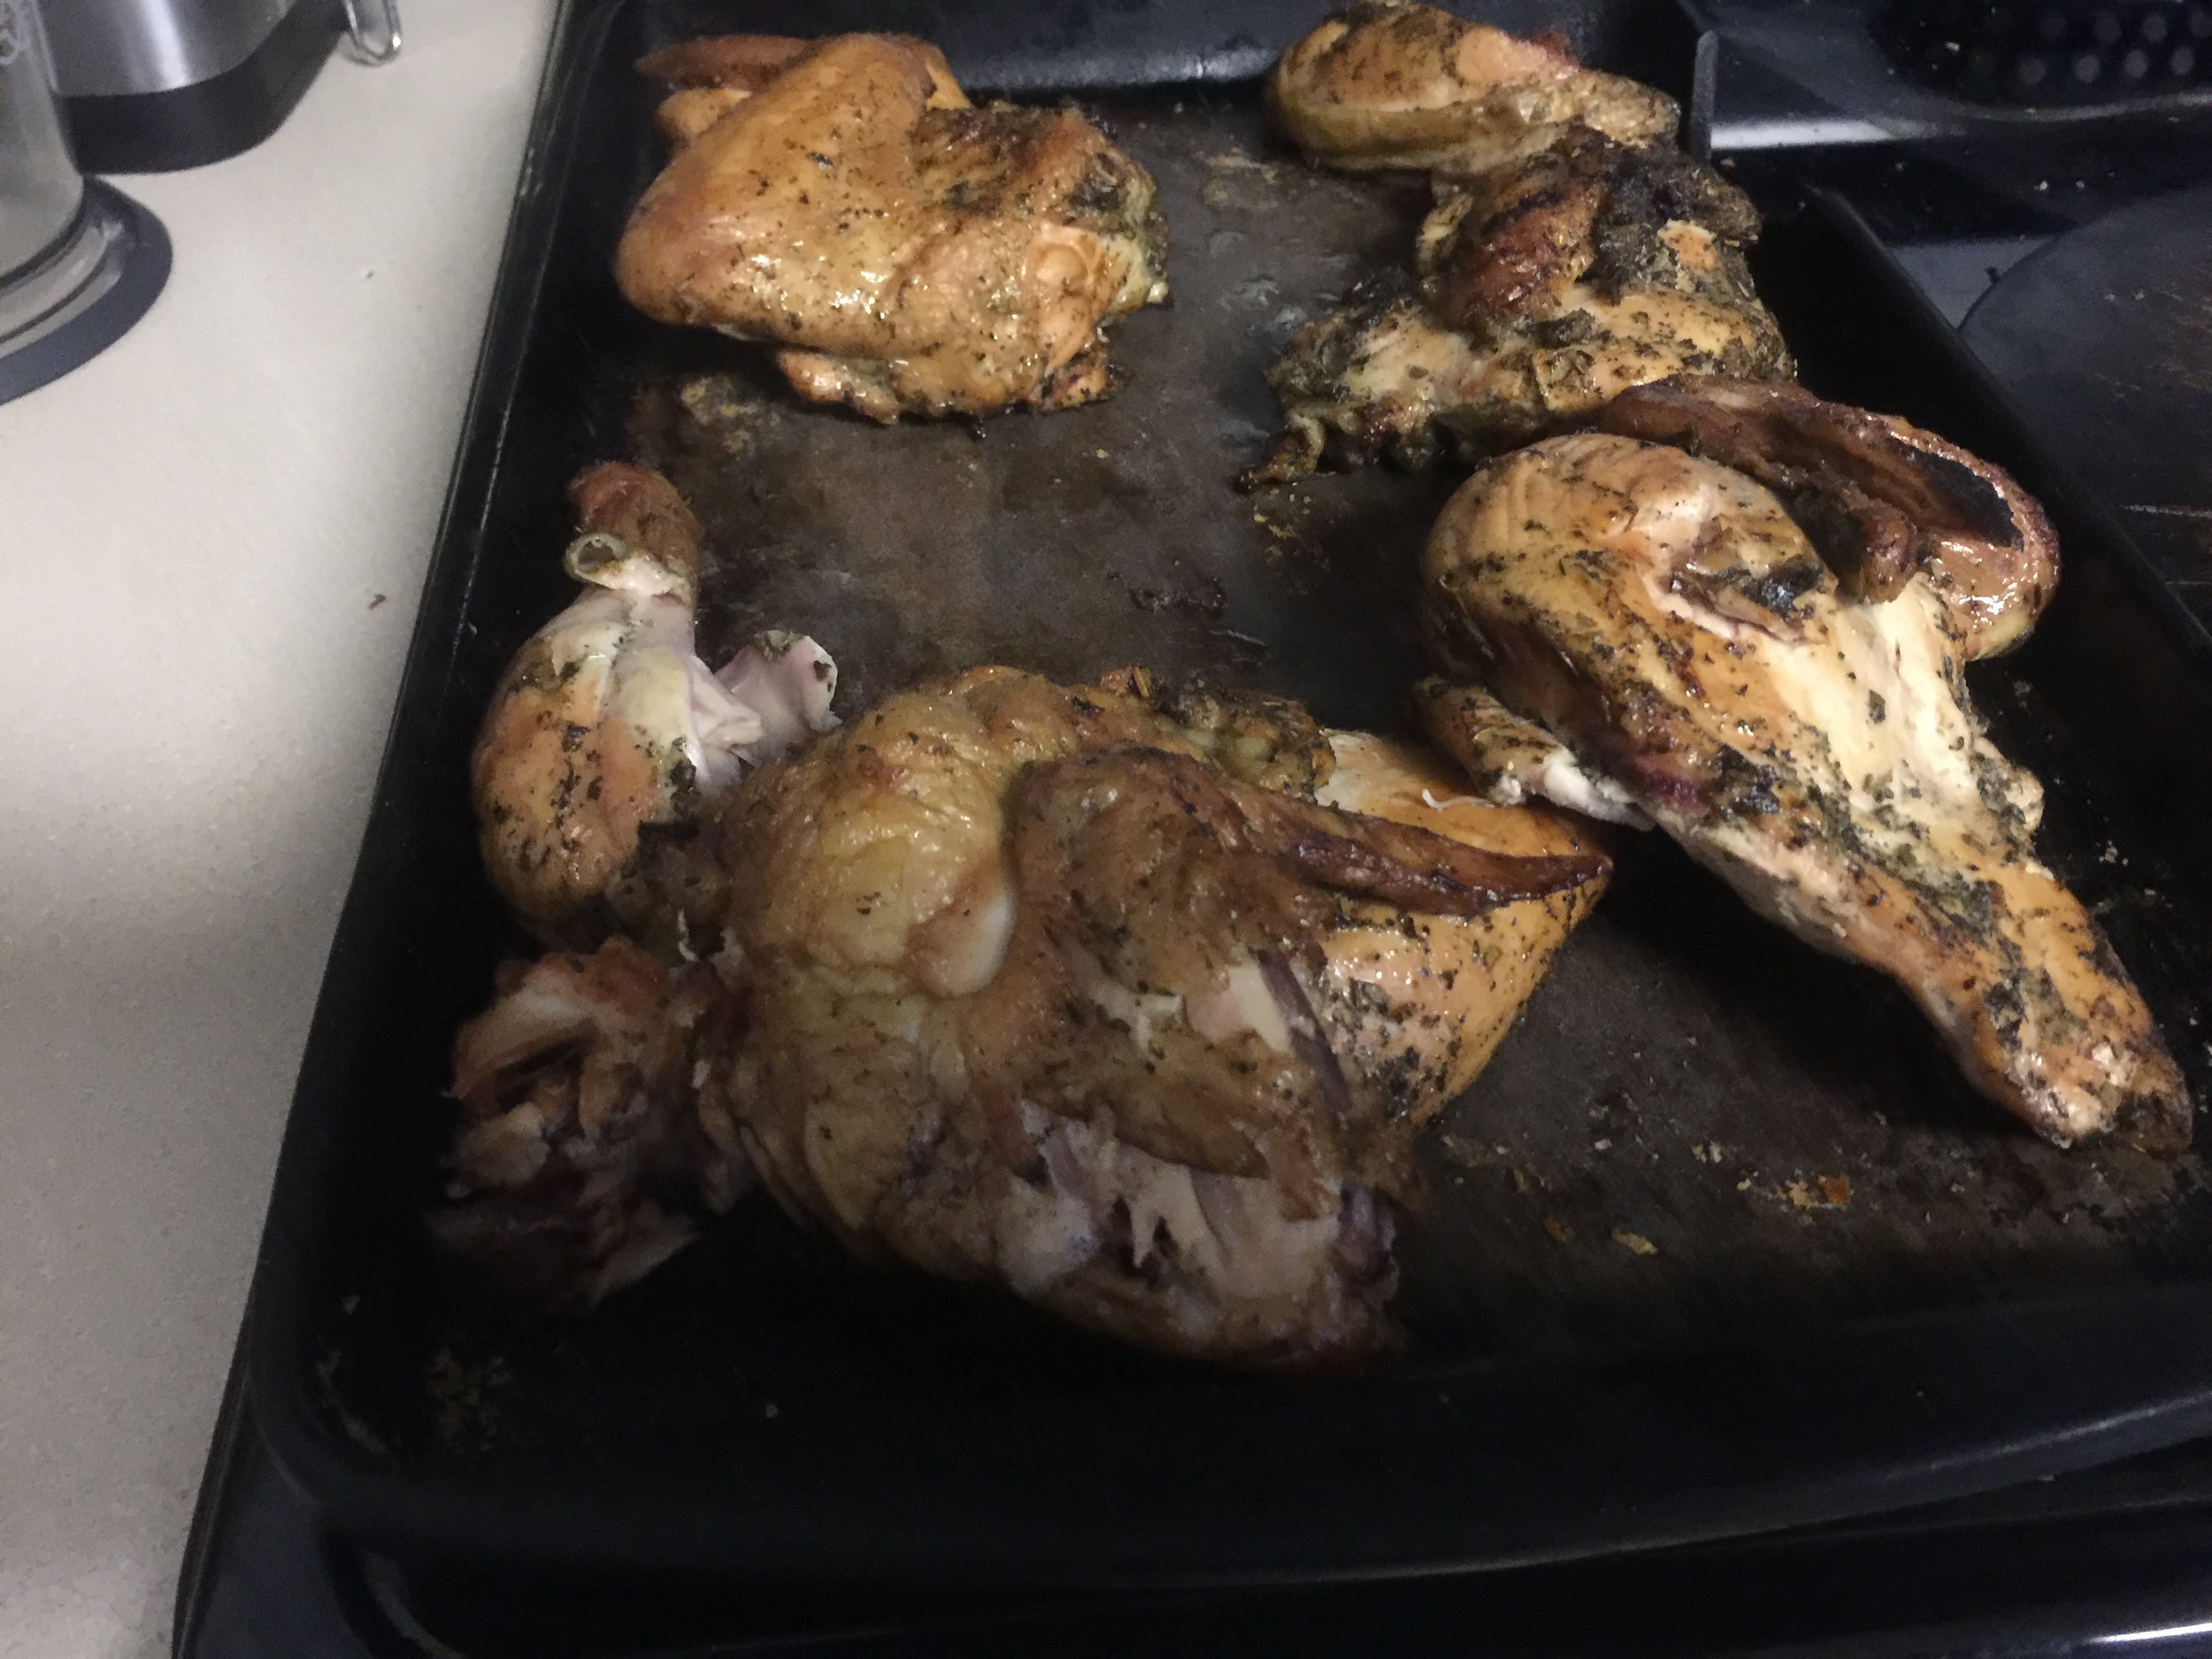
When our cheap ass gasser broke I decided to go back to my roots and get a Weber kettle. It Our SNS arrived today just prior to the time to start the Kingsford. Thanks to the authors of pitmaster.amazingribs.com and for providing the Amazon links. This cook was a little unorganized as I was trying to do too many things at once (like put together a new patio table for my bride). Dinner was chicken kabobs. Boneless, skinless, free range chicken breasts are what my wife brought home. No time to brine, my preferred method for chicken breasts, so I went out to the garden and picked some lemon thyme, cilantro, and rosemary and threw them in the mortar, added some fresh squeezed lemon juice, EVO from an Arizona Monastery we had visited in the spring, and freshly ground pepper. Hit it all with a pestle then put it into a ziplock bag with the chicken and into the fridge for thirty minutes. Added some mesquite chips just prior to putting the chicken on ( picking up wood chunks today). Chicken went on the grill first and after 25 minutes added the kabob rack over the chicken with only the corn on it. Last to go on the rack was the veg. Cook was about 340 according to the Weber lid thermometer ( I know I know, my new maverick arrives Monday). While the chicken was cooking I trimmed and portioned two 7 pound butts and added the fat slab to the grill as a burnt offering (my wife: what smells so good?) the timing was good as the chips did not last long as you might have guessed. Things I learned, experimentation is a must and it can occur as you cook. I meant to mark the 1/4, 1/3, 1/2 and full vent openings with a sharpie prior to cooking. That was critical as I both let the temp drop too low, 200 and too high, 500 for a few minutes each. I was very impressed with the sped in which you can change temperatures with the bottom vent. I did leave the top vent open 1/2 way for the duration of the cook, thanks to the advice of the fine pit masters.
Sunday morning the butts will come out of the fridge and go on the Weber for an 8 hour love fest with smoke, really stoked about that. Thanks to all the pit master club members who help make us better providers of deliciousness for our friends and families. Keep scrolling down past the pictures for our first real low and slow cooked pulled pork.
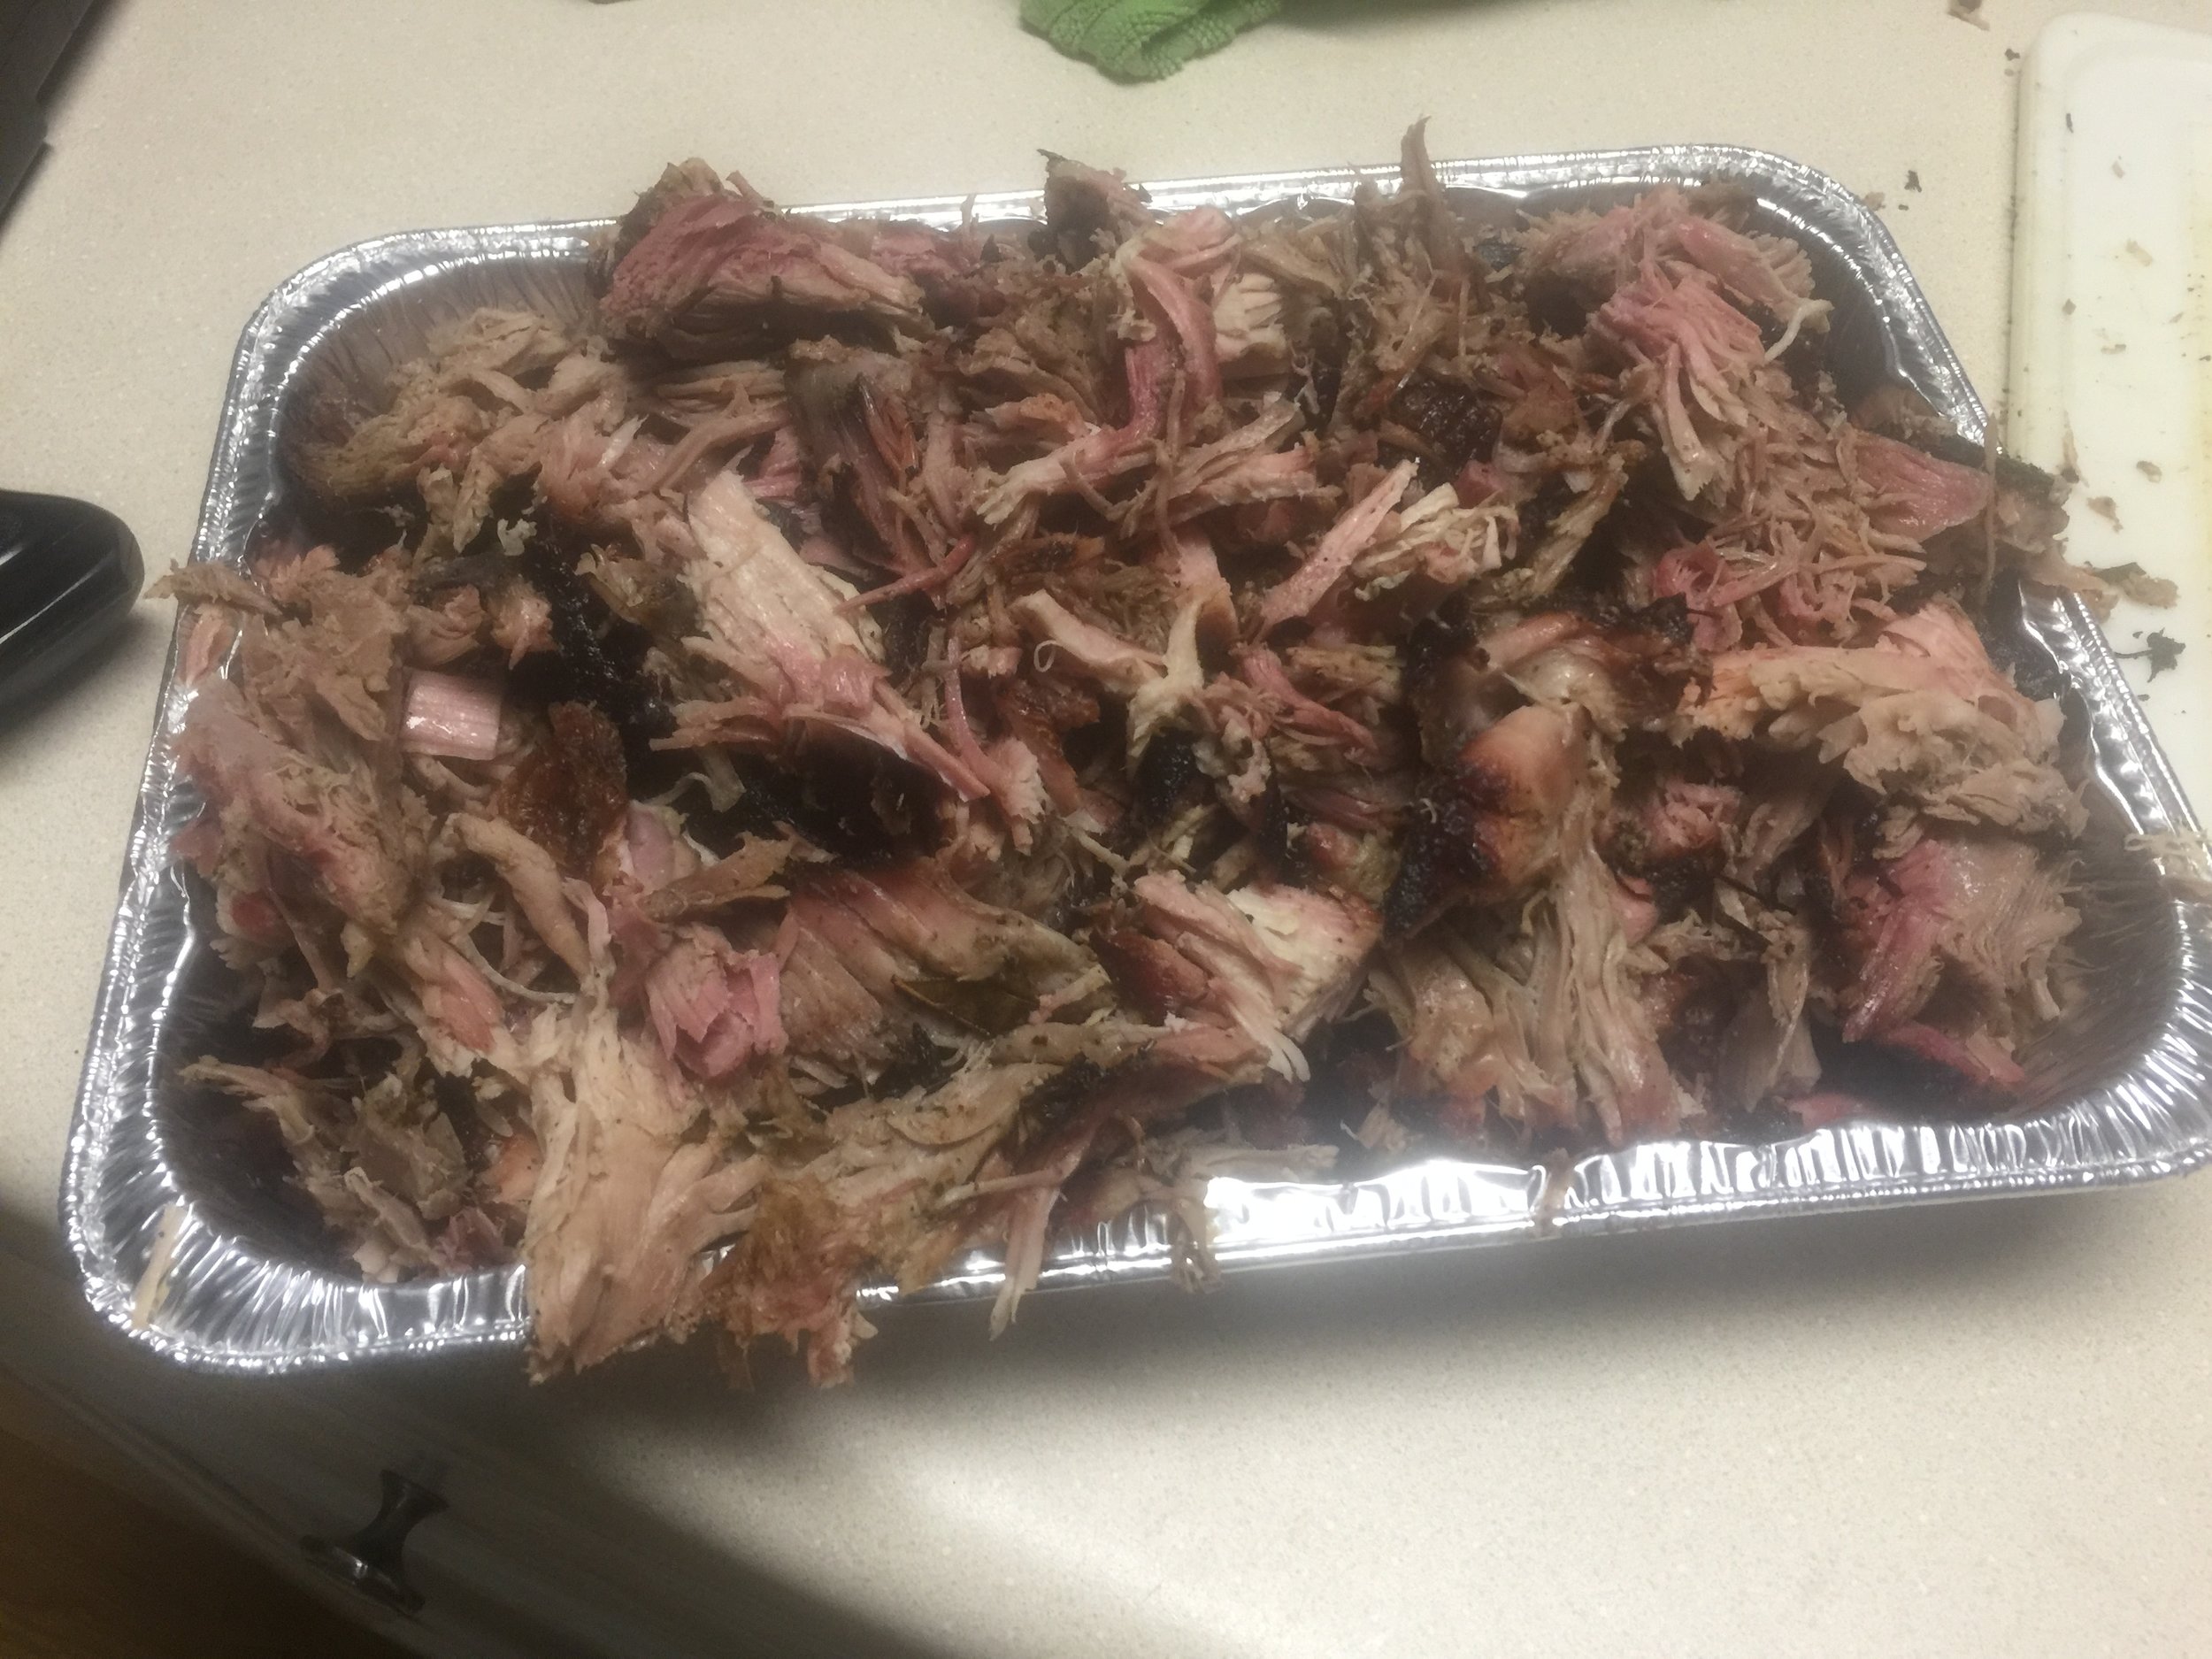
Sunday, May 1, 2016 Pulled Pork
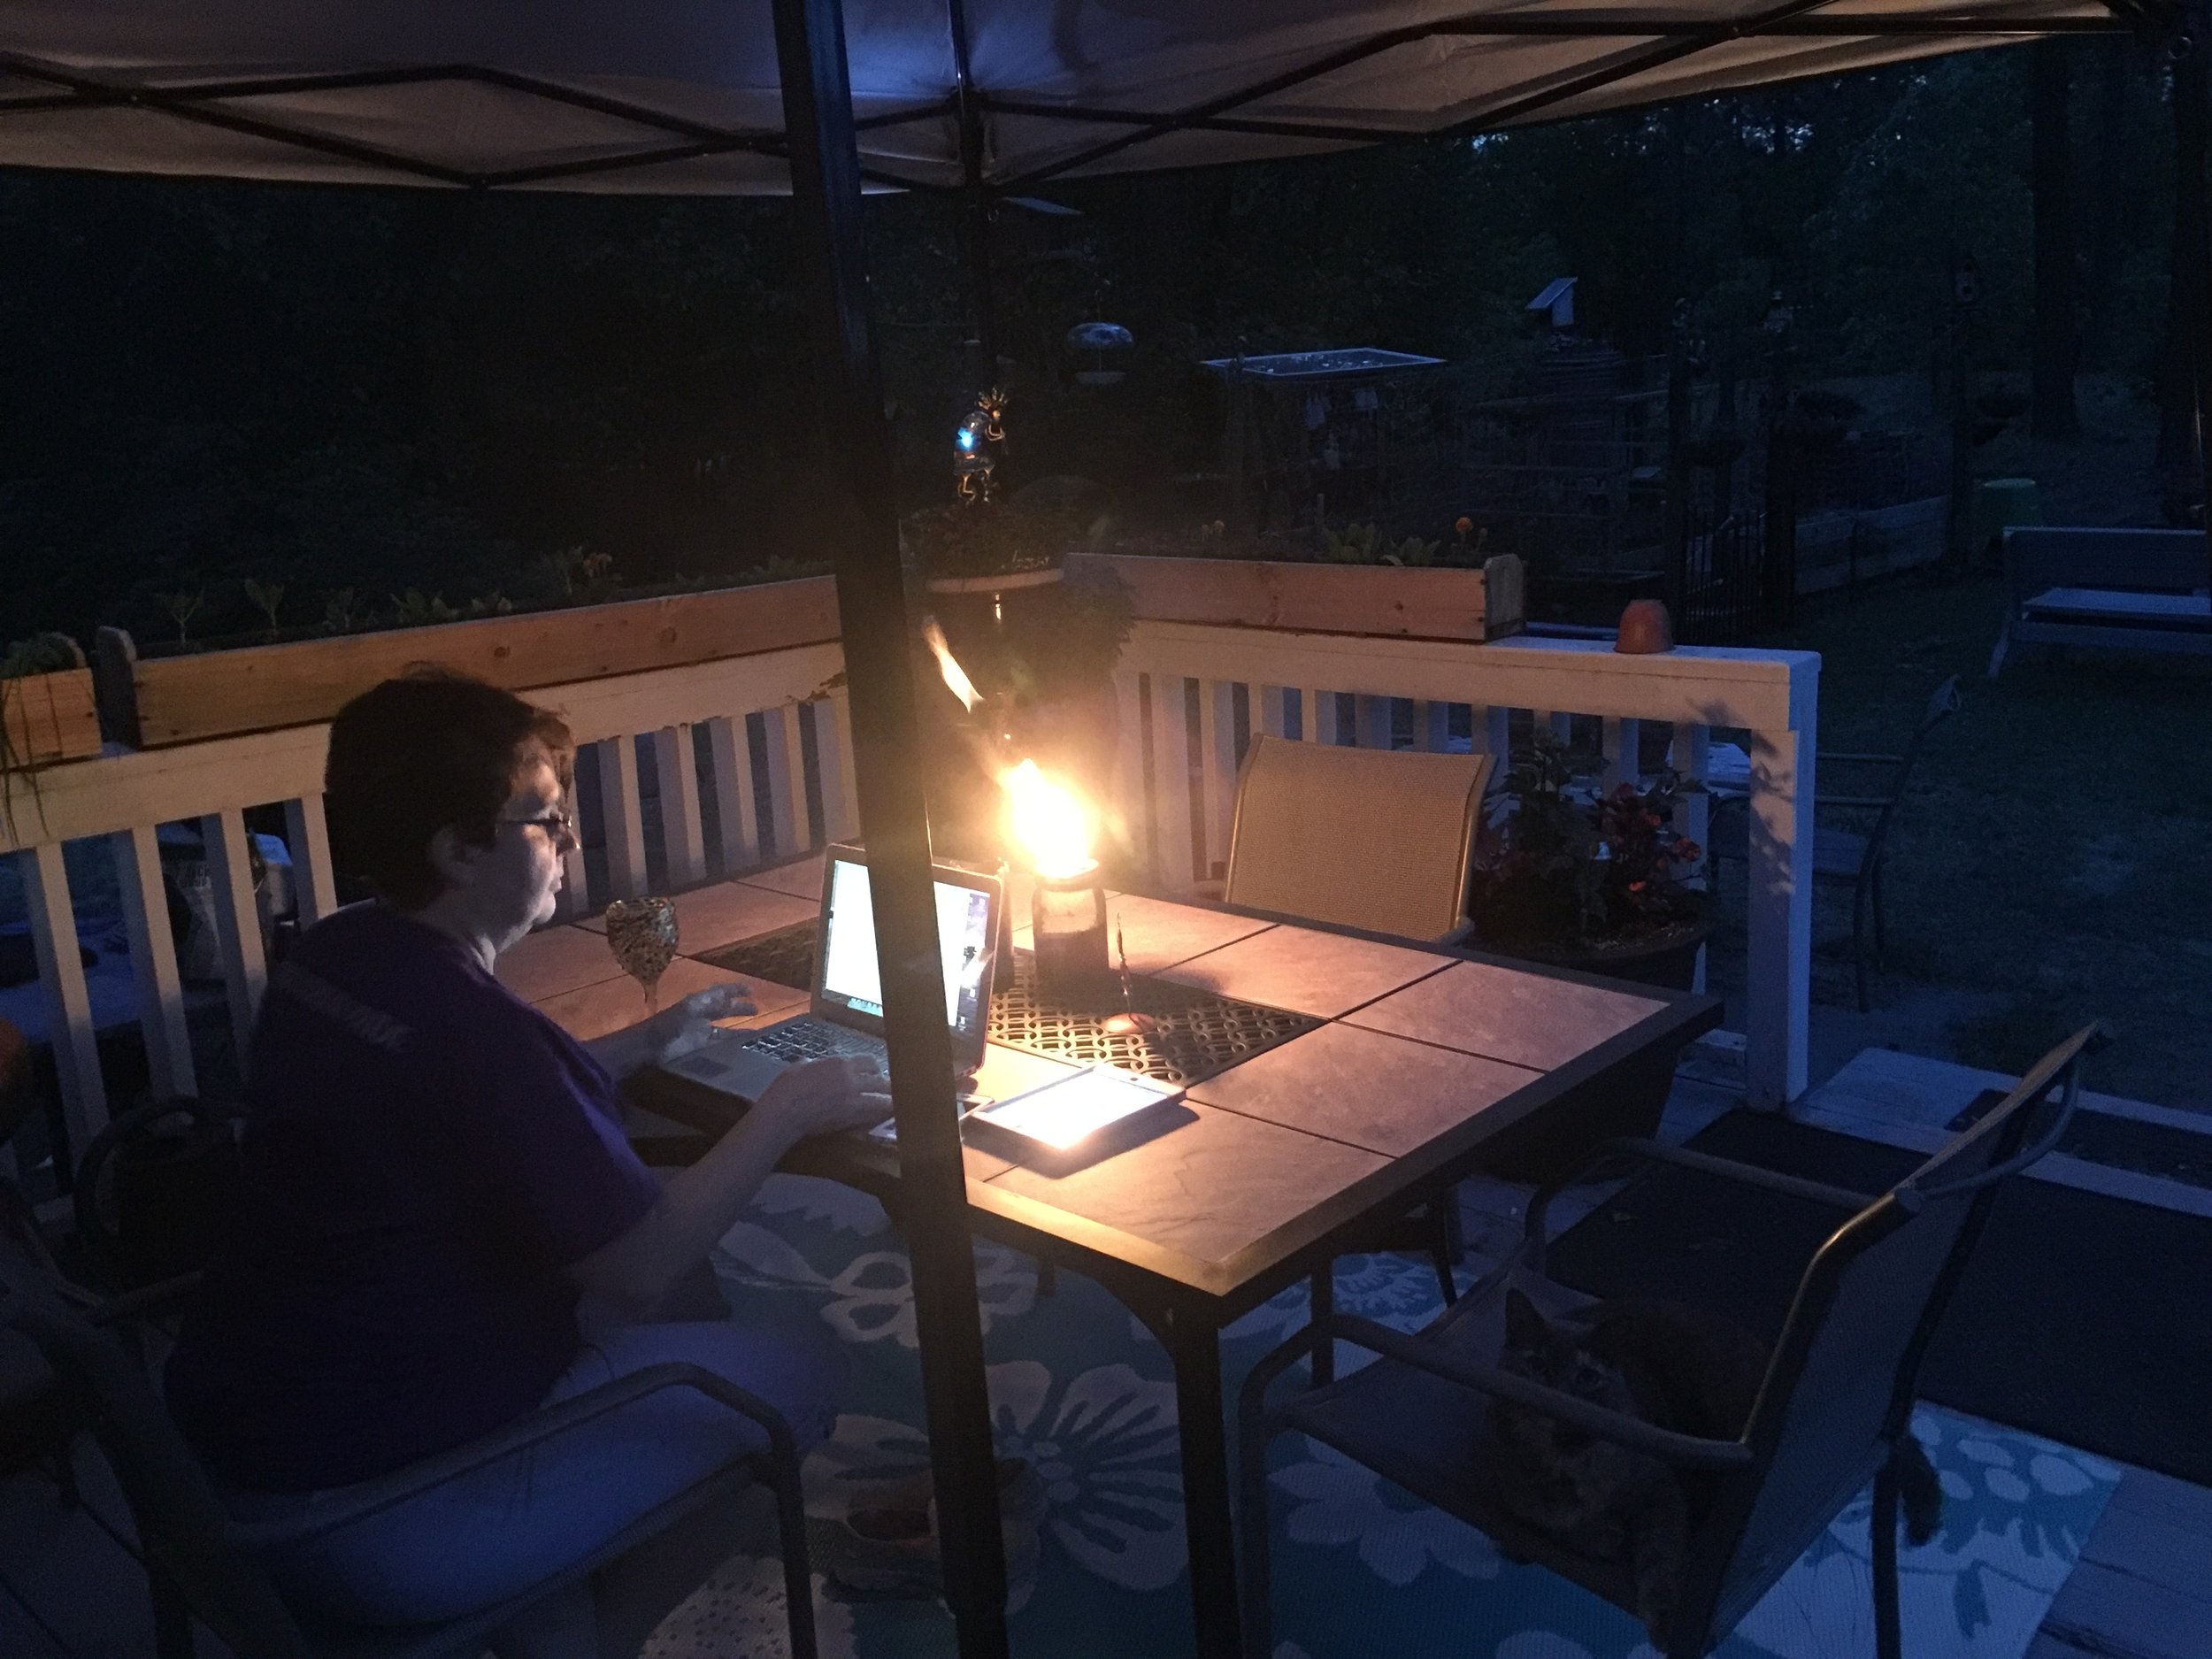
Started late, meat went on at 8:30ish. I followed the Perfect Pulled Pork recipe and the instructions from ABC Barbecue for the low and slow 225 degree cook on the SNS. It was 70 degrees outside but fluctuated up and down as the rain came and went. I moved the grill under the porch canopy for the day before it started to rain.
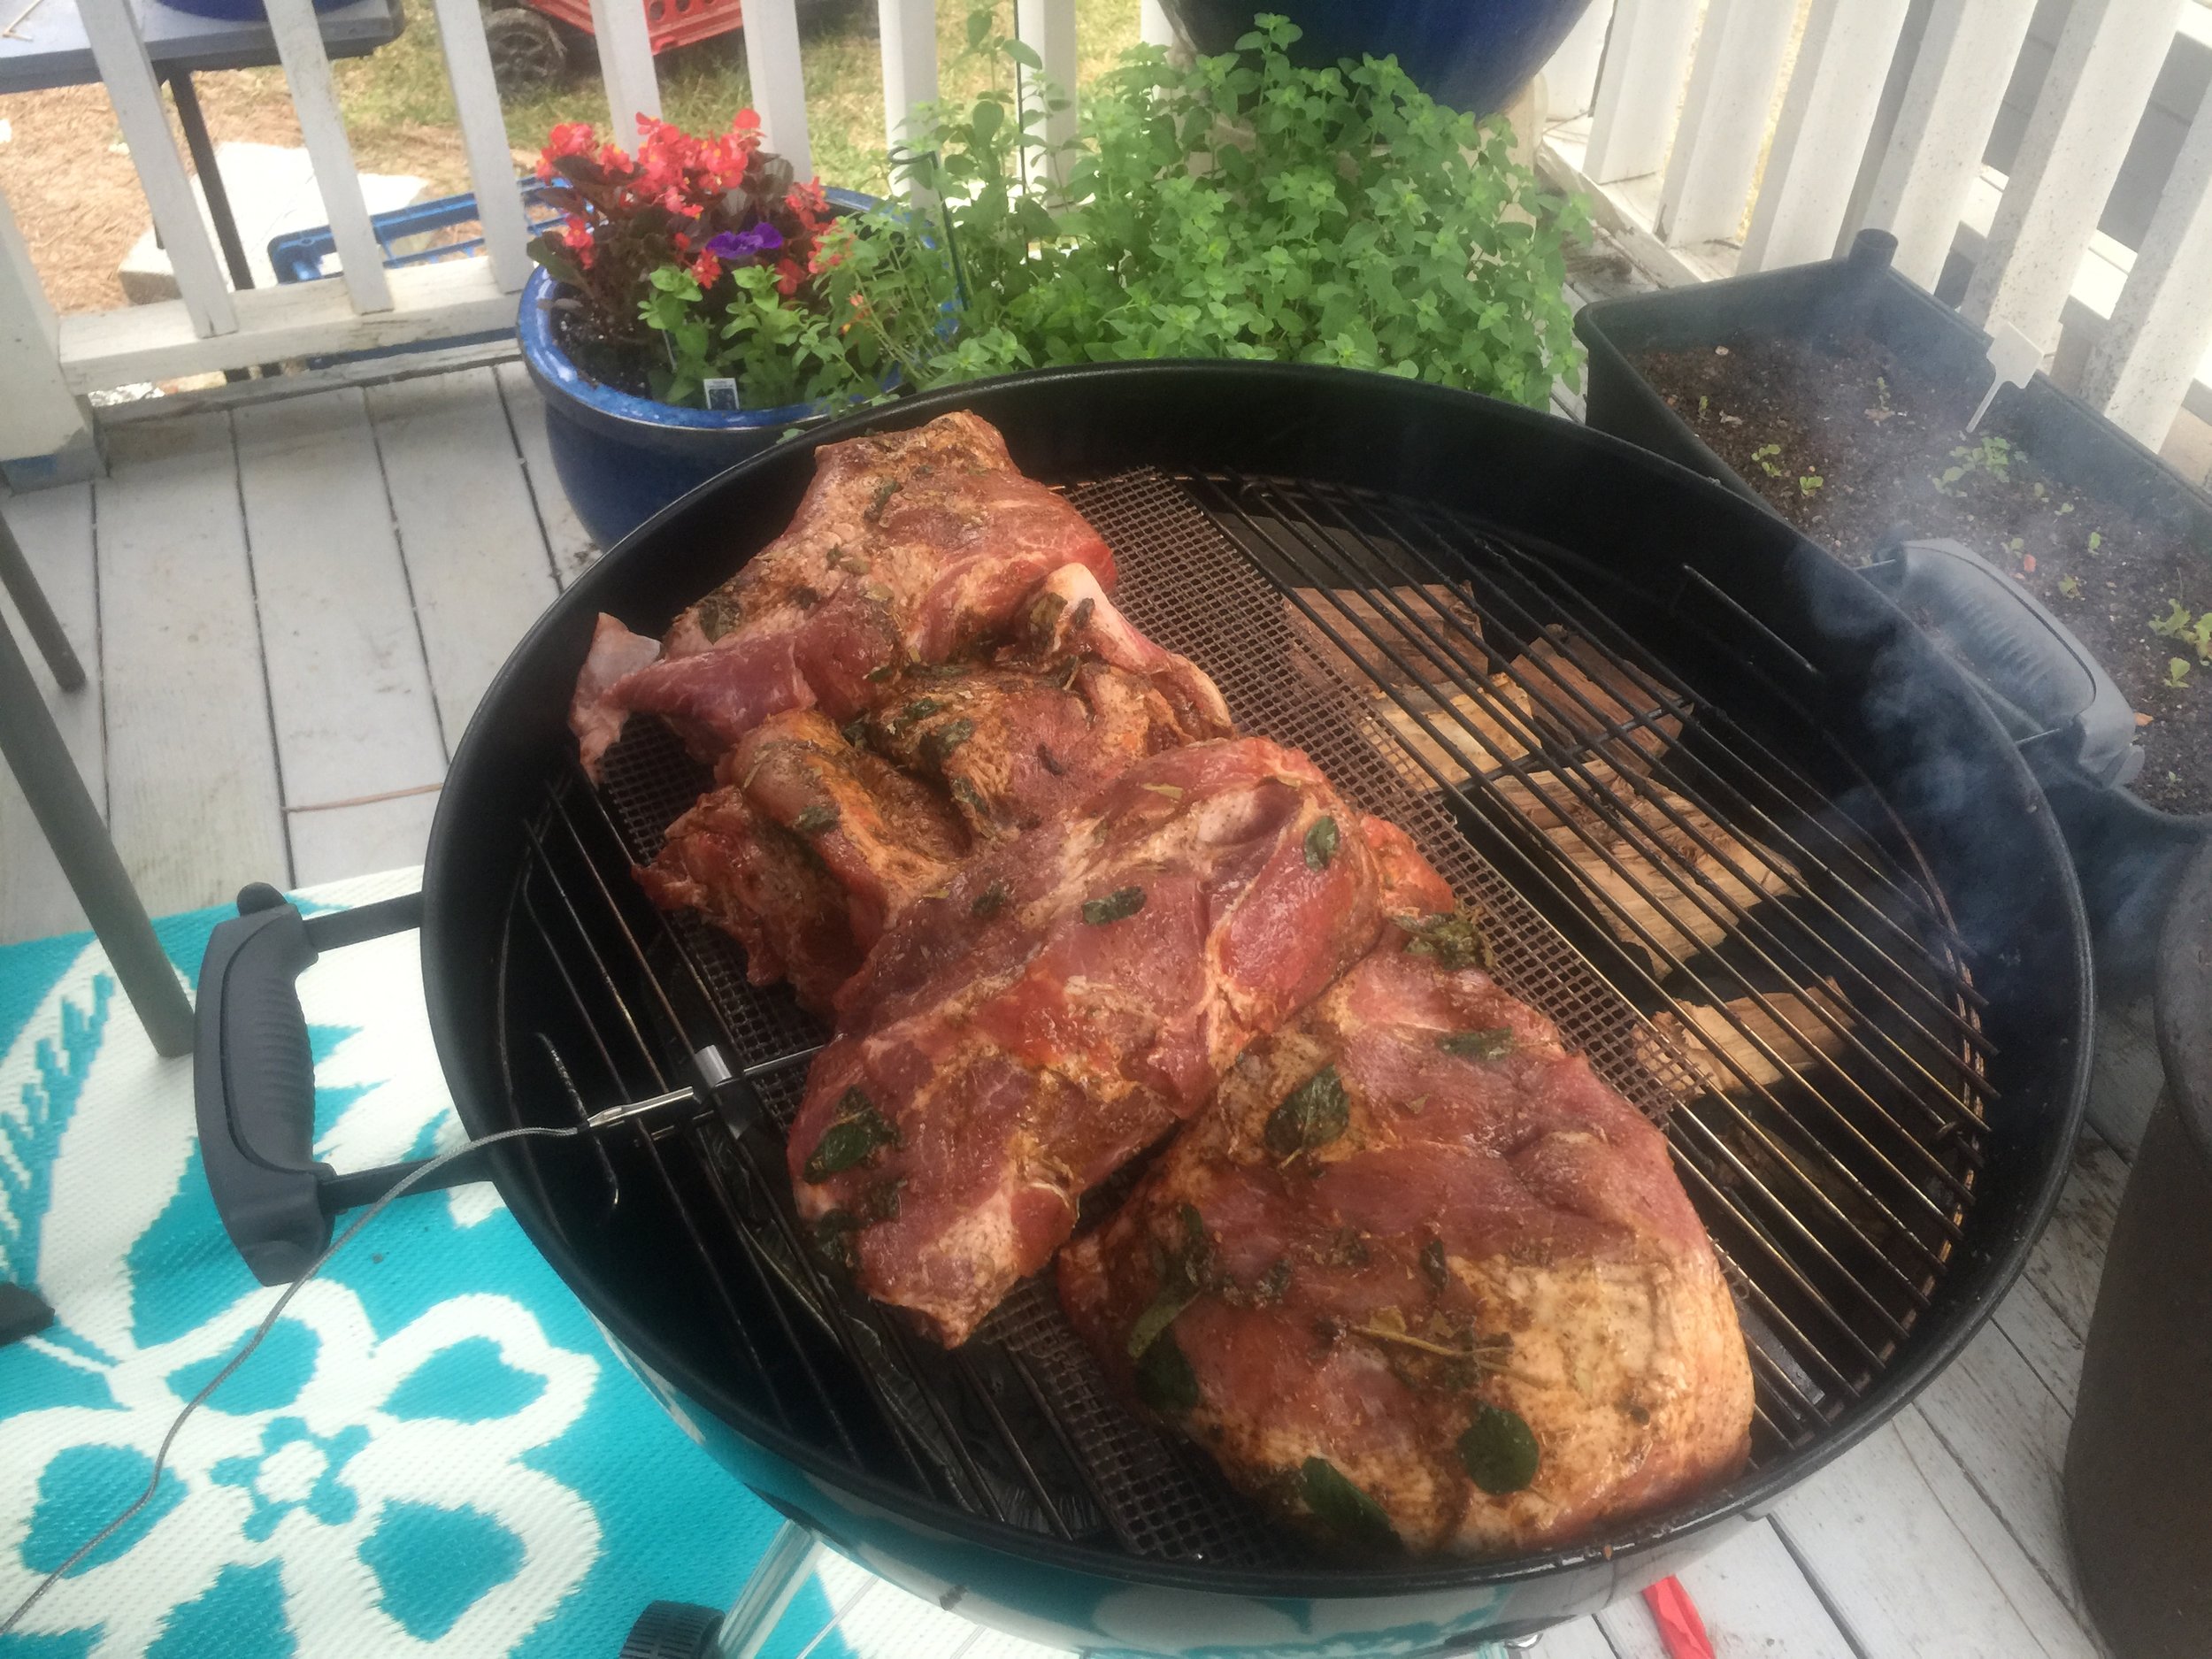
Friday night I halved two 7.5 pound butts. The first I cut along the bone giving me one bone in and one bone out butt, both with a narrower end on one side. The other I halved at the end of the bone giving me to uniform pieces and again one bone in and one bone out. I salted them all with pink Himalayan salt and sea salt through the grinder. They went into the fridge from there. 36 hours later, after the grill was started (giving me 15 minutes to prep the butts) the butts came out and were rinsed and patted dry. I made a paste of olive oil, dried sage, fresh oregano, cayenne pepper powder, minced garlic, bay leaves and my go to for everything, masala. The amounts were as follows:
Pulled Pork Rub/Paste #1
1/4 cup EVO
2 Tablespoons Sage
A bunch (a handful) of fresh oregano minced
1 teaspoon cayenne
1 tablespoon Masala (this stuff is potent go easy until you get used to it)
1.5 tablespoon minced garlic
1 tablespoon minced bay leaves
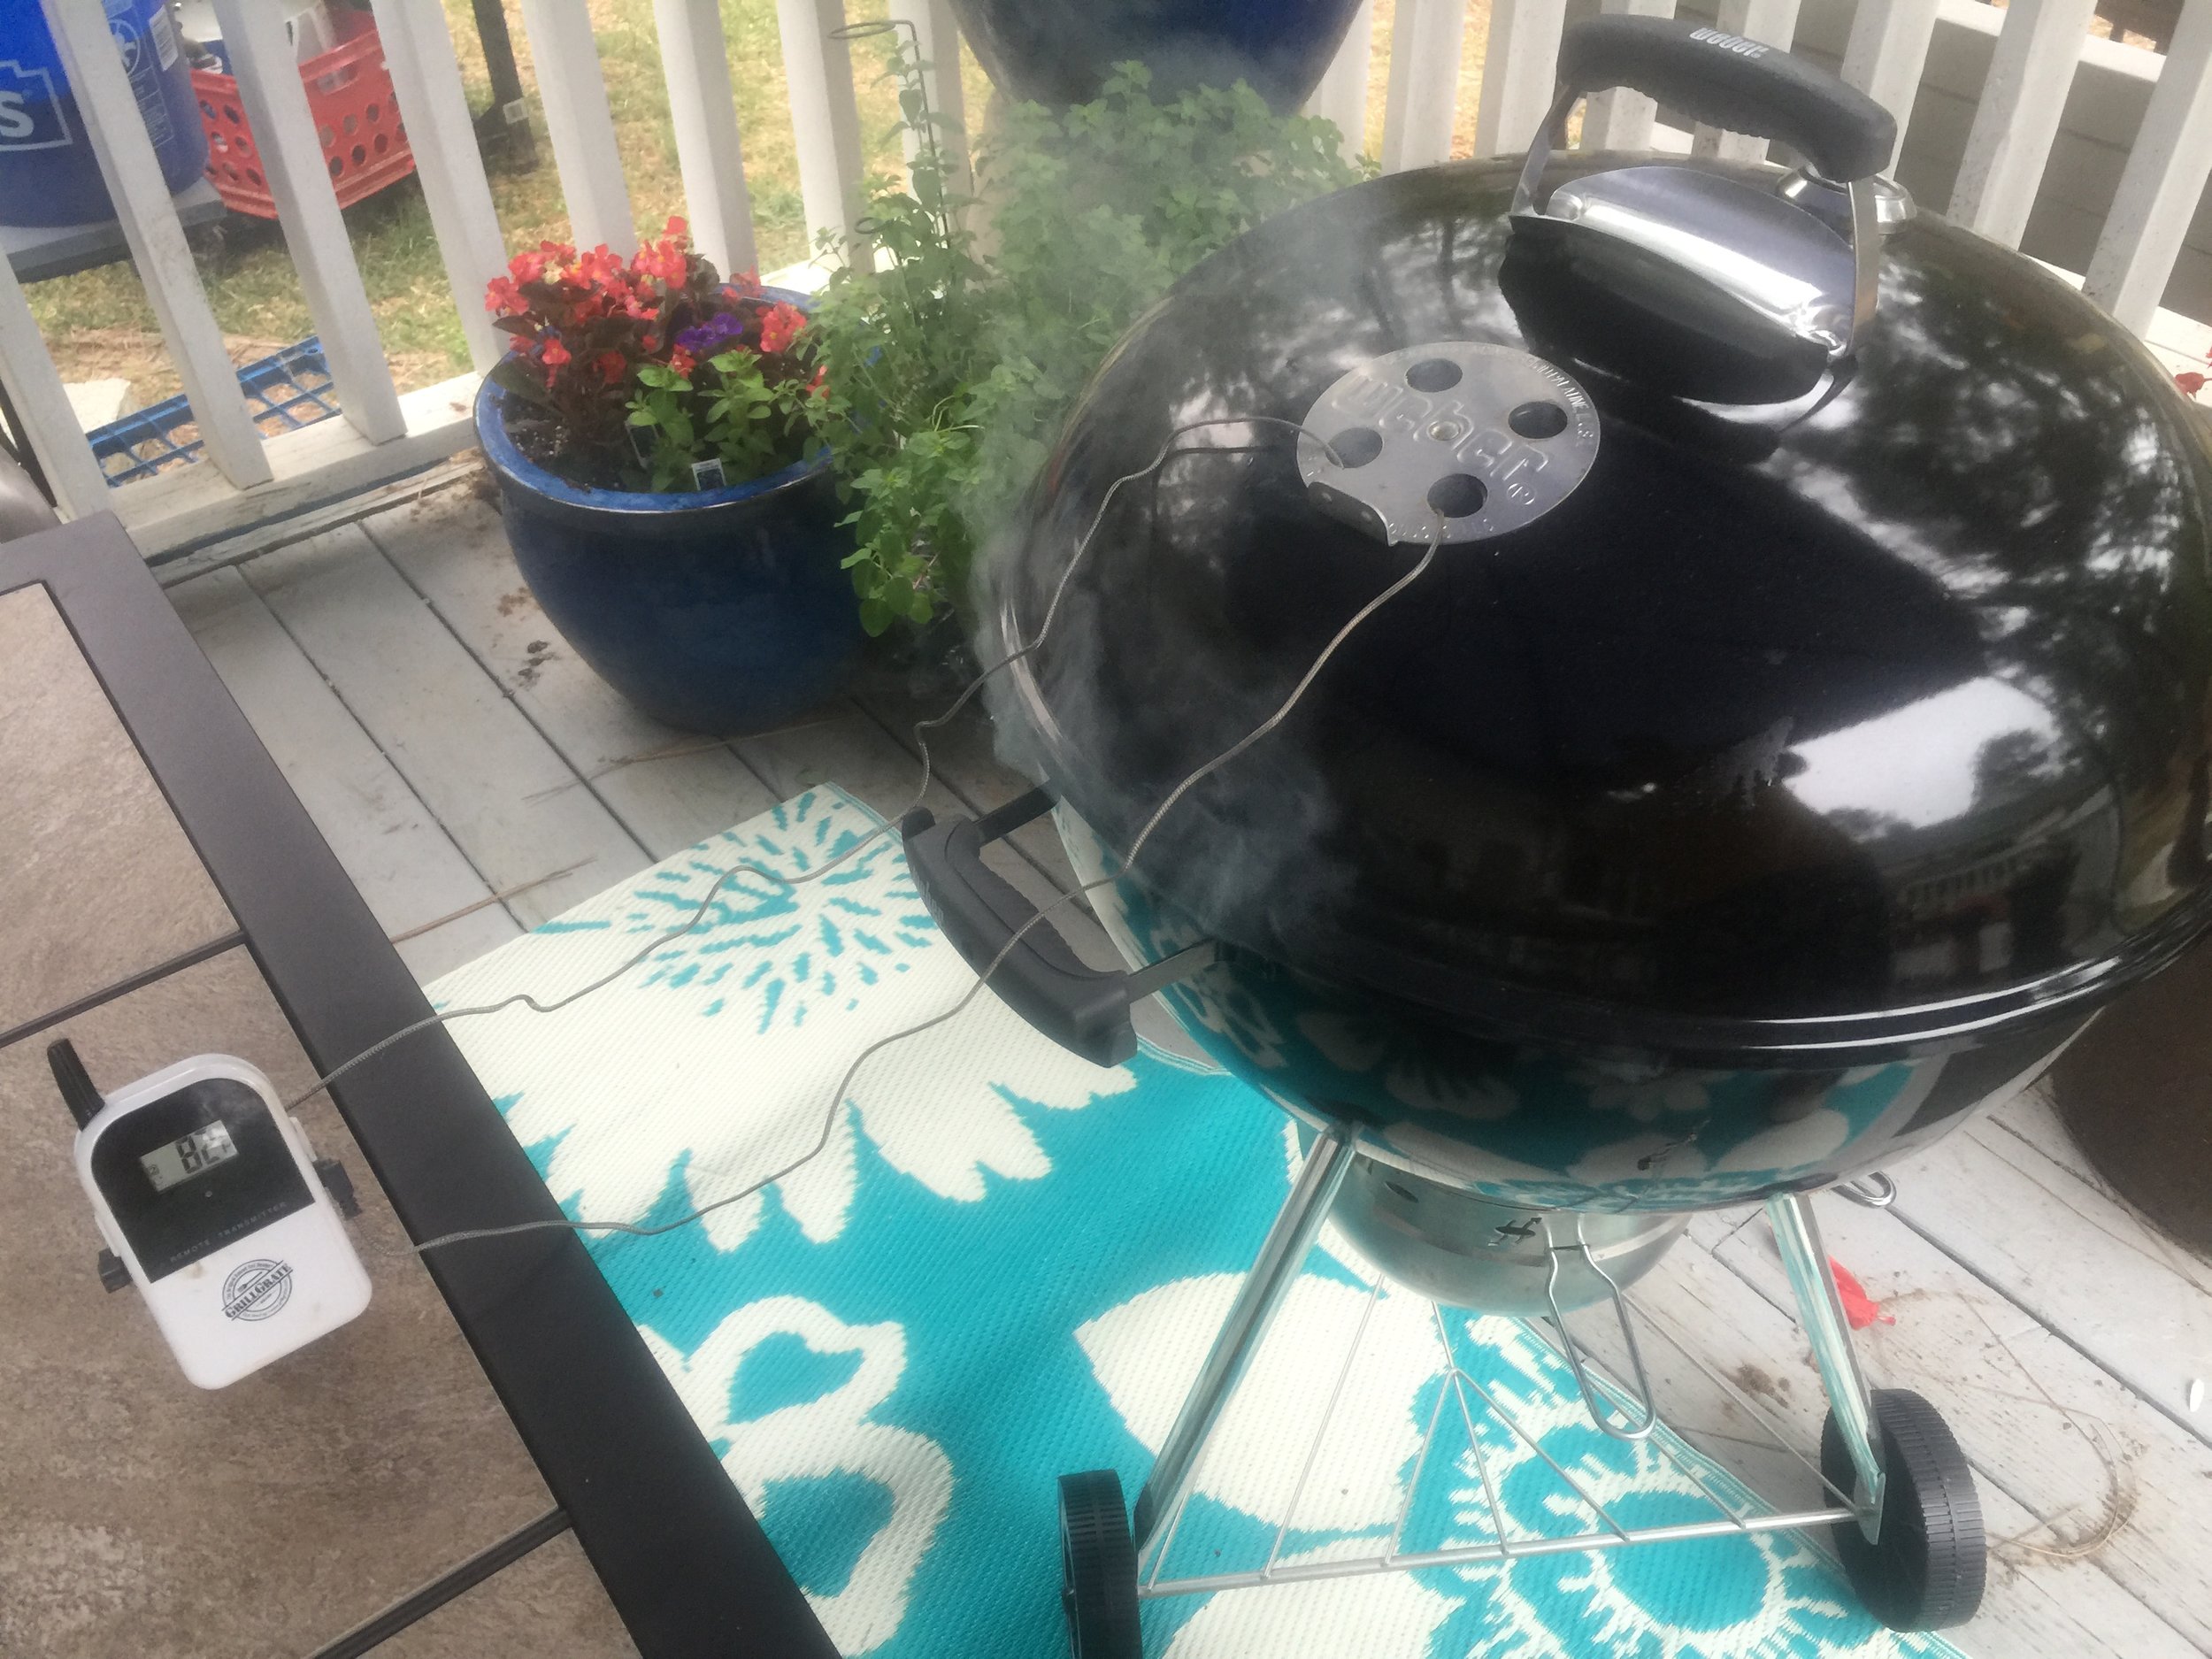
The ingredients went into a mortar and got worked over by the pestle. Then it was on to the meat and then the grill being ready, I added the rest of the briquettes, wood, and water, and set the grill grate on. Next went the meat and the thermometers, then the cover went on the grill with a vow not to peak for at least six hours.
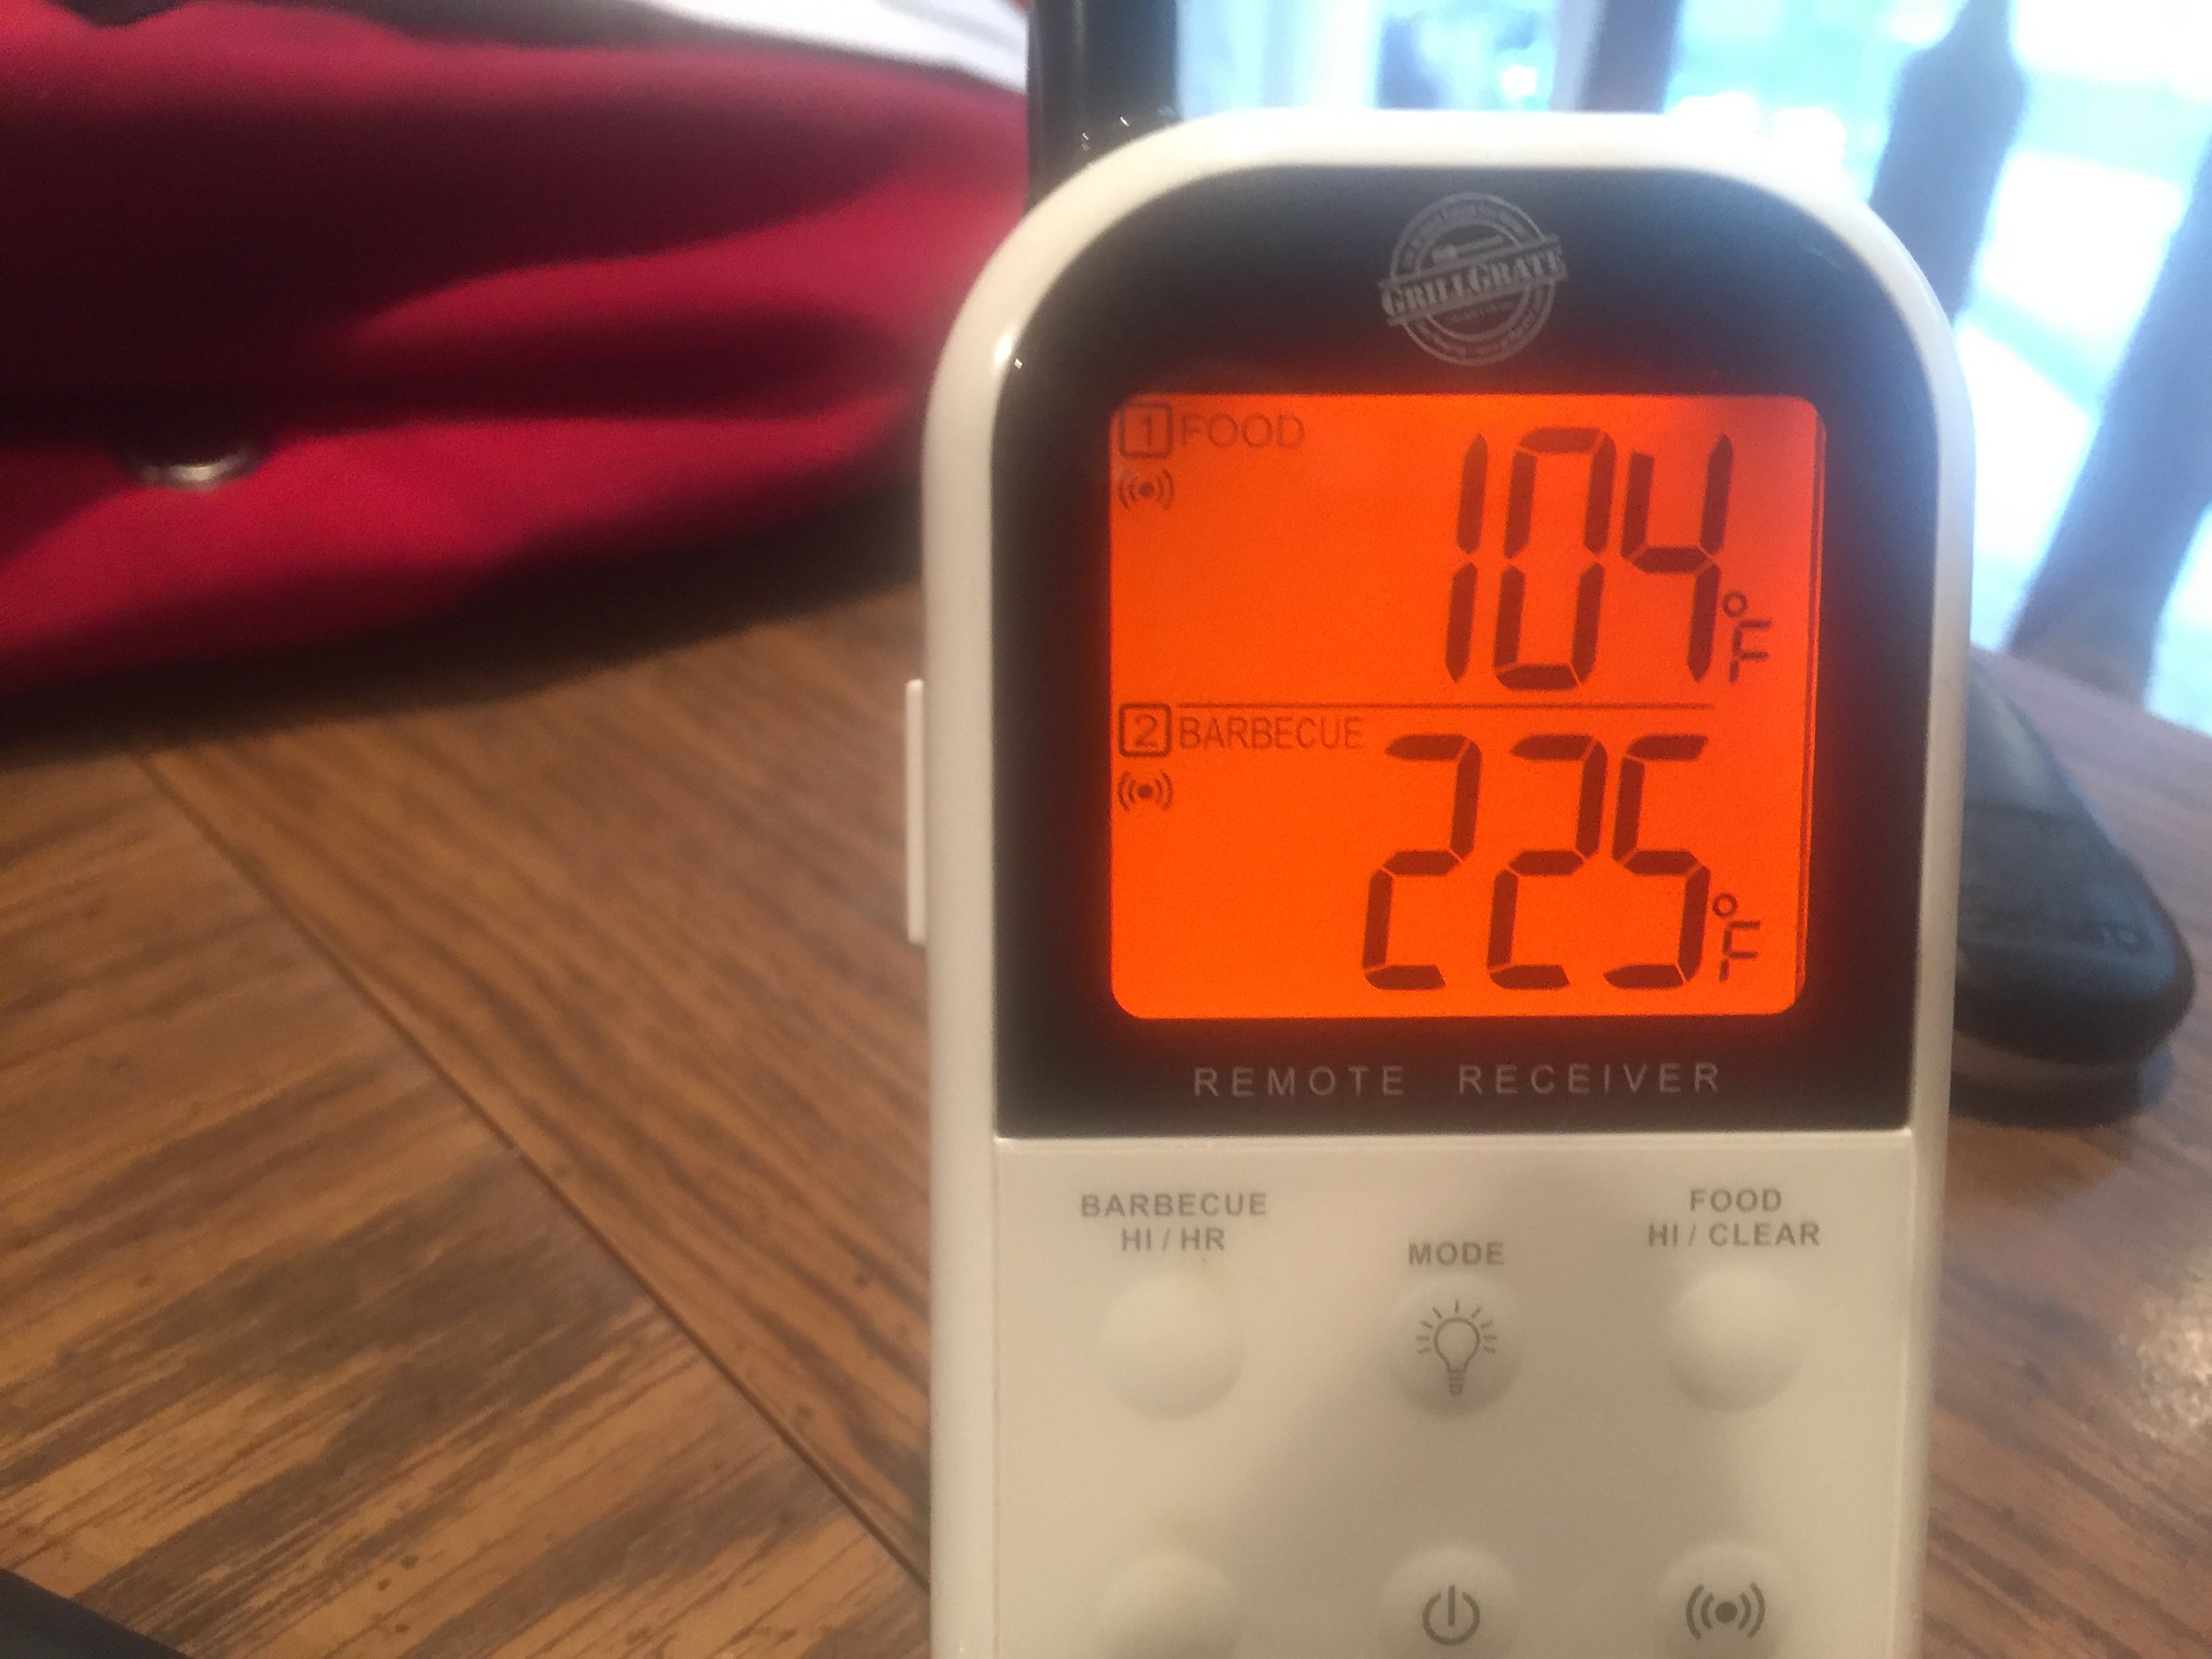
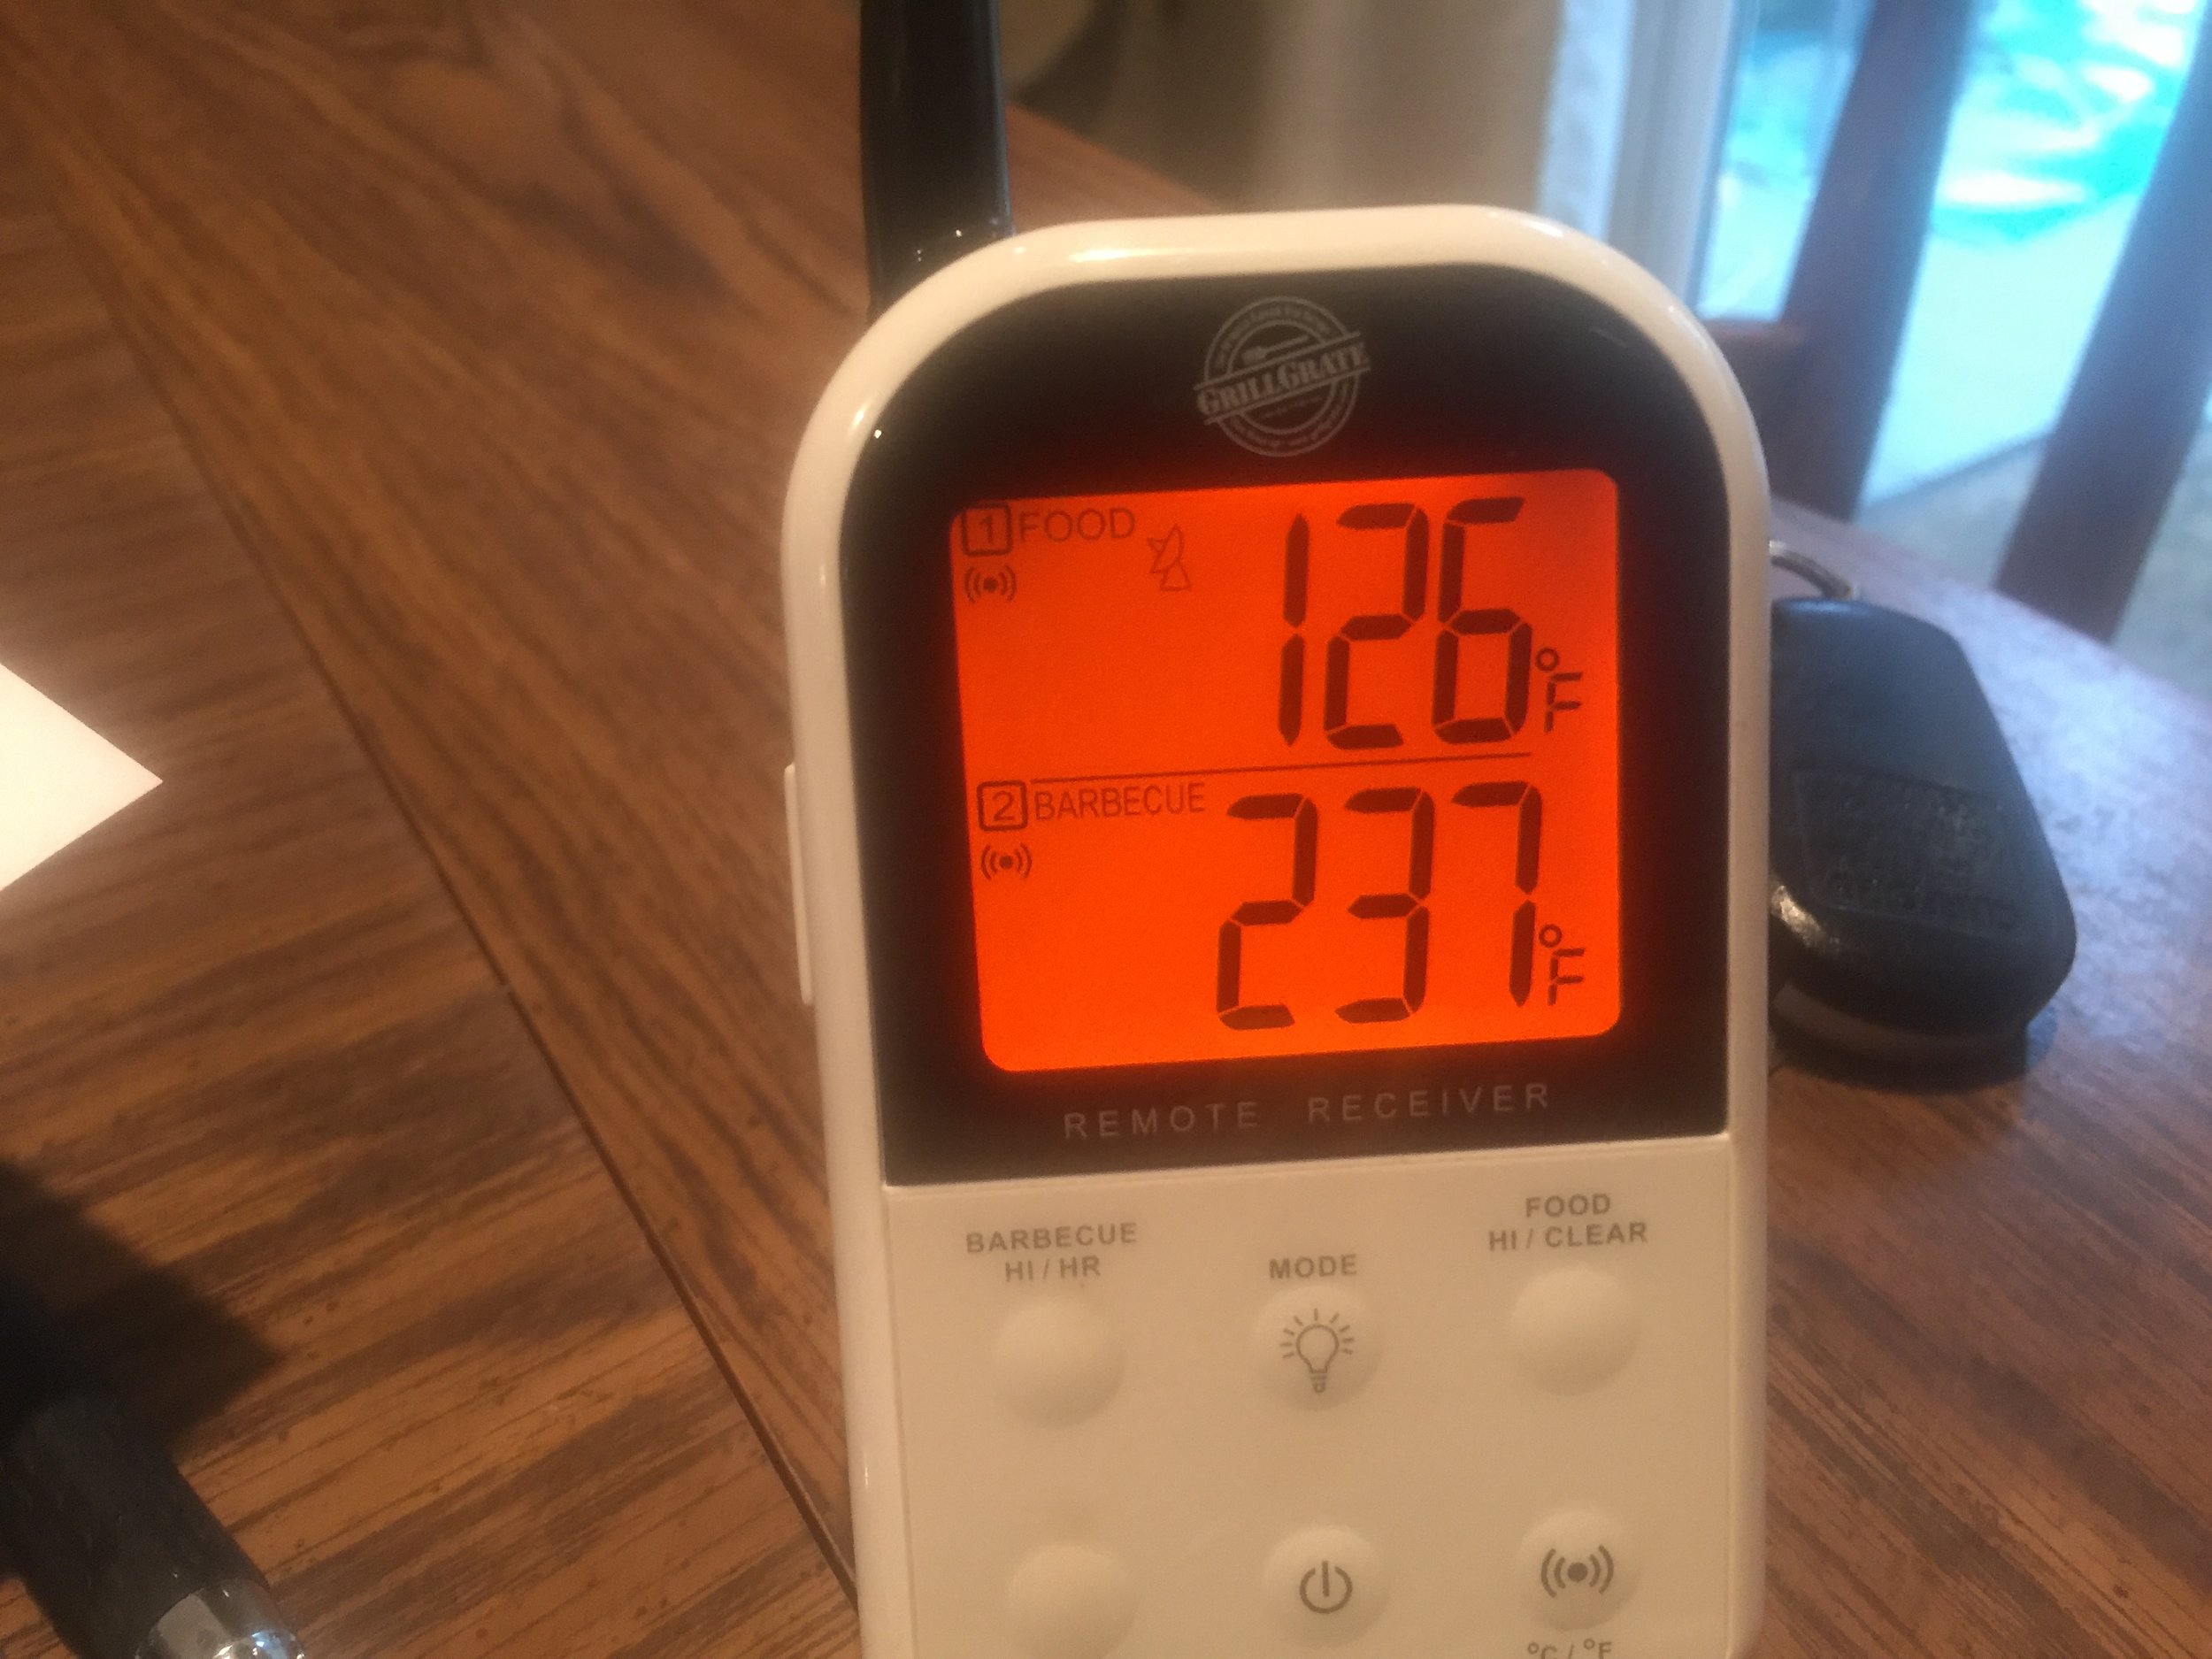
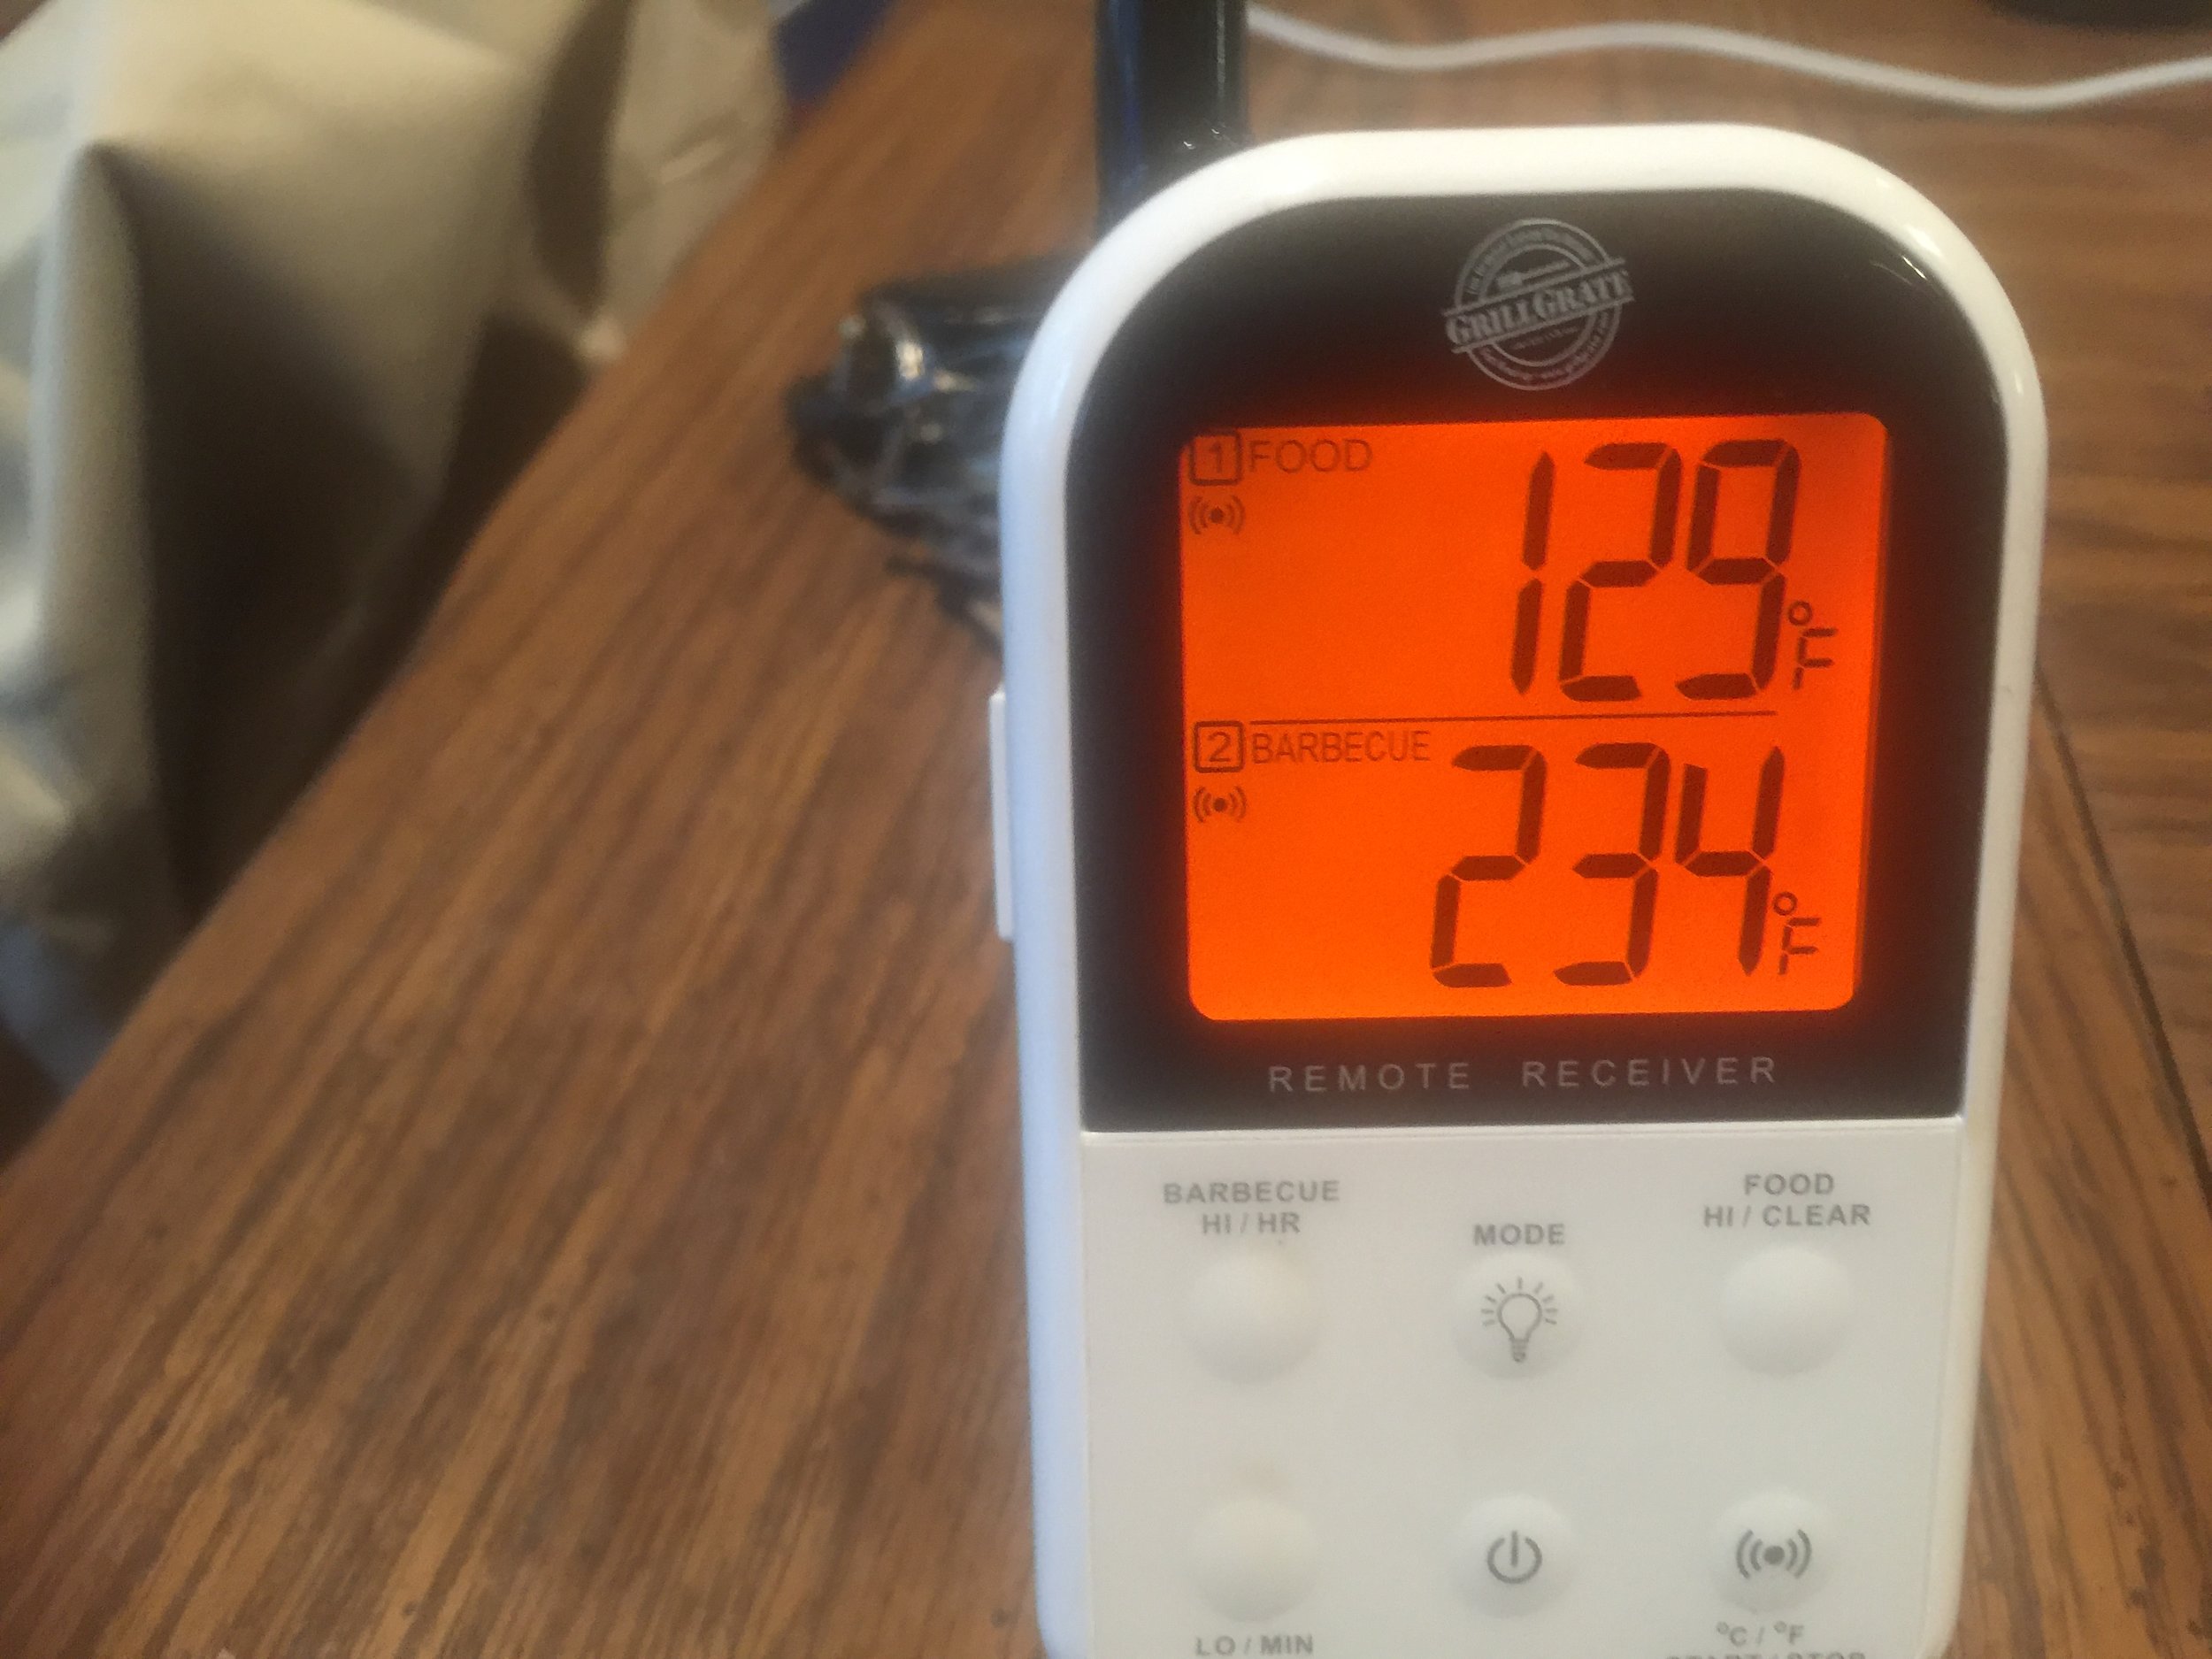
3:52 into the cook we are holding steady at 232 degrees BBQ. Meat temperature is 154.
4:10 into the cook we are at 225 and 156 respectively.
5:10 198 & 154
Added 10 charcoal and some wood of course temp plunged to 178 so I adjusted vents until it came to desired range and closed the vents to prescribed positions
5:30 214 & 154
6:41 214 & 162
7:34 255 & 163
7:49 250 & 165
At about 8:30 temperature started dropping hard had to add 3/4 chimney of brqquetes and 4 wood chunks
9:00 back at 221 & 171
10:30 finished a tad high at 318 but dead on at 195 on the meat
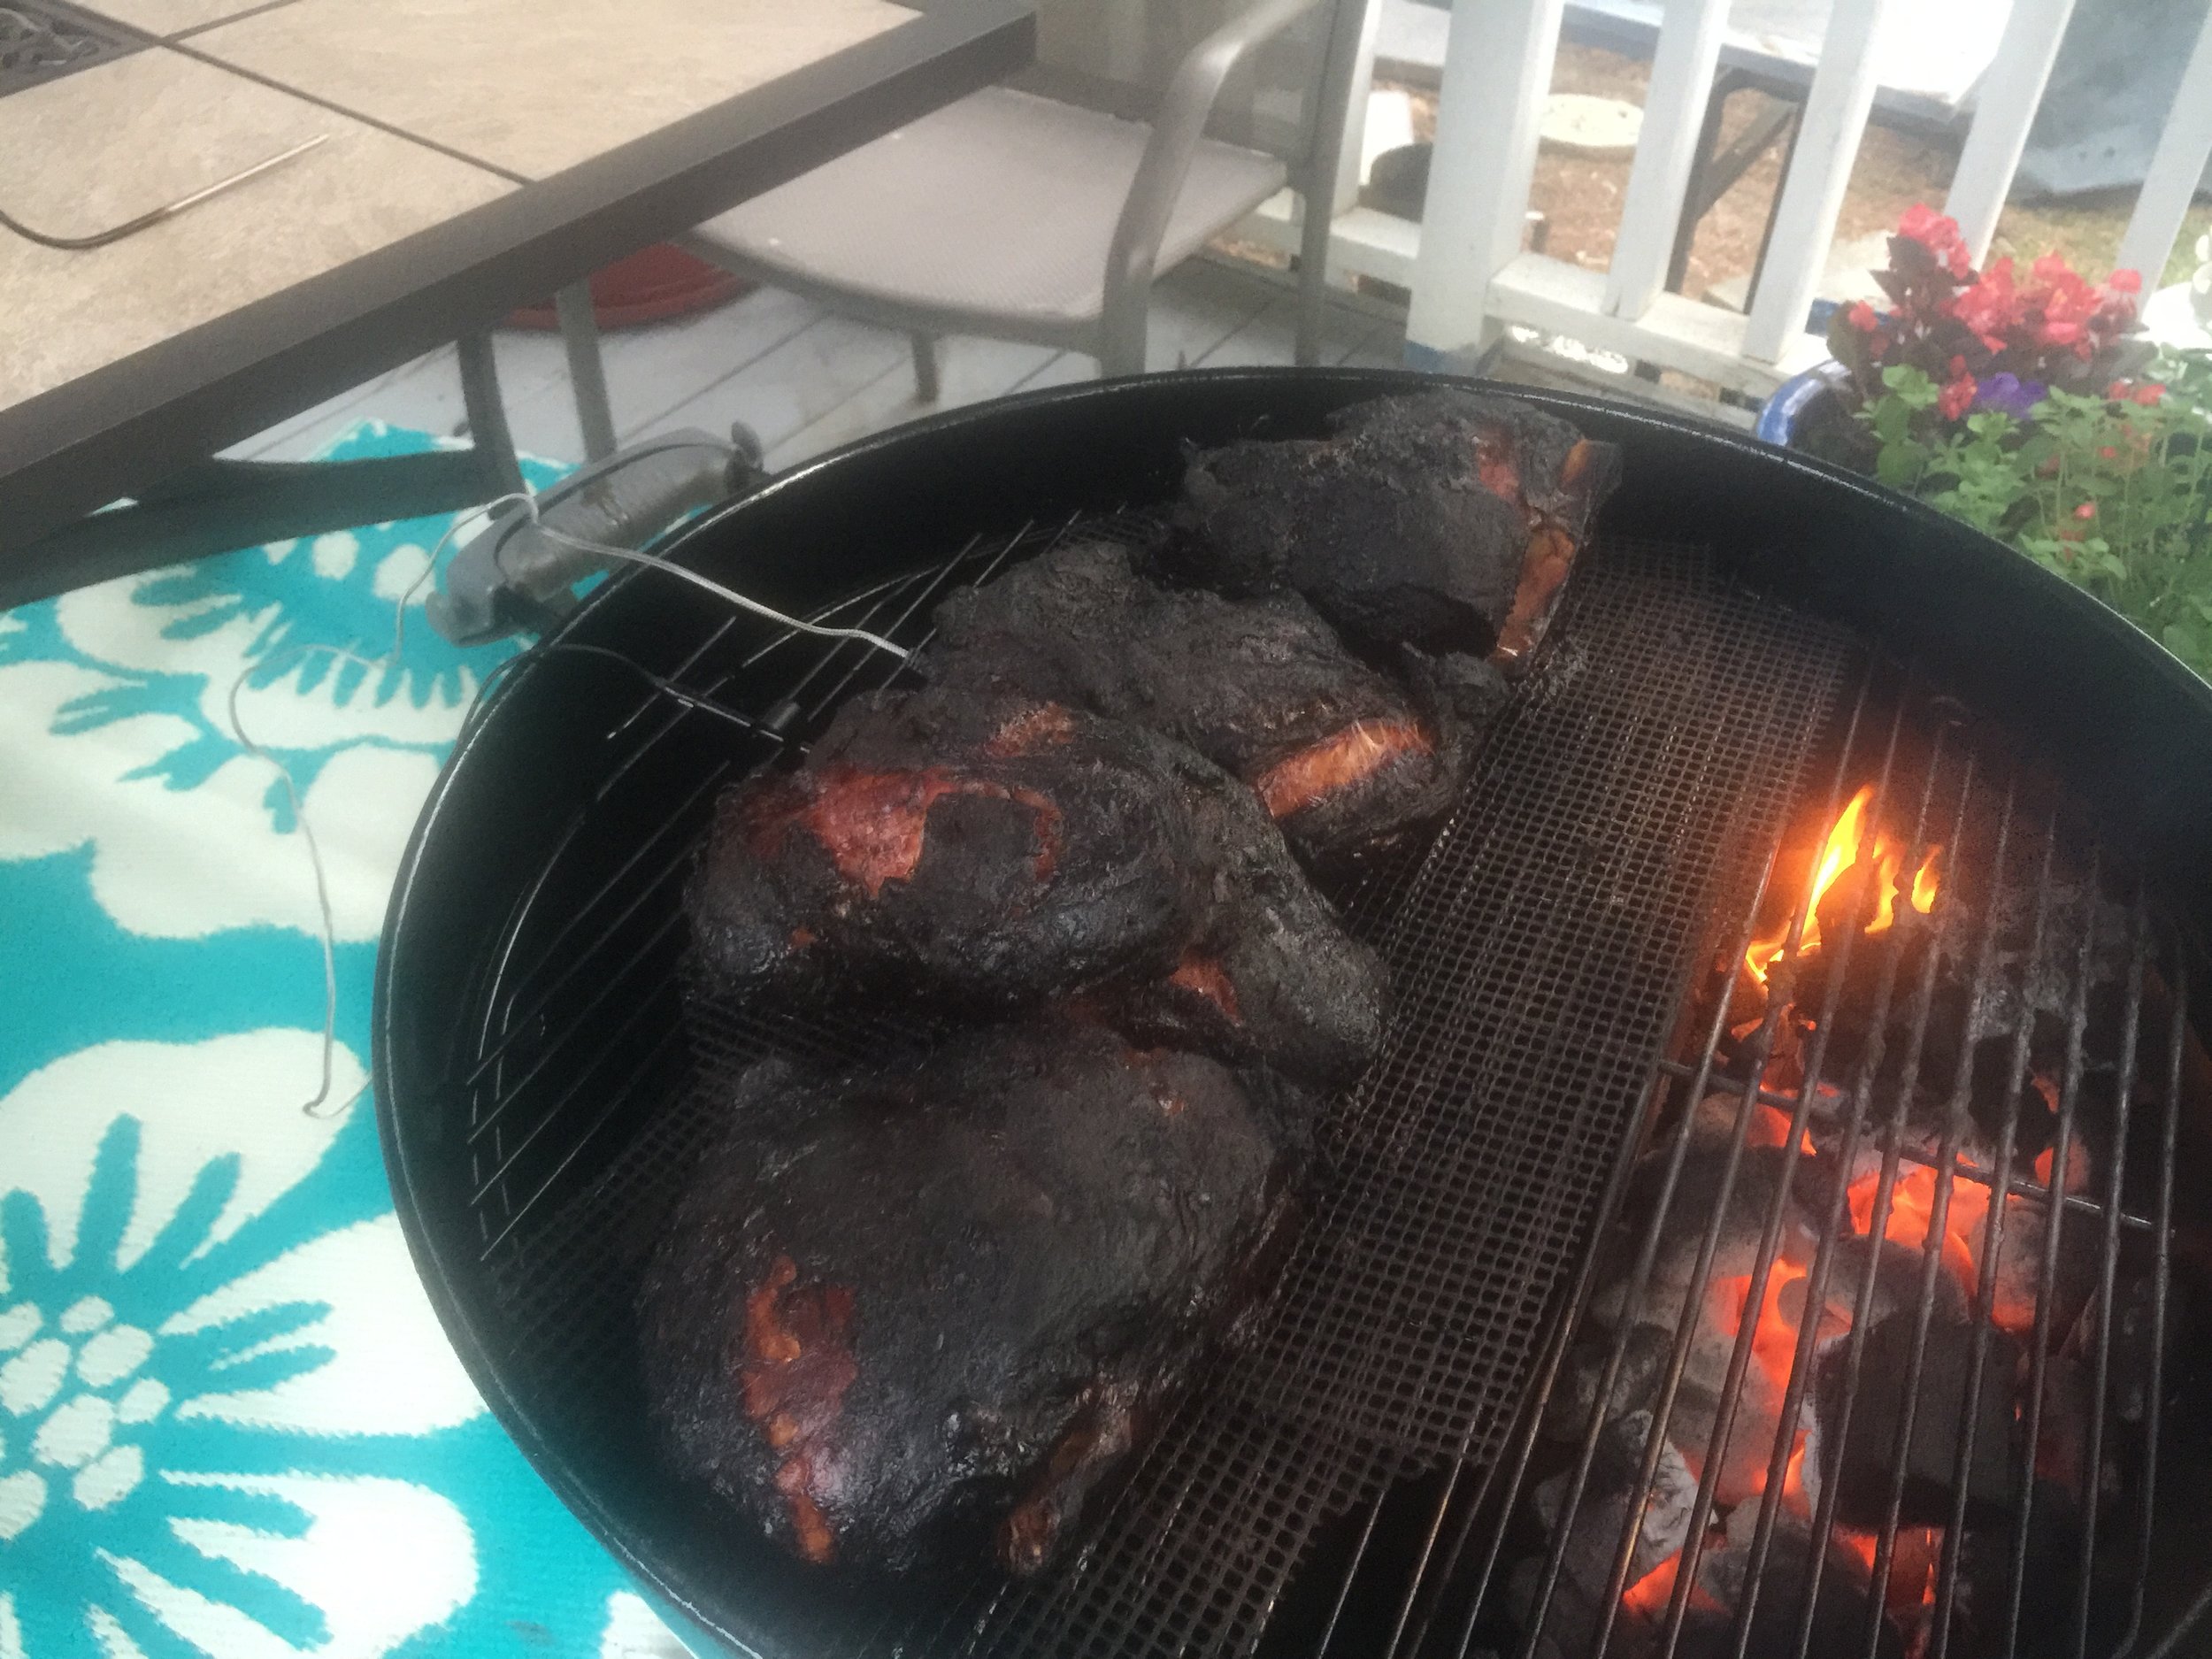
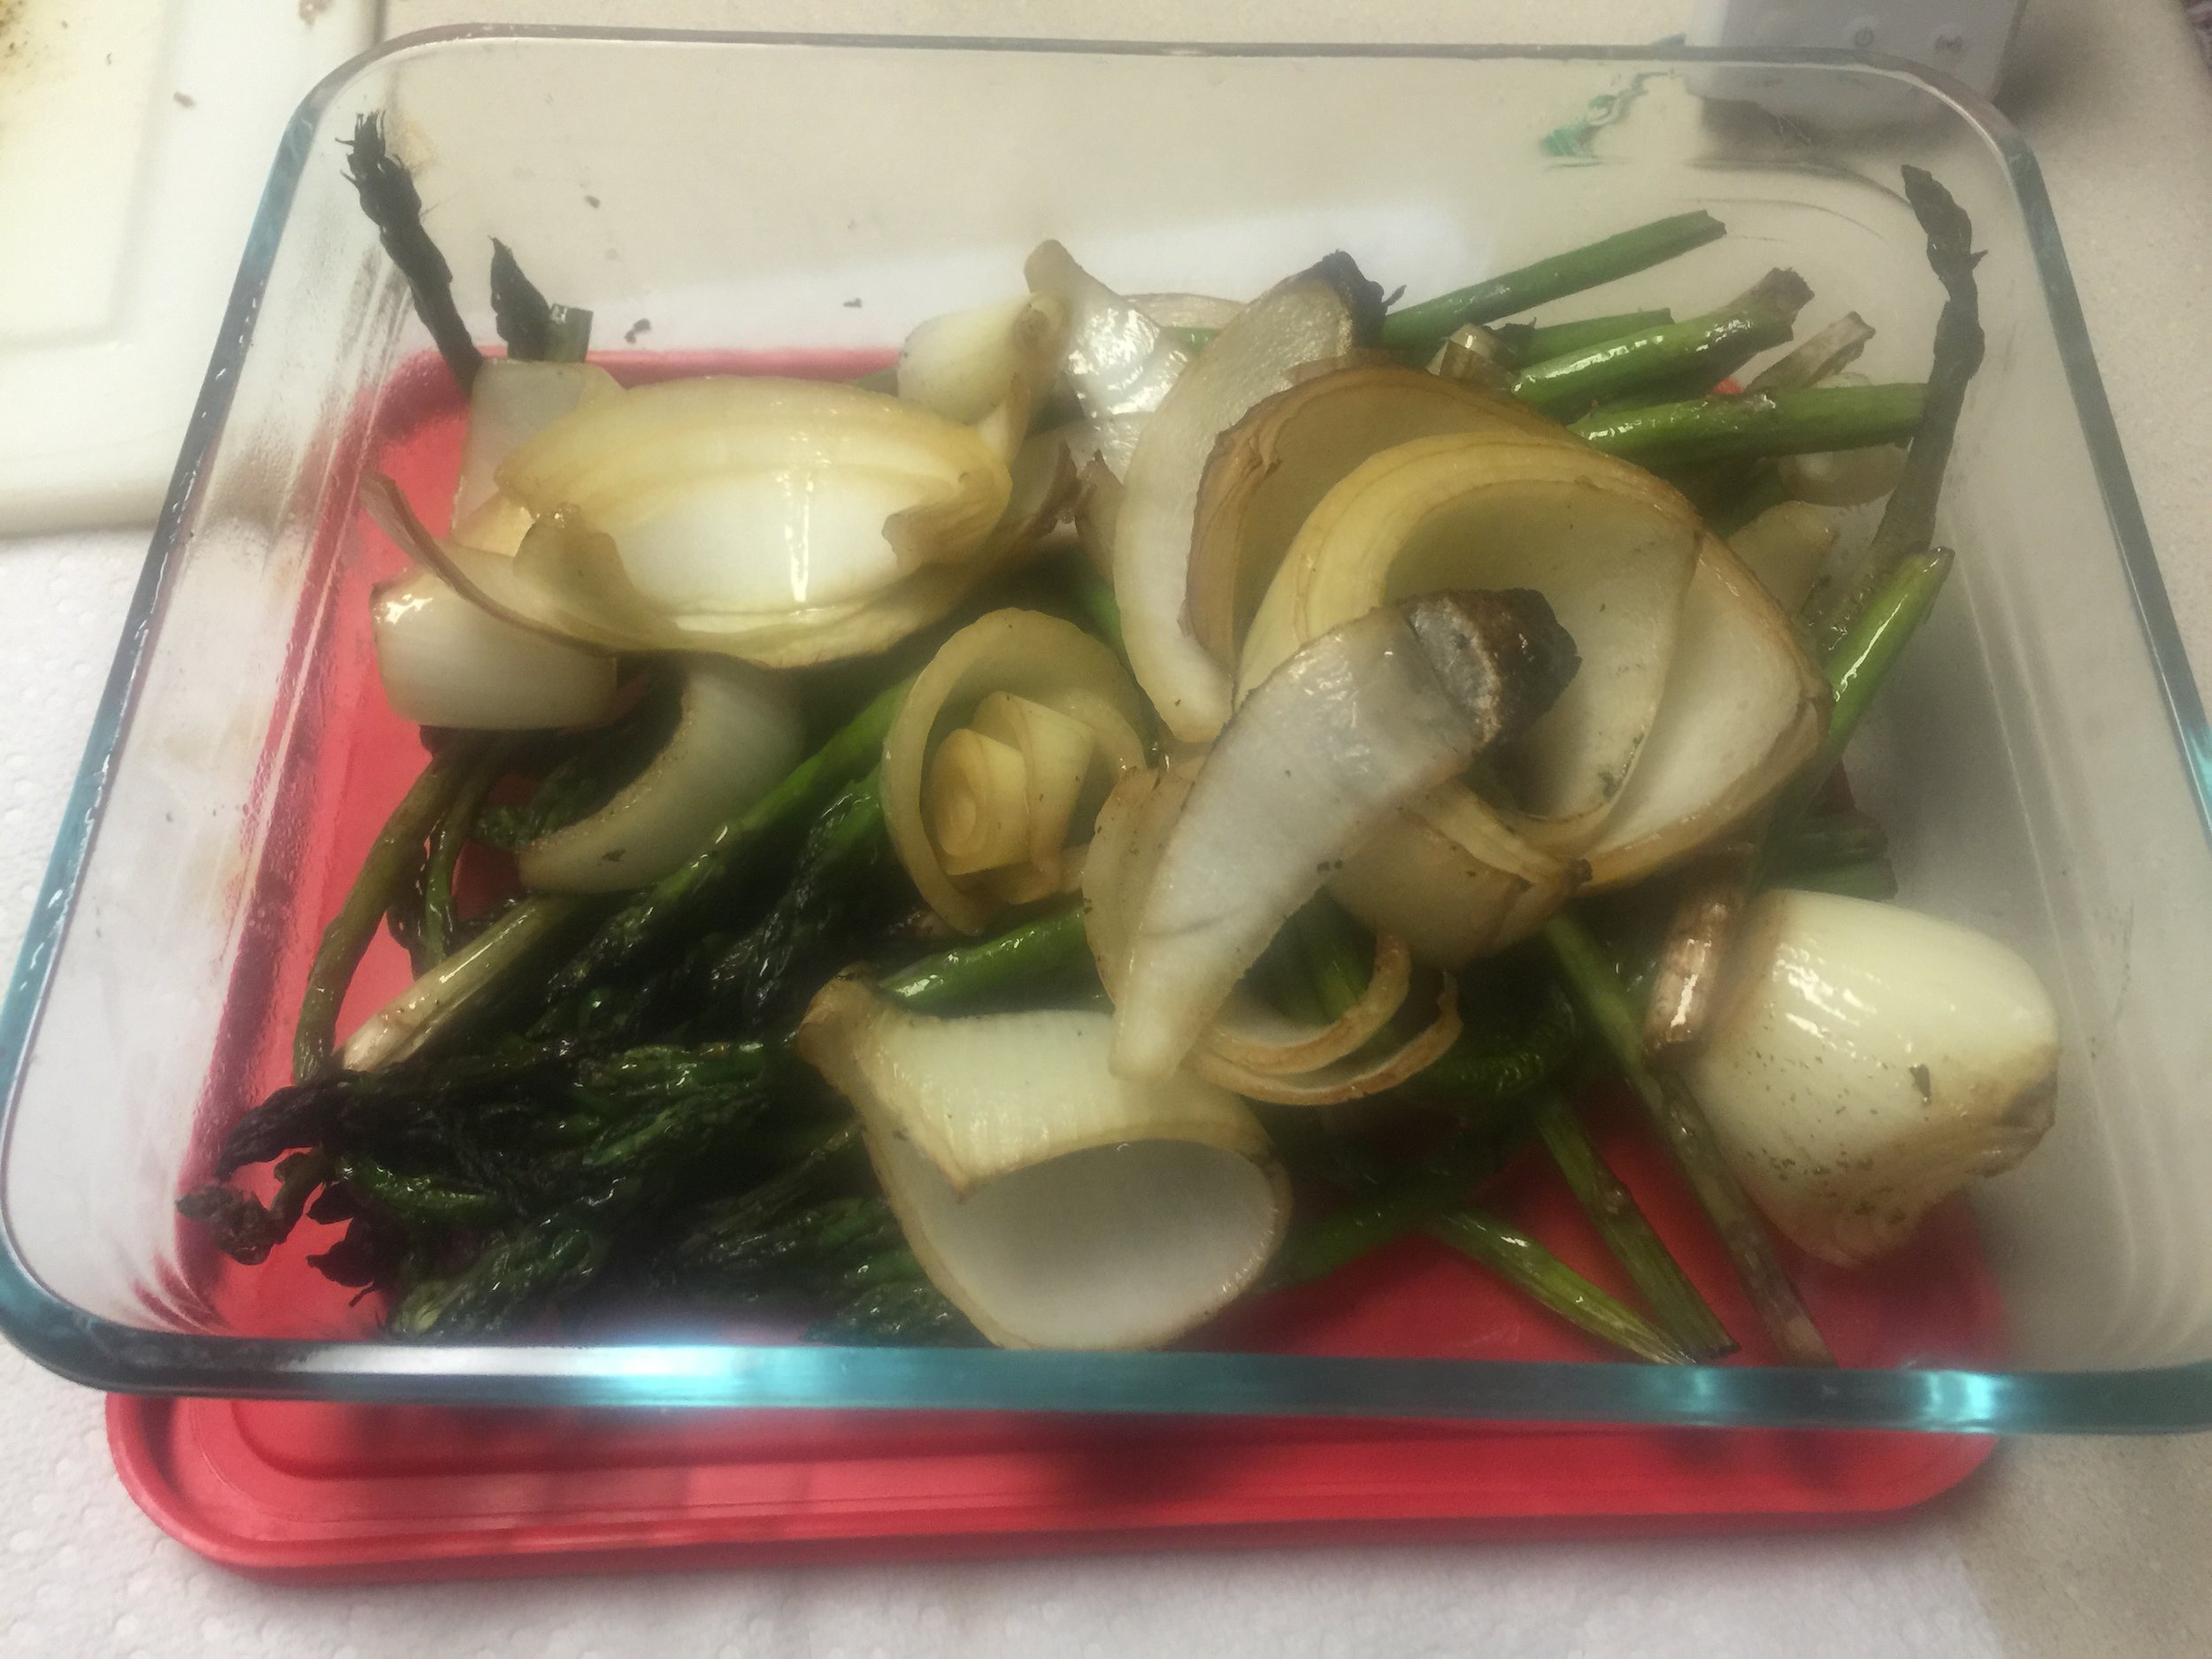
Pulled the meat off the grill and through on some asparagus, onions, acorn squash, & butternut squash. The asparagus & onions came off when I finished pulling the pork. The squash is for tomorrow and will be on the grill for about an hour tonight.
So lets sum it all up.
Time: 10hrs 30 minutes. Target temp: 225 Actual temp: 178-318 Meat temp: 195
Ambient temperature and weather: 62-77 degrees raining changing to sun at 4pm
Fuel: Weber 17005 Apple Wood Chunks and Kingsford charcoal.
Sauce ingredients:
3 cups vinegar
1 TBS minced garlic
1 TSP dried basil
2 TSP Worchestshire
2 TBS Pink Himalayan Salt
1 1/3 TBS cracked red pepper
2 TBS Hungarian Paprika
1 TSP fresh ground pepper
Lessons learned: 4 butts is too much unless you want to plan 12 hours of work. Know your vent positions, your fuel, and thank goodness for the ET-732 and SNS! The Pit rocks! Check it out you will not be sorry.